From the monthly archives: January 2014
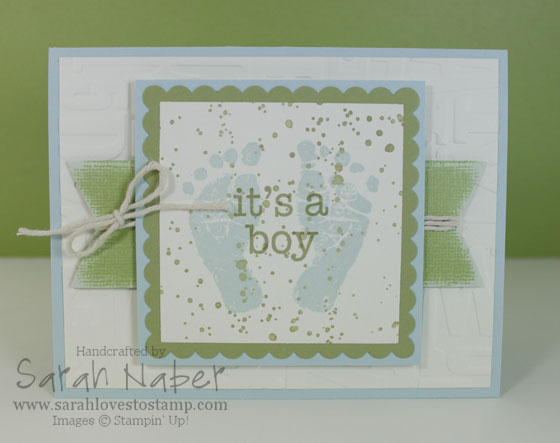
Hi there! I’m sorry for my extended absence! I have been sick sick sick over here at the casa de Naber! Yuck!!! Thankfully, I’m finally feeling on the mend and was very excited to get back into my stamp room and create for you! Check out my card using the super cute, Baby Prints Stamp Set! This one is an oldie but a goodie, debuting about a year ago and ending up in our fantastic 2013-2014 Annual Catalog! I used the sketch from the As You See It Challenge Blog and a color combo perfect for a baby boy from over at Cupcake Inspirations!
This card came together pretty quickly! I stamped the feet in Soft Sky ink, then stamped the splatters from Gorgeous Grunge over the top in Pear Pizzazz. I used my Stamp-a-ma-jig to insure perfect placement of my sentiment which I stamped in Pear Pizzazz. You’ll notice the sketch has a banner below it – I totally planned to do that until I was assembling my final card which is when I realized my focal point was so large there wasn’t room for the sentiment below it! So technically, I stamped the sentiment last! 🙂 Had I known this would be an issue, I would’ve “stamped off” the Pear Pizzazz splatters before stamping them onto my project so the sentiment would stand out even more. As it was, the splatters were done full strength so I actually left my handy Stamp-a-ma-jig handle where it was after stamping the sentiment the first time and stamped it again, in exactly the same spot, to make it just a tad darker! Maybe that’s a new trick for you! It’s like the opposite of stamping off! Double inking let’s call it!
Anyway, I cut it out with the 4th largest Square framelit and then used the largest Square framelit that is scalloped to make a smaller scalloped square. I’ll have to make a video for that soon! I’ll insert it into this post when I do! I just cut the square that mats that one to be a tiny bit larger. Then I took a piece of Pear Pizzazz Core’dinations Cardstock (from the Subtles Collection Pack) measuring 1-1/2″ x 5″ and flagged the ends (I wanted a super shallow “V” or I would’ve just used the Banner Framelits Dies from the Occasions catalog.) Then I sanded it down to reveal some of that lighter inner core. I took the Gold Baker’s Twine and peeled the gold striping off of it (super easy to do) to reveal the Vanilla twine underneath! Wrapped this around the banner piece, tied a bow and attached it to the rest of the card! The layer I attached it to is a piece of Very Vanilla Cardstock cut to 4″ x 5-1/4″ and embossed in the Big Shot Die Cutting Machine with the Alphabet Embossing Folder (one of my favorites)! I attached that to a Soft Sky base measuring 5-1/2″ x 8-1/2″ that I scored at 4-1/4″. The sanded banner piece was popped up on Stampin’ Dimensionals and the main focal point was popped up with double Stampin’ Dimensionals to reach the embossed piece and just one layer of Stampin’ Dimensionals where it was adhered to the sanded banner piece.
I hope you like it! It would be SUPER simple to make this card into a great girl or gender neutral card too!!! It’s a great sketch, so please play along with us over at the As You See It Challenge Blog! You have until Wednesday evening to get your entry in! Come check out what the other Design Team members have made too!!!

Here it is! My first new video for the New Year! Better late than never, right? I’m excited about LOTS of new things that will be coming your way! I hope you enjoy this video – it’s a bit different than my normal cardmaking or tool tips. I LOVE Post It Notes and am constantly reaching for them to jot something down so it’s pretty appropriate for me! 🙂 Thanks for your patience as I took time with family over the holidays and went on a much needed vacation with my hubby in early December! My New Year’s Resolution is to post regularly for you all on my blog and YouTube especially, adding in Facebook, Twitter and Pinterest more too!!! I also still need to blog my AWESOME trip to Houston last week for Stampin’ Up!’s Leadership Conference!!!
Hi there! I’m writing to you from {not so} sunny Houston! I’m at the Stampin’ Up! Leadership Conference and having a GREAT time. Last night, I was able to attend my first ever Manager’s Reception. All I can say is WOW! It was so amazing and I work for such a generous company! I am so blessed. I want to thank each of you, my friends and customers, for helping me get there! Without you, none of this would be possible. I cannot stress that enough! We were at the beautiful Houston Aquarium and I will be posting pictures soon, but it was a night full of fun, food, amusement rides, feeding sting rays, food, mocktails, food…and more food! Seriously, Stampin’ Up! spoils us SO much! Unbelievable!!! I can’t wait to share some fun new things I’ve learned with you all as well!
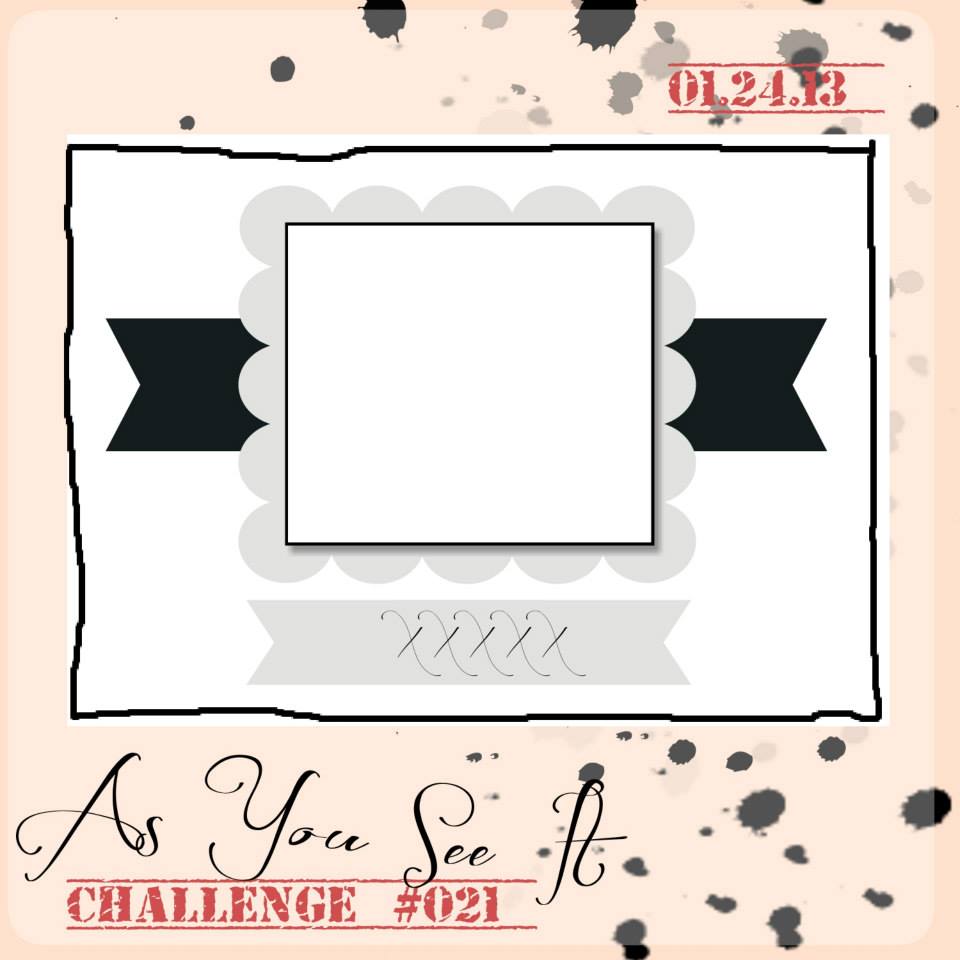
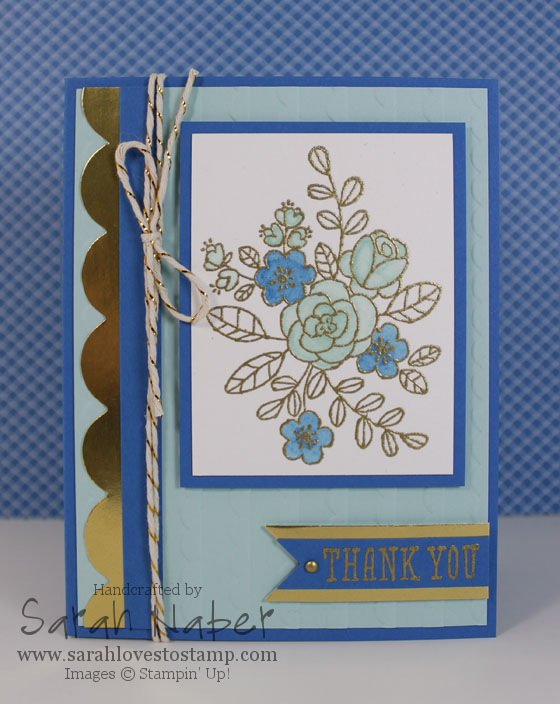
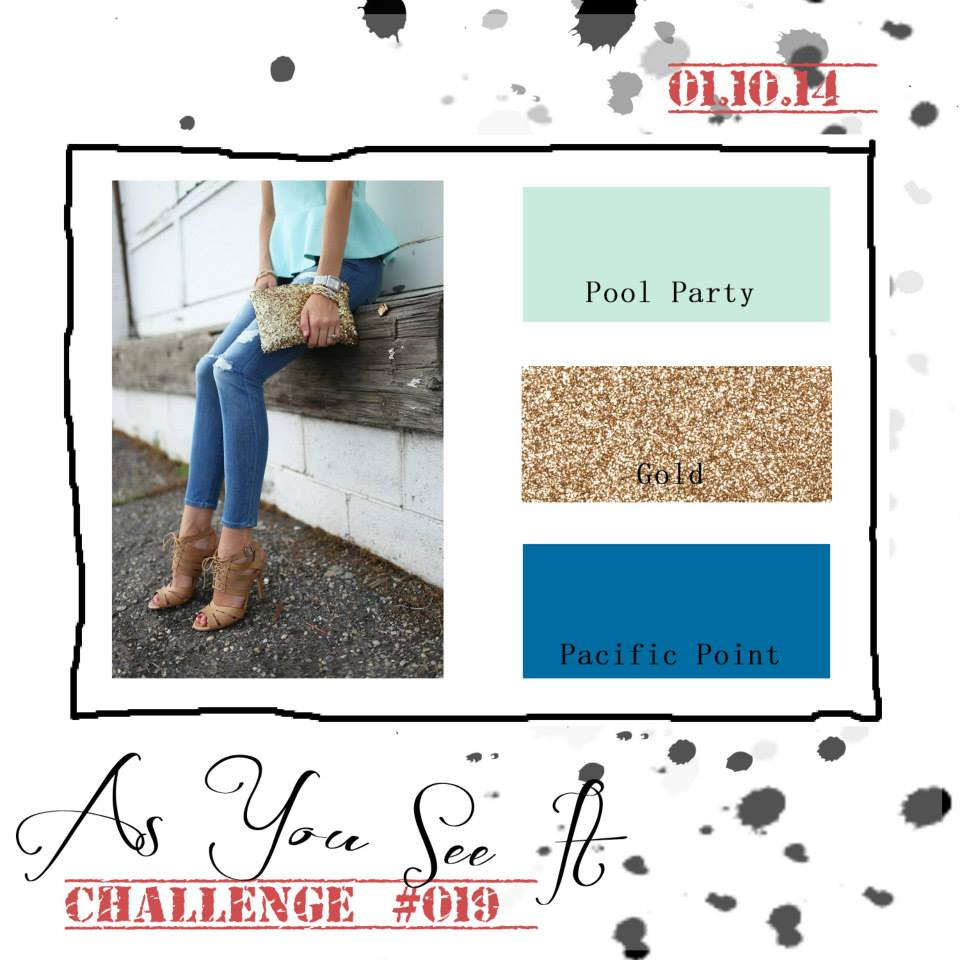
This week’s challenge over at the As You See It Challenge Blog is a color combo. Have you noticed gold popping up everywhere, from jewelry to clothes to papercrafting? This challenge totally embraces that trend with a color combo of Pacific Point, Pool Party and Gold! I LOVE the inspiration photo, but this one was tricky for me. Do you ever have that? Like you are just needing one more color to make your vision come to life? But I stuck with it and was able to make a card that I not only liked, but enjoyed enough to make 16 of for a swap I’m hosting here at Leadership 2014. I hope you enjoy it too!
I just had to have the So Very Grateful stamp set when I saw the fun, line art image of those flowers! So beautiful, fun and versatile, depending on which look you are wanting to achieve. I stamped it onto a piece of Watercolor Paper with VersaMark ink and sprinkled on some Gold Stampin’ Emboss Powder before heating it (where the magic actually happens). I then colored in the flowers with Pool Party and Pacific Point Classic Ink Refills and an Aqua Painter (they come in a pack of 2 – I used the one with the smaller brush). That piece was mounted onto a rectangle of Pacific Point cardstock. The base of the card is a 8-1/2″ x 5-1/2″ piece of Pacific Point cardstock, scored at 4-1/4″. I embossed a piece of 4″ x 5-1/4″ Pool Party cardstock with the Scallops Textured Impressions Embossing Folder and mounted that on top of the base. I followed that with a strip of Gold Foil Sheets cut out with the fantastic Tasteful Trim Bigz XL Die on the larger scallop pattern (there are FOUR 12″ long patterns on this one die). A 3/8″ x 5-1/4″ strip of Pacific Point was adhered on top, followed by a bit of the new Gold Baker’s Twine (LOVE!). To create the sentiment banner, I embossed the “Thank You” sentiment from So Very Grateful onto Pacific Point cardstock, then die cut it out with the largest of the Bitty Banners Framelits. I also cut one of these out of the Gold Foil Sheets and cut it in half to make a little mat for the Pacific Point Piece. I trimmed the right edge to be straight and stuck a Mini Brad through it. Are you wondering how I made a SILVER Mini Brad gold? I took the brad, dabbed it into the VersaMark ink pad and then sprinkled Gold Stampin’ Emboss Powder on and heated it. *TIP: I recommend using a tweezers to heat it up as the brad will get pretty hot! To finish it off and add some sweet dimension, I used Stampin’ Dimensionals to adhere the focal point and the sentiment piece.
I hope you’ll head on over to the As You See It Challenge blog at http://www.AsYouSeeItChallenge.com and give this week’s fun color combo a try!!!
Supply List
STAMPS:
So Very Grateful (Wood-Mount 133050, Clear-Mount 133053)*
PAPER:
8-1/2″ x 11″ Pacific Point Cardstock (111350)
8-1/2″ x 11″ Pool Party Cardstock (122924)
Watercolor Paper (122959)
12″ x 12″ Gold Foil Sheets (132622)*
INK:
Pacific Point Classic Stampin’ Pad (126951)
Pool Party Classic Stampin’ Pad (126982)
VersaMark (102283)
ACCESSORIES:
Gold Baker’s Twine (132975)*
1/8″ Mini Brads (122941)
Gold Stampin’ Emboss Powder (109129)
Multipurpose Liquid Glue (110755)
Stampin’ Dimensionals (104430)
TOOLS:
Stampin’ Trimmer (126889)
Simply Scored Scoring Tool (122334)
Bone Folder (102300)
Paper Snips (103579)
Craft Scissors (108360)
Aqua Painters (103954)
Heat Tool (129053)
Paper-Piercing Tool (126189)
Stampin’ Pierce Mat (126199)
Big Shot Die-Cutting Machine (113439)
Bitty Banners Framelits Dies (129267)
Scallops Textured Impressions Embossing Folder (132971)*
Grid Paper (102787)
Stampin’ Scrub (126200)
Stampin’ Mist (102394)
*Product featured in the 2014 Occasions Catalog! Contact me today at 816.341.0208 or Sarah@SarahLovesToStamp.com if you need a copy!
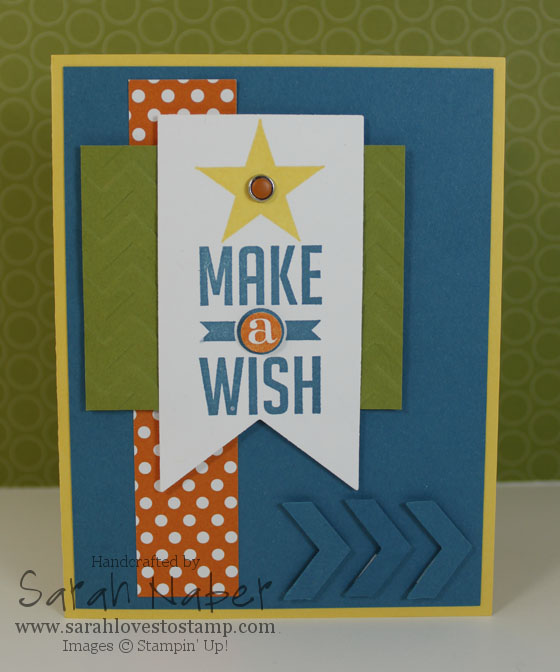
TODAY is the first day of the fabulous Occasions Catalog!!! My first must have item is what I used on this card – the Perfect Pennants Bundle!!! It has great sentiments, a great medium-sized heart and star, as well as some fun border patterned strips too. And to top it all off, it is made to work with the Banner Framelits which come bundled with the stamp set at a 15% discount! You can’t beat that, right? LOVE!
This card is also my Design Team submission for our “Arrows” theme challenge this week over at the As You See It Blog! Hot, hot trend in papercrafting right now and I just love this punch! I did a fun tone on tone effect with it here. I also, loved accenting the center of the star with a Candy Dot Brad Base with a Pumpkin Pie Candy Dot (from the Brights Collection) in the center! The “a” in “Make a Wish” is cropped out with the teeny circle in the Itty Bitty Shapes Punch Pack and popped up on a dimensional (well, a 1/4 of a dimensional anyway) for a bit of extra pizzazz. The other layers are a strip of pumpkin designer series paper from the Polka Dot Parade DSP and a piece of Old Olive cardstock that I textured with the Chevron folder.
I hope you love today’s card. Now, head on over to the As You See It Blog, check out what the other design team members have made and play along with Challenge 018! Can’t wait to see what you’ll create in our very first theme challenge!!!