
From the monthly archives: November 2011

Hello stampers! Today is the last day of Stampin’ Up!’s annual sale that happens at the busiest shopping week of the year – containing Black Friday and Cyber Monday! If you have any orders to place, you can do that directly in my Stampin’ Up! store by clicking HERE or if you live locally you can email me your orders by 11 pm Central time (I need payment before I can put in your order so make sure you either drop that off or have your credit card number on file with me). The link above takes you directly to the Online Extravaganza page so you can check out the specials (with pictures) or if you have a catalog at home, here’s the PDF file of the specials.
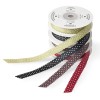
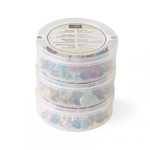
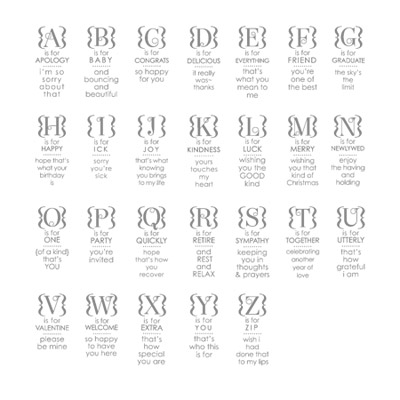
Don’t miss out on Stampin’ Up!’s best sale of the year! I had to get myself the 1/2″ Scallop Dots Ribbon Bundle, Glimmer Brad Bundle, and the Occasions Alphabet among other things! Order now and get great savings for either you or your crafty friends and family!
If you didn’t know, today is America Recycles Day so we’re going to focus on ways to recycle with our papercrafting hobby! Here are 5 ideas of how you can recycle leftover supplies:
1. Punch out scraps of paper to use on cards or scrapbook pages.
2. Received a Stampin’ Up! order lately? Use that pretty brown packing paper on a card or scrapbook page. I love to punch out scallop circles out of the paper and layer them to make poufy flowers. You can even stamp on it!
3. Donate all your scraps to a local elementary school to put to use in their creative projects.
4. Use unconventional supplies on your cards or scrapbook pages – I’ve used the plastic pop can connectors and scratched CDs that no longer play on scrapbook pages.
5. Save a cardboard box and tear the top layer off to reveal the corrugation. Ink it up with craft ink or acrylic paint and use it to stamp a pattern on a card, scrapbook page or other project. You can also re-purpose bubble wrap and use it in the same way.
6. With the holidays coming, save the boxes you receive online orders in and reuse them to wrap your gifts this holiday season. This is also a great tip for birthday present wrapping as well! Do this instead of purchasing shirt boxes or other gift boxes and save money and help the Earth at the same time!
7. Have supplies you haven’t used in a year? Donate them to Operation Scrapbook, a charity that strives to provide Foster Children and children with cancer their own scrapbooking supplies completely free of charge. Letting others “reuse” your supplies in this way, helps both those children, the Earth, and your own cluttered space all at the same time!  If you’d like to donate to Operation Scrapbook, send your donation to Operation Scrapbook, 3407 NE Excelsior St., Kansas City, MO 64117.
Pick one of these tips and contribute to America Recycles Day!
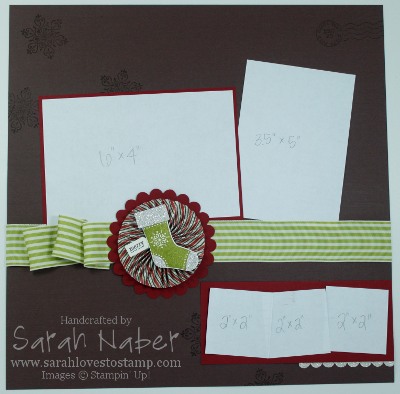
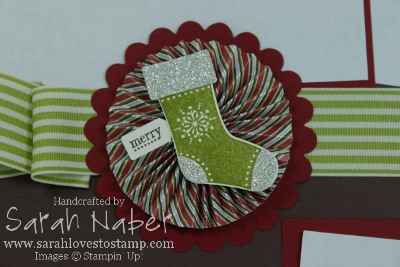
Hello! Today I have another one of our projects from my club meeting on Tuesday. It showcases three of my favorite items from the Stampin’ Up! Holiday Mini Catalog – the Simply Scored Scoring Tool, Stitched Stockings Stamp Set, and Stocking Builder Punch. It also features one of my favorite current trends in papercrafting – rosettes (or medallions or lollies)!
I stamped first on this page with the snowflake and postmark stamps from Winter Post (love it!) with my Chocolate Chip Classic Stampin’ Pad. Craft ink (also known as pigment ink) is recommended for scrapbook pages, but since none of my pictures would actually be touching the places where I stamped, I went ahead and used Classic ink. I wanted to draw the eye diagonally from the upper left hand corner down to the bottom right hand corner (leading the eye over all the photos) so I stamped the snowflakes randomly in that direction. I included a mat for my largest photo to make it the focus of the page, as well as a mat to highlight 3 smaller photos (or journaling) in the lower right hand corner.
The ribbon is adhered with Sticky Strip, which I use whenever I pleat ribbon or make 3D items. The larger scallop circle from the Scallop Circle #2 die was die cut from Cherry Cobbler Card Stock, then layered with a rosette made out of the Letters to Santa Designer Series Paper (DSP), and of course the stocking from Stitched Stockings and the “merry” greeting from Tiny Tags. See the closeup photo below for more detail, as well as the complete supply list below:
I hope you enjoyed the project today! Make sure to visit my online store and order any items you need to preserve your treasured Christmas memories for generations to come!!!
STAMPS:
Stitched Stockings (Wood – 123782; Clear – 123784)
Tiny Tags (Wood – 118091; Clear – 118592)
Winter Post (Wood only – 111780)
PAPER:
Cherry Cobbler Card Stock (119685)
Very Vanilla Card Stock (101650)
Chocolate Chip 12″x12″ Card Stock (124273)
Silver Glimmer Paper (124005)
Letters to Santa Designer Series Paper (122349)
INK:
Chocolate Chip Classic Stampin’ Pad (100908)
Old Olive Classic Stampin’ Pad (102277)
ACCESSORIES:
Old Olive 1-1/4″ Striped Grosgrain Ribbon (retired)
Dotto Repositionable Adhesive (103305)
Dotto Refill (100902)
Sticky Strip ((104294)
Multipurpose Liquid Glue (110755)
Glue Gun & Glue Sticks
TOOLS:
Tabletop Paper Cutter (106959)
Simply Scored Scoring Tool (122334)
Stitched Stockings Builder Punch (124095)
Jewelry Tag Punch (117190)
Scallop Edge Border Punch (119882)
Big Shot Die-Cutting Machine (113439)
Scallop Circle #2 Bigz Die (113469)
Clear-Mount Block A (118487)
Clear-Mount Block D (118485)
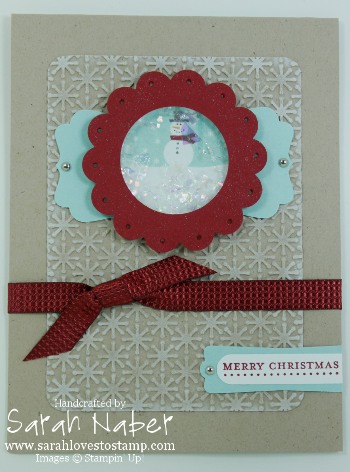
The snowman tag image from Tags til Christmas (Item #was the inspiration for this shaker card. We created it at our most recent Scrap 6 Stampin’ Techniques club meeting on Tuesday. This also uses a few of my favorite items from the Holiday Mini Catalog – Mica Flakes, Shaker Frames, and the Snow Burst Embossing Folder.
First, I took the snowman tag image from Tags til Christmas and used an exacto knife to cut carefully through the rubber and label around the “To: and From:” part of the stamp. This is one of my favorite features of the clear-mount stamps – you can customize them by using an exacto knift to eliminate part of the image but then can just stick it back together on one of Stampin’ Up!’s Clear-Mount Blocks to recreate the original image. I love the versatility of being able to do this!
I will show how to assemble the rest of the card in a video to be posted soon! For now, you can order the supplies needed to make the card along with me at my online store!
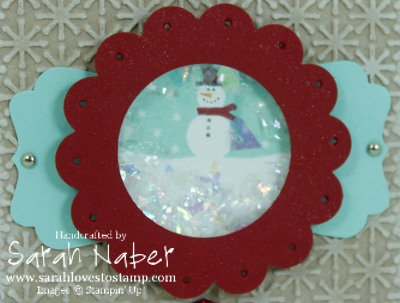
Here is a close-up of the snowman shaker part of the card:
STAMPS:
Teeny Tiny Wishes (Wood only – 115370)
Tags til Christmas (Wood – 120847; Clear – 121169)
PAPER:
Cherry Cobbler Card Stock (119685)
Crumb Cake Card Stock (120953)
Pool Party Card Stock (122924)
Whisper White Card Stock (100730)
INK:
Cherry Cobbler Classic Stampin’ Pad (119669)
Pool Party Classic Stampin’ Pad (122938)
Whisper White Craft Stampin’ Pad (101731)
Blender Pens (102845)
Basic Black Stampin’ Write Marker (100082)
Basic Gray Stampin’ Write Marker (120966)
Cherry Cobbler Stampin’ Write Marker (119681)
More Mustard Stampin’ Write Marker (100076)
ACCESSORIES:
Mica Flakes (124115)
Shaker Frames (124155)
C herry Cobbler 3/8″ Quilted Satin Ribbon (124105)
Window Sheets (114323)
Mini Brads (122941)
Frost White Shimmer Paint (116854)
Rubbing Alcohol – mixed with Shimmer Paint makes shimmer mist (SEE VIDEO)
Multipurpose Liquid Glue (110755)
TOOLS:
Tabletop Paper Cutter (106959)
Simply Scored Scoring Tool (122334)
Modern Label Punch (119849)
Decorative Label Punch (120907)
Word Window Punch (119857)
2-3/8″ Scallop Circle Punch (118874)
1-3/8″ Circle Punch (119860)
1-3/4″ Circle Punch (119850)
3/16″ Corner Rounder Punch (119871)
Big Shot Die-Cutting Machine (113439)
Snow Burst Textured Impressions Embossing Folder (124096)
Paper-Piercing Tool (116631)
Mat Pack (105826)
Bone Folder (102300)
Sponge Daubers (102892)
Clear-Mount Block D (118485)
Hi there! Welcome to my new stamping blog! If you’ve ventured here from my previous blogspot blog, thanks for following me over to this new blog! I hope you’ll keep coming back for new Stampin’ Up! projects and weekly features like Sarah’s Technique Tuesday and Tool Time Thursday! If you don’t know me, please feel free to read my “About Me” page and let me know if you have any questions. I’ll be back soon with projects, videos, and news – all featuring Stampin’ Up! products that I love!!!
Have a fabulous day! Take a few minutes this week and stamp something for yourself!
