From the monthly archives: February 2014
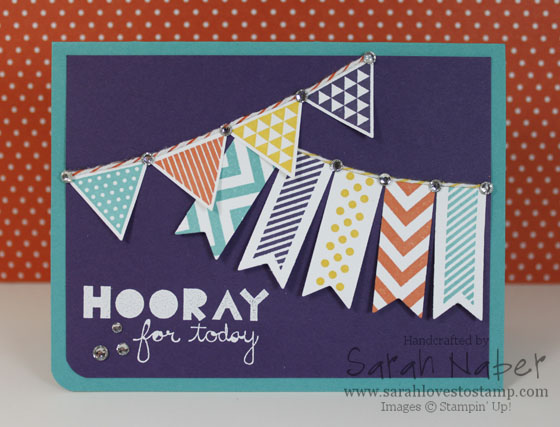
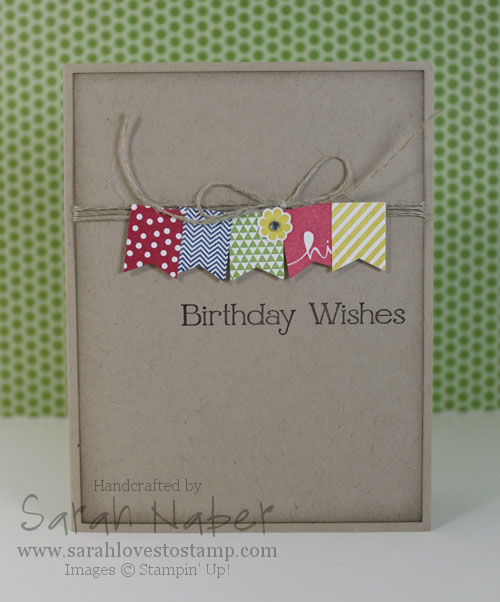
I’m really excited about how the banners came together on this card! I had originally planned on using Banner Blast (from Sale-A-Bration) when I first saw this sketch, but I left it in Kansas City at my upline’s home when we had a meeting a few weeks ago! I’m kind of glad I did, because it gave me the opportunity to think about what else I could use and I’m wild about the results!
I had written down a similar color combo (it had Cajun Craze instead of Tangerine Tango) but I felt like Cajun Craze gave it a fall feel so I substituted in Tangerine Tango! I will be using this color combo again – it isn’t typical me, but I LOVE it!!! I hope you do too!
I’ll be back with the supply list and instructions later! 🙂 And with the weekly challenges I’m going to enter the card in too. Check out the other creations by the Design Team at the As You See It Challenge Blog! And, OF COURSE, play along!!!
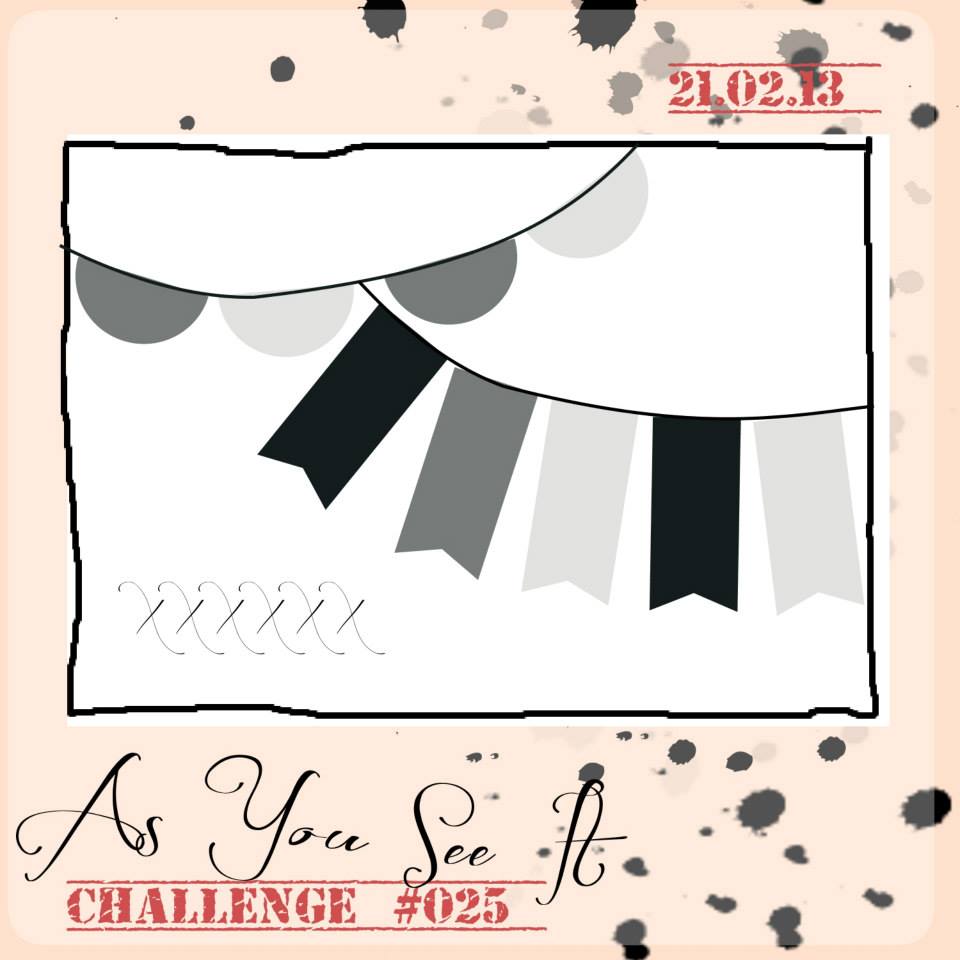
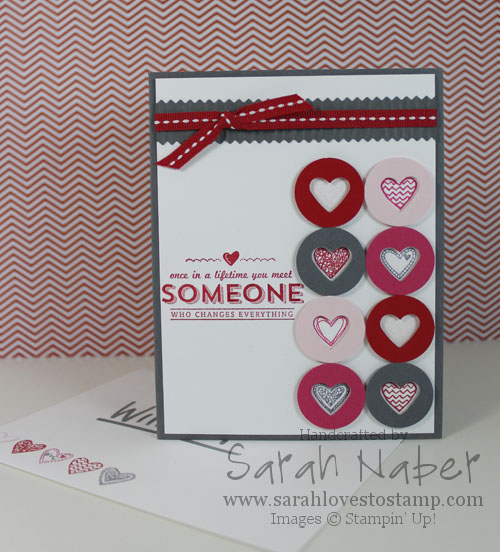
Hi there! Today I have my husband’s Valentine’s Day card to share with you! I combined a few great challenges to bring a fun, masculine card to you (at least my hubby says it is still masculine with the pink since it was for V-day and he says ribbon is ok too). Loving this lovey combo of colors from the Color Throwdown Challenge and the FABULOUS sketch from Freshly Made Sketches! I can tell you I will be using this layout again soon! LOVE!
I received the Language of Love stamp set (Wood-Mount 133074, Clear-Mount 133077) at Stampin’ Up! Leadership in Houston in January (FREE perk for attendees! Woohoo!) and had NO idea I’d fall in love with it (no pun intended…honestly) this much!!! I combined it with the perfect sentiment from the FREE Sale-A-Bration exclusive stamp set, See Ya Later (Wood-Mount 133533, Clear-Mount 133536)! LOVE IT! This sentiment is also GREAT for any love card: Valentine’s Day (obviously), weddings, anniversaries, best friends, and even for adopted parents/children too (I instantly thought of how much my parents changed my life when they adopted me).
One tiny detail you can’t see well from the picture? I used markers to ink up the 5 Heart Strip stamp from Language of Love in the 4 different colors I used and stamped it in the bottom left corner of my envelope. I used the Basic Gray Stampin’ Write Marker to put a tiny “W + S” in one of the open hearts on the envelope for a personalized touch for my hubby, William. I also used the Envelope Liners Framelits Dies (132172) to line the envelope with some Real Red patterned paper from the Brights Designer Series Paper Stack (130134).
You can earn See Ya Later, or any of the other 12 SAB exclusive choices, FREE with any $50 product order! Don’t miss out on this awesome opportunity! Click here, or any of the links below to visit my Online Store!
How To
1. Cut Basic Gray cardstock to 8-1/2″ x 5-1/2″ and score in half at 4-1/4″. Cut a strip of Basic Gray to 4-1/4″ x 1″. Cut Whisper White cardstock to 4″ x 5-1/4″.
2. Using Small Heart Punch, punch 2 hearts out of scraps of each of Basic Gray, Melon Mambo, Pink Pirouette, and Real Red cardstocks. Push the punch in as far as it will go and leave space between the 2 punched hearts for the next step! (Set aside the hearts you punched out, as you actually want the negative image for this project!)
3. Using the 1″ Circle Punch upside down (so you can see where you’re punching), center it around each of the punched hearts from Step 2. Punch all 8 of these out and decide on how you want to arrange them! 🙂
4. Stamp the 5 Heart Strip stamp from Language of Love on 1″ strips of Whisper White cardstock in each of the following colors: Basic Gray, Melon Mambo, Pink Pirouette and Real Red. Use the 3/4″ Circle Punch to punch out 2 hearts from each color. The hearts that look white above are actually Pink Pirouette. This color is VERY pale and hard to pick up in the photo. Sorry about that! *TIP: The hearts are close enough together that you will punch an edge of the heart next to it. This is not a big deal at all because you won’t see that through the little circle/heart windows we made in Step 3.
5. Use Stampin’ Dimensionals (cut apart) to adhere the circle/heart windows from Step 3 onto the stamped heart circles from Step 4. I put my dimensionals on the back of the circle/heart windows – a half dimensional at the top of the heart point and a quarter dimensional on each side of the bottom point of the heart. Then I lined it up over the top of the heart I wanted behind the window and pressed down.
6. Next I laid out where I wanted the circles to be and made a mark between the 2nd and 3rd set of circles so the sentiment could be right in the void between the circles. I then used my Stamp-a-ma-jig to position the “Someone” sentiment from the Sale-A-Bration choice See Ya Later stamp set in Real Red ink. Earn it FREE with a $50 purchase from now until March 31, 2014.
7. I used the Multipurpose Liquid Adhesive to adhere the circle hearts down to the white layer. *TIP: Use the Multipurpose Liquid Adhesive anytime you need a bit of time to move things around a titch. That’s the beauty of a liquid adhesive – it’s a total life saver for my perfectionist nature!
8. Run the strip of Basic Gray cardstock through the Big Shot Die-Cutting Machine with the pinked edge from the Finishing Touches Edgelits Dies. You’ll have to run it through once for one edge and a second time for the second edge.
9. Run the strip of Basic Gray through the Big Shot again using the Woodgrain Embossing Folder to give it a bit extra oomph and add some texture to the card! It is rare that I can make a card without these things!!! *TIP: Do all embossing LAST! If you have any cutting to do with the Big Shot, running an embossed piece through the machine will flatten the embossing a bit.
10. Glue the Basic Gray strip to the top of the card. Trim the excess off of the edges. *TIP: I shared this yesterday, but when I’m going to emboss and I need it to be a specific size (this strip needed to be 4″ wide), I cut it a bit bigger and trim it after embossing, either on my paper cutter or with Paper Snips if it is a strip that will overhang the edge like this one.
11. Finally, tie a knot of ribbon around the white layer and adhere the layer to the card base! 🙂 *TIP: Whisper White and Very Vanilla are a bit thinner than our other cardstocks and thus I have trouble with them buckling when I go to tie my ribbon around a single layer of these cardstocks, so I used my favorite ribbon tying trick on this card. Check out the video posted below for how I do this. On this project, as I mentioned in the video, I used a Glue Dot (Stampin’ Up!’s are mini sized) in the center of my knot to put it exactly where I wanted it. Also, in the video, I used our regular Stampin’ Mist bottle. Since the ribbon needed to span 4″ (plus some to tape on the back) on this card, I used the Stampin’ Mist Refill bottle as my cylinder (it is larger). I taped the edges to the back before adhering it to the card base.
*BONUS TIP: The ribbon tip in this video will also help you use a little less ribbon too – stretching your roll to make even more projects before it runs out! Just by a couple of inches of course so not huge but if you’re using a specific color tons or mass producing cards, you’ll notice a difference.
Supply List
STAMPS:
- Language of Love (Wood-Mount 133074, Clear-Mount 133077)
- See Ya Later (Wood-Mount 133533, Clear-Mount 133536) *Earn it FREE with a $50 product order during Stampin’ Up! Sale-A-Bration. Offer ends March 31, 2014.*
PAPER:
- 8-1/2″ x 11″ Whisper White Cardstock (100730)
- 8-1/2″ x 11″ Basic Gray Cardstock (121044)
- 8-1/2″ x 11″ Melon Mambo Cardstock (115320)
- 8-1/2″ x 11″ Pink Pirouette Cardstock (111351)
- 8-1/2″ x 11″ Real Red Cardstock (102482)
INK:
- Basic Gray Classic Stampin’ Pad (126981)
- Melon Mambo Classic Stampin’ Pad (126948)
- Pink Pirouette Classic Stampin’ Pad (126956)
- Real Red Classic Stampin’ Pad (126949)
ACCESSORIES:
- Real Red 1/4″ Stitched Grosgrain Ribbon (126875)
- SNAIL Adhesive (104332)
- Multipurpose Liquid Glue (110755)
- Mini Glue Dots (103683)
- Stampin’ Dimensionals (104430)
TOOLS:
- Stampin’ Trimmer (126889)
- Simply Scored Scoring Tool (122334)
- Bone Folder (102300)
- Paper Snips (103579)
- Craft Scissors (108360)
- Stamp-a-ma-jig (101049)
- Small Heart Punch (117193)
- 3/4″ Circle Punch (119873)
- 1″ Circle Punch (119868)
- Big Shot Die-Cutting Machine (113439)
- Big Shot Magnetic Platform (130658)
- Finishing Touches Edgelits Dies (127010)
- Woodgrain Textured Impressions Embossing Folders (127821)
- Grid Paper (102787)
- Stampin’ Scrub (126200)
- Stampin’ Mist (102394)
This card was entered into challenge at: Color Throwdown, Cupcake Inspirations, Freshly Made Sketches, Artistic Inspirations, Crafting from the Heart, Challenges 4 Everybody, Cuttin and Stampin, Digistamps4Joy, Lexi’s Creations, Lady Bug Crafts, Oldie But a Goodie (Woodgrain folder, Edgelits, Punches, Pink Pirouette), Paper Pretties, and Splitcoaststampers Ways to Use It (Red, Red, Red). 🙂
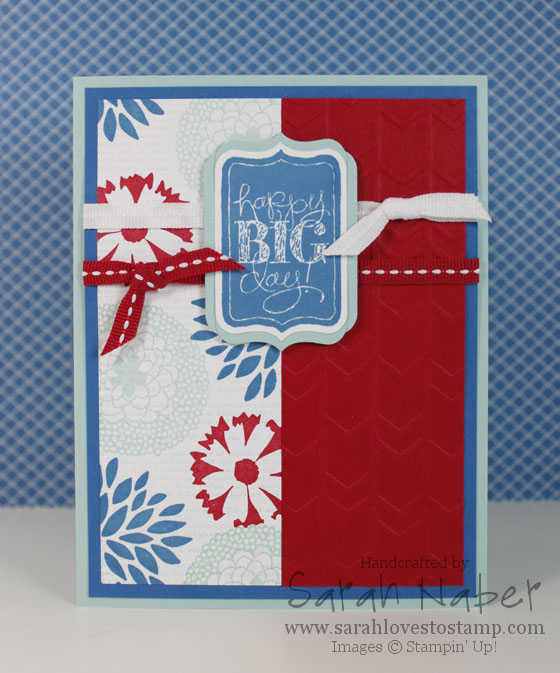
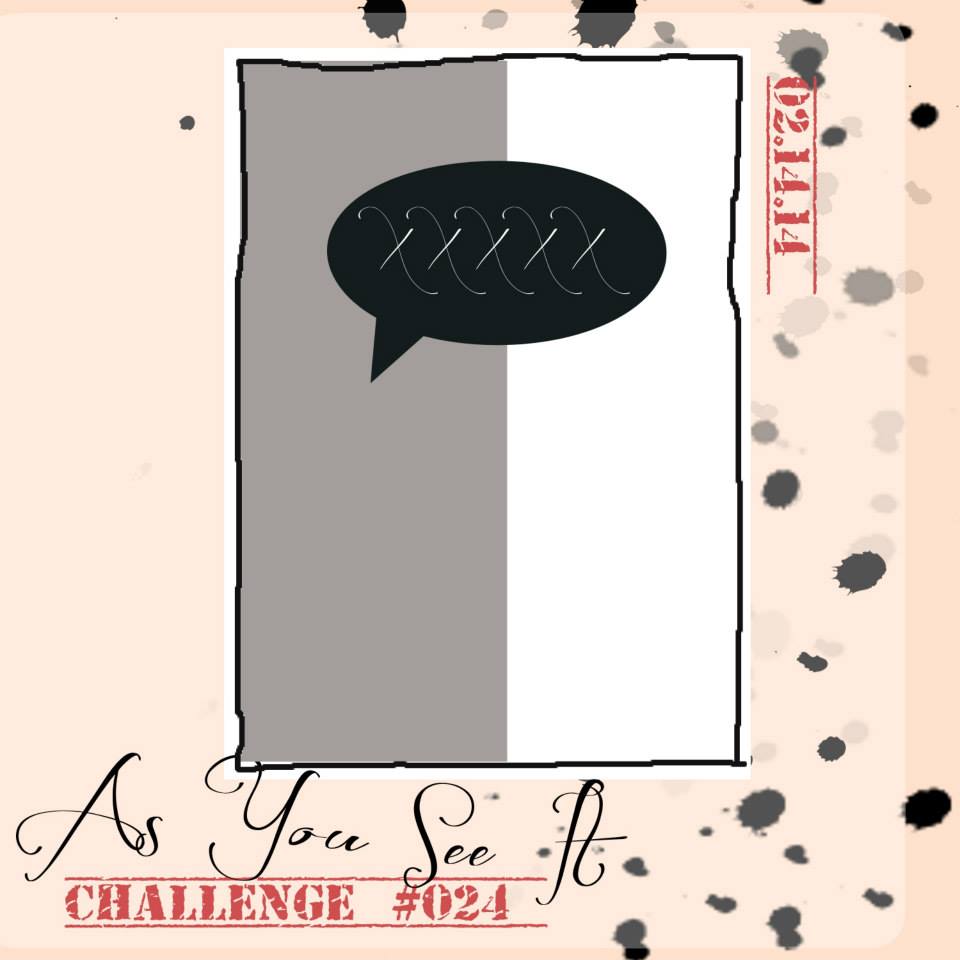
Hi there! It’s Friday and that means a new challenge over at the As You See It Challenge Blog! Check out the creations by the other AYSI Design Team Members too! I also combined it with the color challenge from Colour Q Challenges this week. I wasn’t sure about these colors to begin with but loved the final result. I hope you do too!
How To
1. Cut your Pool Party cardstock to 8-1/2″ x 5-1/2″ for your card base and score it at 4-1/4″. Cut the Pacific Point to 4″ x 5-1/4″. Cut a piece of Whisper White to 1-7/8″ x 5″. Cut a piece of Real Red to 2″ x 5-1/4″ – see Step 3 for why!
2. Ink up the Dictionary Background Stamp in Soft Sky ink, stamp off onto a scrap paper once and then stamp it onto the Whisper White piece. (This is super hard to see in the photo but is gorgeous in real life!) Then use the Petal Parade stamp set (FREE Sale-A-Bration exclusive stamp set with any $50 purchase!) and Pacific Point, Pool Party, and Real Red inks to stamp the rest of the white panel.
3. Run the Real Red piece through the Big Shot with the Arrows Textured Impressions Embossing Folder. Cut the final piece down to 1-7/8″ x 5″. *TIP: Cut your piece of cardstock a bit larger than you want it (usually 1/8″ is plenty depending on how intricate the embossing folder design is) and trim it down to the size you want AFTER embossing! The embossing “shrinks” the paper a bit so this is a great idea when you need an exact size or to match up with another piece like I needed on my card.
4. Use the Multipurpose Liquid Adhesive to adhere both the Whisper White and Real Red strips side-by-side onto the Pacific Point layer.
5. Tie the Real Red and Whisper White 1/4″ Stitched Grosgrain Ribbons around the Pacific Point layer. Adhere this to the card base.
6. Stamp the “Happy Big Day” from the Chalk Talk Stamp Set (LOVE!) in Pacific Point ink onto a scrap of Whisper White. Die cut it out with the Big Shot and the matching Chalk Talk Framelits Dies.
7. Die cut two more of the same label shape out of a scrap of Pool Party cardstock. Cut one set in half horizontally and one set in half vertically and glue behind the sentiment to make a custom mat! *TIP: This is one of my favorite tricks to do with punches and die cuts that may not have a nesting shape! Make your own! Works fabulously with the Decorative Label Punch among others.
I hope you love this card! This sketch was a great one to work with. Head on over to the As You See It Challenge Blog and play along! 🙂 We’re always excited to see what you have created!!!
This card was entered into challenges at: ColourQ, polkadoodles, Crafting from the Heart, Challenges 4 Everybody, and Word Art Wednesday.
Supply List
STAMPS:
Petal Parade (Wood-Mount 133599, Clear-Mount 133602)***FREE Sale-A-Bration Choice with $50 Order***
Chalk Talk (Wood-Mount 130631, Clear-Mount 130634) *Get the stamp set with the matching framelits and save 15% with the Chalk Talk Bundle: Wood-Mount 132731, Clear-Mount 132730!*
Dictionary Background (Wood-Mount 130348, Clear-Mount 130351)
PAPER:
8-1/2″ x 11″ Whisper White Cardstock (100730)
8-1/2″ x 11″ Pacific Point Cardstock (111350)
8-1/2″ x 11″ Pool Party Cardstock (122924)
8-1/2″ x 11″ Real Red Cardstock (102482)
INK:
Pacific Point Classic Stampin’ Pad (126951)
Pool Party Classic Stampin’ Pad (126982)
Real Red Classic Stampin’ Pad (126949)
Soft Sky Classic Stampin’ Pad (131181)
ACCESSORIES:
Real Red 1/4″ Stitched Grosgrain Ribbon (126875)
Whisper White 1/4″ Stitched Grosgrain Ribbon (126877)
SNAIL Adhesive (104332)
Multipurpose Liquid Glue (110755)
Stampin’ Dimensionals (104430)
TOOLS:
Stampin’ Trimmer (126889)
Simply Scored Scoring Tool (122334)
Bone Folder (102300)
Paper Snips (103579)
Craft Scissors (108360)
Big Shot Die-Cutting Machine (113439)
Big Shot Magnetic Platform (130658)
Chalk Talk Framelits Dies (129983) *Get the stamp set with the matching framelits and save 15% with the Chalk Talk Bundle: Wood-Mount 132731, Clear-Mount 132730!*
Arrows Textured Impressions Embossing Folders (132187)
Grid Paper (102787)
Stampin’ Scrub (126200)
Stampin’ Mist (102394)
It’s finally here! This is Week #1 in a 10 part series that I’ve promised to my Mailing List Subscribers! I thought I’d share Week #1 with all of you! If you want to make sure you see the rest of the 9 videos to come, just put your name and email in the box over to the right and hit the “Send Me My Video!” button. Don’t forget to click the confirmation link in the email that will come immediately to your inbox or you won’t be added! 🙂
I hope you enjoy this week’s card! It was my favorite sample shown at our Stampin’ Up! Leadership Conference in January!
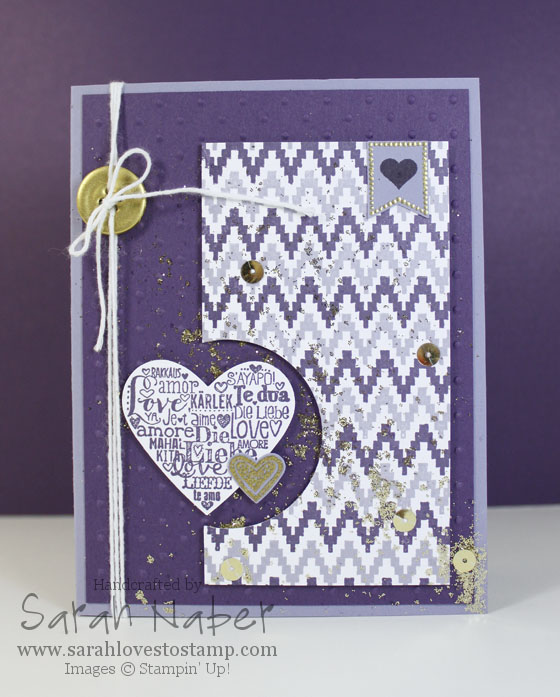
Hi Stampin’ Friends! Did you think I’d forgotten about you? Oh, no! Of course not! I was supposed to post this card on Friday as a part of the As You See It Design Team but I’m just finally getting around to it today! Technical difficulties followed by more illness – I’m headed to my doctor next week so hopefully whatever is making me sick all the time can get taken care of!
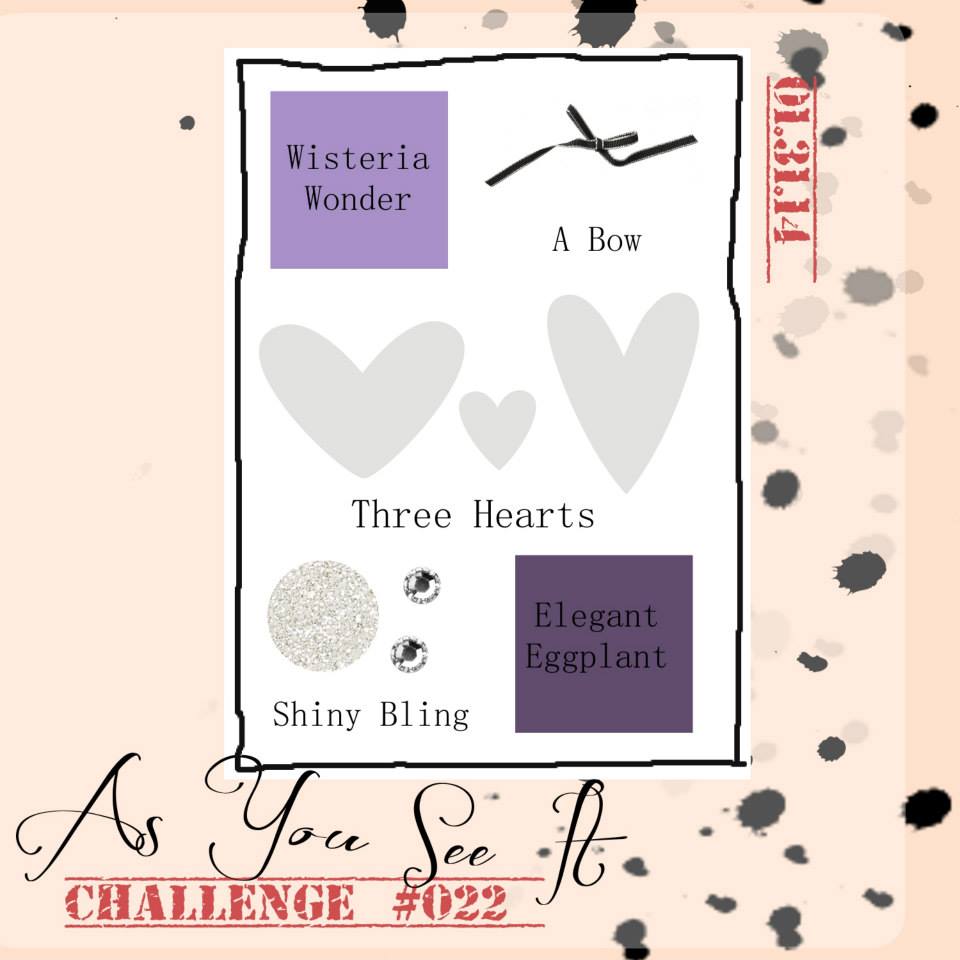
Ok! So on to the fun stuff! This is my FAVORITE type of challenge we do over at As You See It Challenges! Check the graphic below for the items you need to include on your project to play along. You have until Wednesday at midnight! 🙂 While I used purples on this card to meet the challenge, you could do it in virtually any color combo! Red & pink for traditional Valentine’s Day colors, or your main squeeze’s favorite colors for an anniversary card, or the wedding colors of a couple for a personalized, super sweet wedding card! I also used the Retro Sketch #99, but the deadline to play along in their challenge has passed – I still LOVE this sketch though!
I LOVE the background with the super trendy ikat chevron border from the Eye-Catching Ikat Photopolymer Stamp Set. I alternated inking them up in Wisteria Wonder and Elegant Eggplant and stamped them onto a piece of 2-1/2″ x 4-1/2″ Whisper White cardstock. *TIP: Clean the ikat chevron border stamp in between each color with the Stampin’ Scrub and Stampin’ Mist for a quicker, cleaner process!!! (You could try stamping all of one color first but it is easier to insure perfect placement by stamping it how you want the finished product to look.) Love that piece – my favorite thing about the card! One of the Circles Collection Framelits Dies cut out the partial circle perfectly. The Full Heart Punch and Small Heart Punch are a perfect match for the Language of Love Stamp Set! The larger heart was stamped in Elegant Eggplant on Whisper White Cardstock, while the smaller heart was stamped using Versamark ink onto Wisteria Wonder cardstock and heat embossed in Gold Stampin’ Emboss Powder!
Do you love that tiny little banner? That’s from one of the 2014 Sale-A-Bration EXCLUSIVE stamp sets, Banner Blast! It has a matching punch that is also a choice with any $50 purchase! Gotta love that! The dotted border is stamped in VersaMark ink on Wisteria Wonder cardstock and heat embossed with Gold Stampin’ Emboss Powder! I used my trusty Stamp-a-ma-jig to line the little heart from Banner Blast up right in the center and stamped it in Elegant Eggplant.
How about the gold bling details? The button is actually one from the Regals Designer Button Collection (Garden Green!). I pressed it into the VersaMark pad, sprinkled it with some Gold Stampin’ Emboss Powder and heated it with the Heat Tool until it melted! Then I did that same thing two more times to get an even coat on it. I also repeated the process on the edges. Slipped it on the card with a bit of White Baker’s Twine tied through the holes! Once I had assembled the card (before I added the hearts), I diluted a blob of my Multipurpose Liquid Glue with water and used a paint brush to spatter it onto the card. I sprinkled some fine gold glitter on for some sparkle! I also cut apart the Gold Sequin Trim and added a few of these pretties with Multipurpose Liquid Glue.
The Elegant Eggplant Layer (4″ x 5-1/4″) was embossed with the Perfect Polka Dots folder and the Big Shot. The stamped ikat chevron piece has some extra effect thanks to the Stampin’ Dimensionals underneath! I also added Stampin’ Dimensionals to the hearts after gluing the smaller one to the larger one. 🙂
Come on over to the As You See It Challenge Blog and play along! You still have plenty of time before Wednesday night rolls around! If you’re in the midwest like me, you might have a snow day tomorrow to get a bit inky and try this challenge! We’re supposed to get 10″ – can you believe that?