
From the monthly archives: October 2013
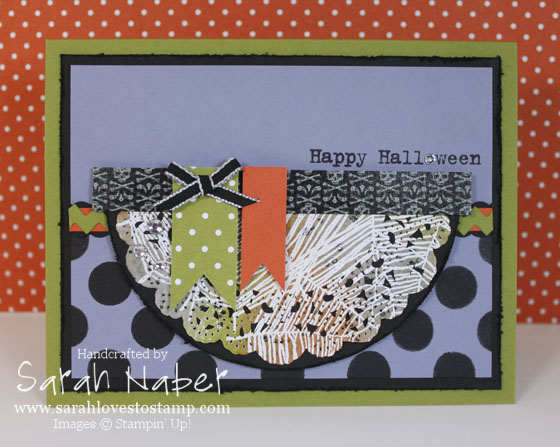
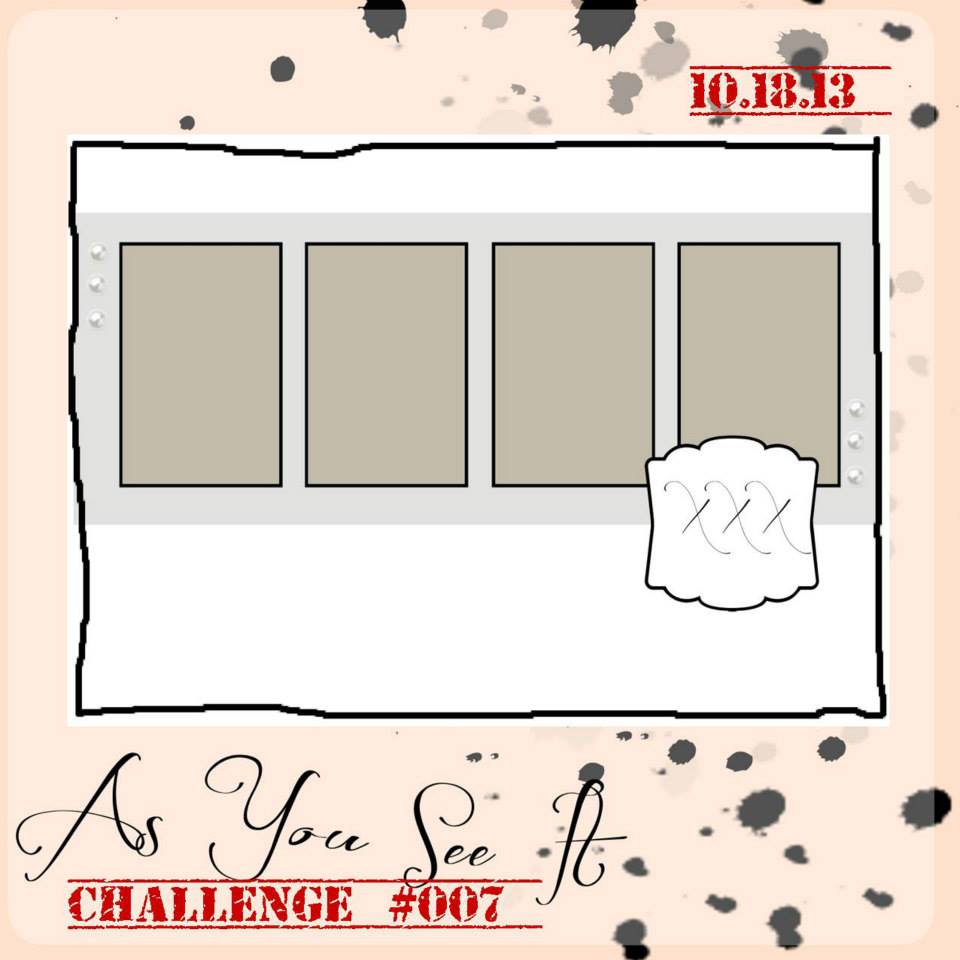
I’m so excited to bring you another new fun challenge from the As You See It Challenge Blog today! I can’t believe we’re already on Challenge #008! Great, fun, different sketch for you today! I combined that sketch with the color challenge from colourQ Challenges!
I fell in LOVE with the new Photopolymer stamp set from Stampin’ Up!, called Bite Me! Super fun! I embossed the spiderweb stamp onto the doily in white, then sponged on Old Olive, Tangerine Tango, and Wisteria Wonder. Then glued it to a half circle from the Circles Framelits Collection (the largest plain circle) that I distressed with the distressing tool. I used Jet Black StazOn Ink and a sponge dauber to stencil onto the Wisteria Wonder the polka dotted pattern from the Banner Kit. (LOVE those banners! SO CUTE!) The strip across the main panel is a labor of love with a piece of Old Olive cut with the Tasteful Trim XL Die in the ric rac pattern layered onto a strip of Tangerine Tango over a strip of Basic Black punched with the Scallop Border Punch. A shame that I had to cover up most of it! The sentiment was stamped in Jet Black StazOn Ink and also comes from the Bite Me stamp set. The half circle was layered onto the Wisteria layer with Stampin’ Dimensionals.
I stuck the Witches’ Brew Washi Tape onto a piece of Basic Black Cardstock and glued it on there. The patterned Old Olive flag is a pattern from the Brights Designer Series Paper Stack. A few rhinestones and a small snippet of 1/8″ Basic Black Taffeta Ribbon finished it off. The main panel was mounted onto a piece of distressed Basic Black Cardstock and that was layered onto an Old Olive base! 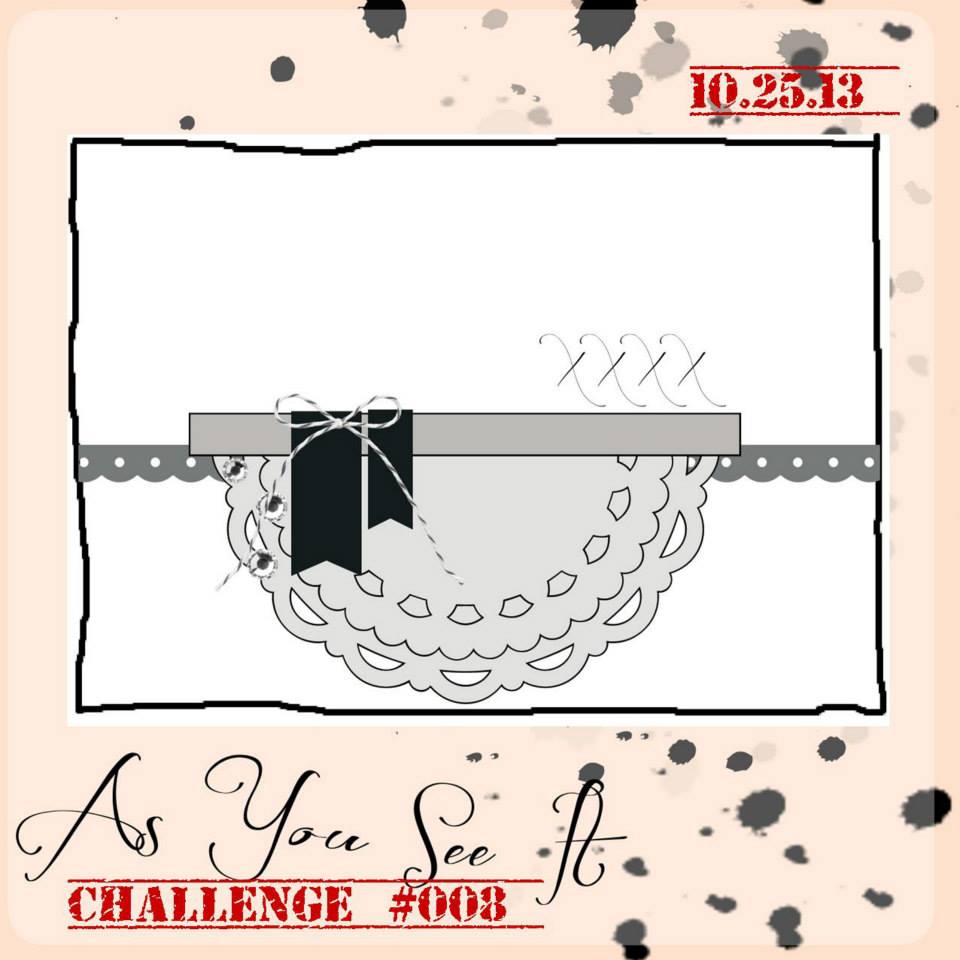
I really hope you’ll play along with us over at As You See It Challenges!!! Bookmark the web address (http://www.AsYouSeeItChallenge.com) and come visit us each Friday for a new challenge!!! Next week’s is one I’m SUPER excited about – not a sketch – so something a little different!
This card was entered into challenges at:
Today Stampin’ Up! announced 25% off of 25 stamp sets in celebration of the actual 25th anniversary of SU! this week!!! (We’ve been celebrating all year, of course, but SU! was actually founded on October 25th so that’s what this extra special stamp sale is about!) This special only runs from October 22th – October 28th!!! If you want to place an order, may I suggest using my hostess code? I’ll draw on October 30th for the winner of the Hostess Benefits! (Remember if the party reaches $250 and you win, you’ll get an extra $25 to spend because of the hostess special! YAY!!!)
Ok, so here’s the Hostess Code: 72HU2EKF
It’s super easy, just enter it in the box to the bottom left of your shopping cart! It’ll say my name as the hostess since I don’t know which one of you lucky stampers will win!!! You’ll also get a spot on my 50/50 board for the chance to win a $50 shopping spree for every $50 increment you spend! Also, I’m doing my FREE SHIPPING offer which is rare and just during this sale for orders including at least ONE stamp set from the 25 stamp sets on sale AND totaling at least $50 in merchandise (before tax & shipping). Feel free to email me at sarah@sarahlovestostamp.com or call/text me at 816.341.0208 if you have any questions!!!
Without further ado, here’s the link to the 25 Stamp Sets! Until the 28th, I won’t feature a creation on my blog that doesn’t use at least one of the 25 Stamp Sets that are 25% off!!! I’ll get us started with some favorite past creations today. Below each picture is the name of the stamp set(s) that I used to make each card! You’ll notice MANY of these are from pretty recent As You See It Challenge Design Team posts! I guess many of these stamp sets are favorites of mine that I reach for when I make cards! MUST HAVES: Gorgeous Grunge & Gently Falling!!!
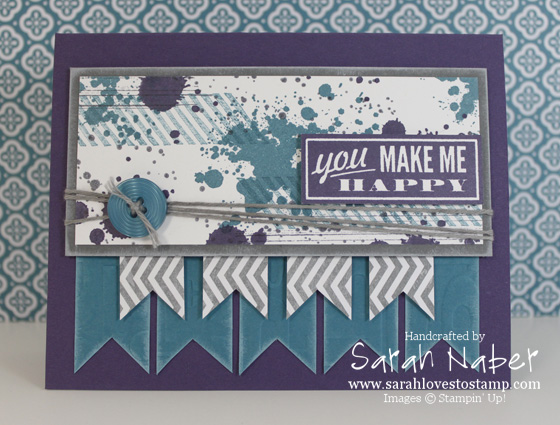 Hello, Lovely & Gorgeous Grunge
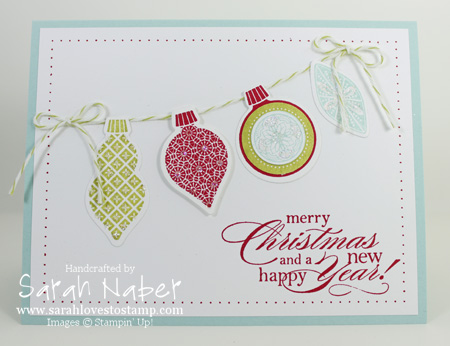 Ornament Keepsakes
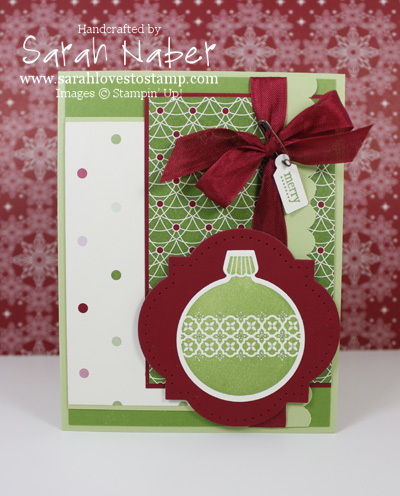 Ornament Keepsakes
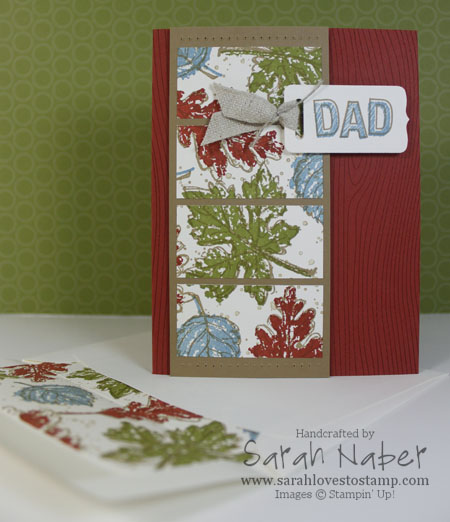 Gently Falling & Gorgeous Grunge
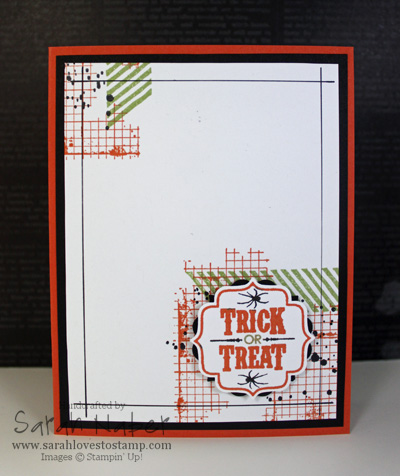 Gorgeous Grunge
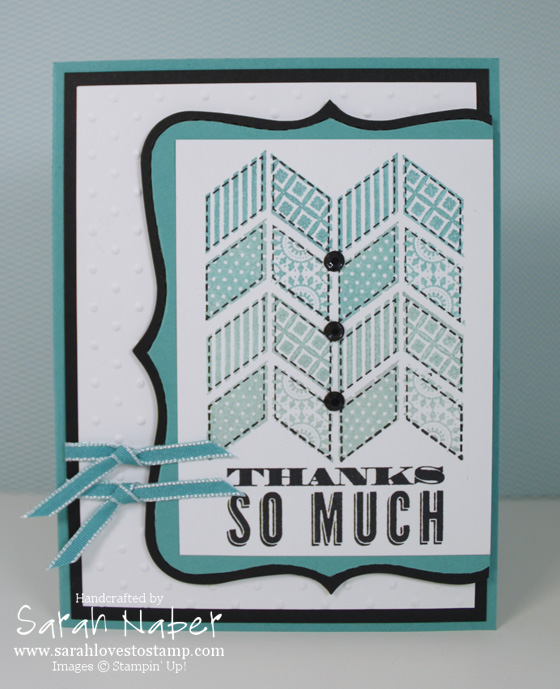 Oh, Hello
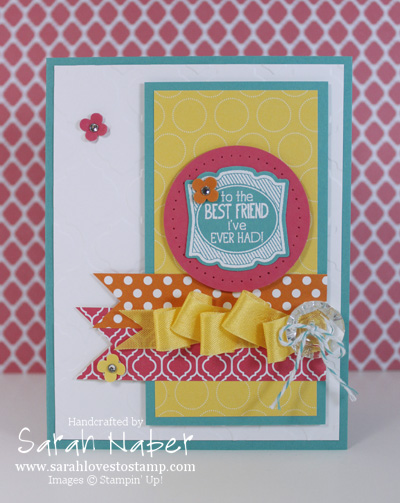 Label Love
Weekly Deals also were announced today! 🙂 Double up your savings and get some of these products too!!! HERE’S the link to the Weekly Deals!
Hi there! Here are a couple of my videos I made last week! Just wanted to make sure you didn’t miss them, although I added them to my post last Friday with the card that I featured in the videos. I hope you enjoy them!
Also, here are the Partial Liner Cardstock Sizes that I promised I’d post with this video:
Partial Liner Cardstock Sizes
Medium Envelope: 3″ x 5-3/4″
Note Card Envelope: 2-1/2″ x 5-1/4″
Square Envelope: 2-1/4″ x 3-1/4″
Hi there! A fun card today for the sketch challenge over at As You See It Challenges! I’m SO loving how this turned out for my dad’s birthday card! I also decorated the inside and the envelope so look below for that as well as a few videos for my Quick Tip Tuesday and Tool Time Thursday this week! (You can see both of them at the very end of this post!)
I used the Gently Falling Stamp Set, which is definitely one of the sets that I use frequently. It is SO simple to use. Either use the solid images alone, outline images alone, or use them together as I’ve done on this card! I stamped the solid images in Cajun Craze, Marina Mist, and Old Olive inks onto a 2-1/4″ x 5″ wide piece of Very Vanilla Cardstock. Then I stamped over them (I just eyeballed it – it’s fun for it not to be perfect) with the coordinating outline images in Baked Brown Sugar ink. I used my favorite Gorgeous Grunge Stamp Set and the small splatters with Baked Brown Sugar ink to add some depth, stamping off on scratch paper each time before stamping onto my panel so the ink was lighter. Finally, I cut them apart into four strips measuring 1-1/8″ x 2-1/4″ and mounted them onto the Baked Brown Sugar panel measuring 2-1/2″ x 5-1/2″. I then used the Essentials Paper Piercing Pack, Stampin’ Pierce Mat, and Piercing Tool to pierce the back of the panel. Flip it over and the front has the “wrong” side of the holes. I really like to do this technique on masculine cards as it is a little rougher looking than the regular way of piercing.
The Woodgrain Background Stamp is stamped in Cajun Craze ink straight onto the Cajun Craze card base. I attached the leaf stamped panel with Stampin’ Dimensionals. I stamped “Dad” with the Sketch and Outline alphabets (Marina Mist for the Sketch and Baked Brown Sugar for the Outline) and then used the Chalk Talk Framelits Dies to cut it out. Check out my video below on how I made this long die shorter to better fit my short “Dad” title. I slipped some Natural Trim through the slot, tied it off with Linen Thread, and attached it with Stampin’ Dimensionals. *TIP: Since I’d used Stampin’ Dimensionals under the main strip, I used one on the left of the “Dad” sentiment piece and stacked them 2 high on the right. 🙂
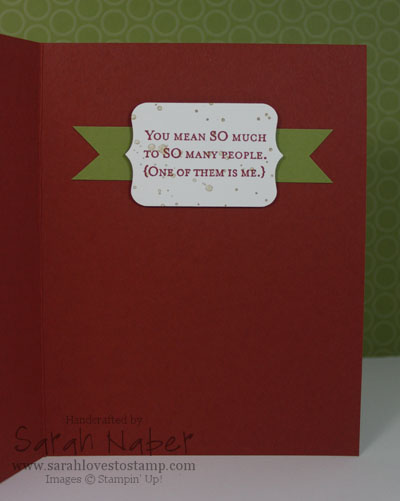
The inside is super simple. I used my Stamp-a-ma-jig to combine 2 sentiments from the One in a Million Stamp Set and die cut it out with the Chalk Talk Framelits Dies. I then took a strip of Old Olive Cardstock and flagged the end with my scissors.
My final step was to create a matching envelope with the Envelope Liner Die. I’ll be posting that video tomorrow but will link to it here (Edited: check it out below). I LOVE how the set turned out! Super professional and simple but special enough for my awesome dad’s birthday!!!
I encourage you to play along with us over at As You See It Challenges! I LOVE what we’ve done so far and hope you’ll join us for some amazing challenges. This week is a sketch challenge, but who knows what’s coming next?!?
This card was entered into challenges at: Papertake Weekly, Stamp-n-Doodle, Creative Craft Challenges 2, Eureka Stamps, The Sisterhood of Crafters, ABC Challenges, 4 Krafty Girlz, Creative Moments, My Craft Creations, and Stamping for the Weekend.
Partial Liner Cardstock Sizes
Medium Envelope: 3″ x 5-3/4″
Note Card Envelope: 2-1/2″ x 5-1/4″
Square Envelope: 2-1/4″ x 3-1/4″
Supply List
STAMPS:
Gently Falling (Wood-Mount 128430, Clear-Mount 123804)
Gorgeous Grunge (Wood-Mount 130514, Clear-Mount 130517)
ABC-123 Outline Alphabet & Numbers (Clear-Mount Only 130568)
ABC-123 Sketch Alphabet & Numbers (Clear-Mount Only 130565)
One in a Million – inside (Wood-Mount 132052, Clear-Mount 126382)
Woodgrain Background Stamp (Wood-Mount 128763, Clear-Mount 127808)
PAPER:
8-1/2″ x 11″ Very Vanilla Cardstock (101650)
8-1/2″ x 11″ Baked Brown Sugar Cardstock (131296)
8-1/2″ x 11″ Cajun Craze Cardstock (119684)
8-1/2″ x 11″ Old Olive Cardstock – inside (100702)
Very Vanilla Medium Envelopes (107300)
INK:
Baked Brown Sugar Classic Stampin’ Pad (131174)
Cajun Craze Classic Stampin’ Pad (126965)
Old Olive Classic Stampin’ Pad (126953)
Marina Mist Classic Stampin’ Pad (126962)
ACCESSORIES:
7/16″ Natural Trim (129287)
Linen Thread (104199)
SNAIL Adhesive (104332)
Multipurpose Liquid Glue (110755)
Stampin’ Dimensionals (104430)
TOOLS:
Stampin’ Trimmer (126889)
Simply Scored Scoring Tool (122334)
Bone Folder (102300)
Paper Snips (103579)
Craft Scissors (108360)
Stamp-a-ma-jig (101049)
Paper Piercing Tool (126189)
Stampin’ Pierce Mat (126199)
Essentials Paper-Piercing Pack (126187)
Big Shot Die-Cutting Machine (113439)
Magnetic Platform (130658)
Chalk Talk Framelits Dies (129983)
*Also comes in a bundle with the Chalk Talk Stamp Set at a 15% discount. Wood-Mount 132731, Clear-Mount 132730!*
Envelope Liners Framelits Dies (132172)
Grid Paper (102787)
Stampin’ Scrub (126200)
Stampin’ Mist (102394)
Hi there! I’d like to send you both of our free product catalogs! Normally, they retail together for $6.25, but I’m going to send them to you for free. However, before I do, I need to have a conversation with you. So if you want your free catalogs, here’s what you need to do. Send me an email at Sarah@SarahLovesToStamp.com with your phone number and the best time to call you. I’ll then call you and we’ll have a short chat. I can’t wait to speak with you and am looking forward to sending you our fantastic catalogs!
*Note: I’m still uploading a YouTube video today so stay tuned for that!!!*
Hi there! Tuesdays are normally the day that new Digital Downloads but now we have the Weekly Deals being announced on Tuesday too! We also had a BRAND NEW Christmas Photopolymer Set release today too! So I’ll share all of that today and bring you the Quick Tip Tuesday Video tomorrow! 🙂
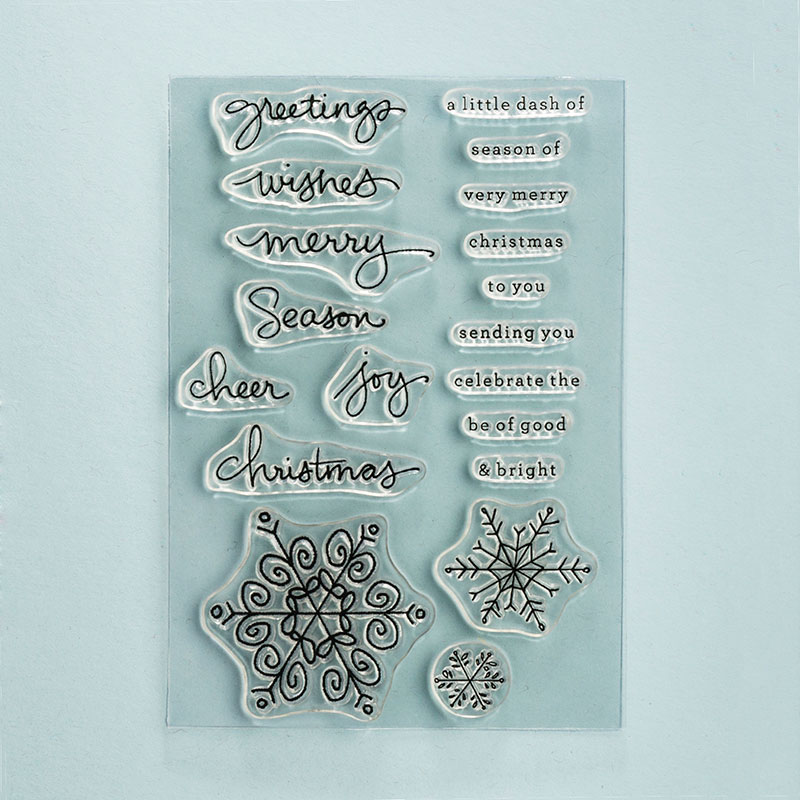
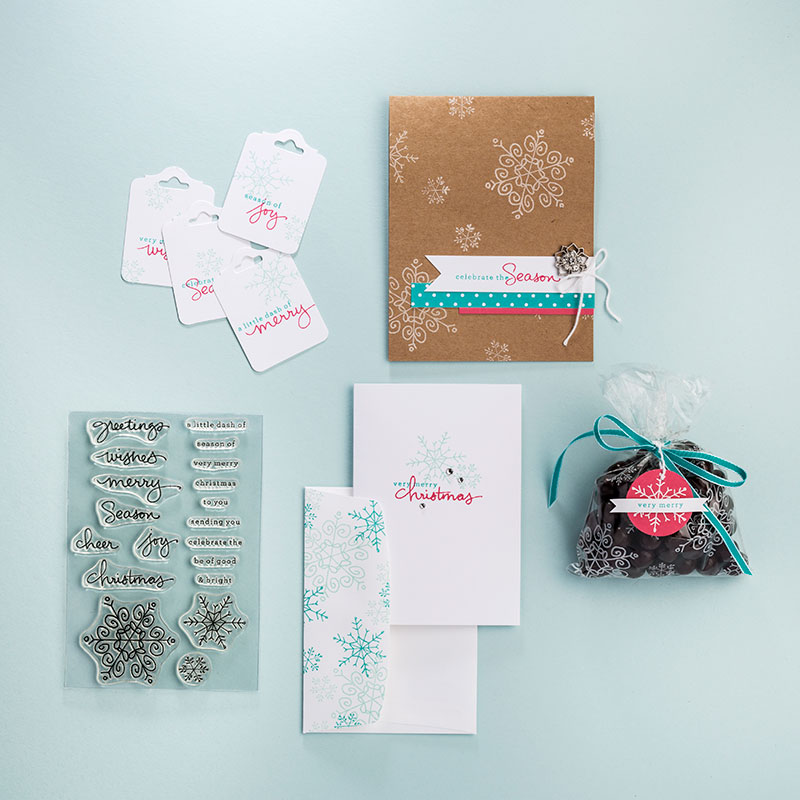
First off, here’s the fantastic Brand New Christmas Photopolymer Stamp Set, Endless Wishes! I LOVE it!!! Look below for a photo of the stamp set, as well as another photo with some samples from SU! using this set. Great for cards, tags, gift packaging, and even scrapbooks too! 🙂 And at only $13.95, the price is right!!! I can’t say enough great things about this stamp set!!! Click here to see Endless Wishes in my Online Store!
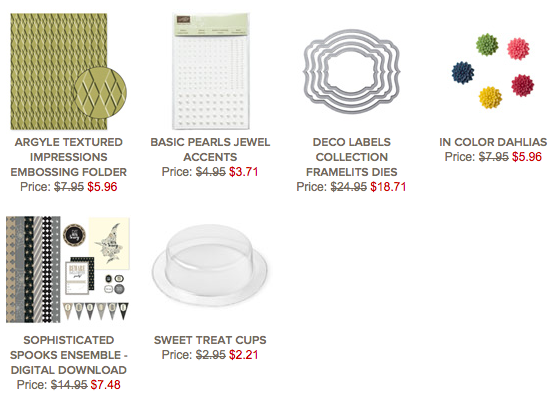
Weekly Deals! These deals are only good until next Monday! Some great ones this week! Watch your email on Thursday for the Thursday Daily Deals (I wouldn’t recommend ordering until then, in case you want to add one of those on). Remember that I do have a Mystery Hostess Event going on right now! Check out the bottom of this post for the info on that! CLICK HERE to see these items in my Online Store!
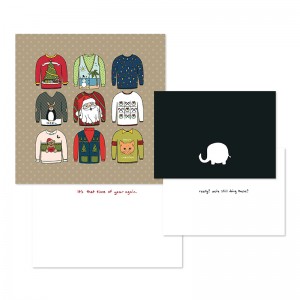
Digital Downloads! Feel free to click on the name of any of the downloads to see the item in my Online Store for more information, more pictures, etc. Hope you love them! I can definitely see some HILARIOUS cards made with the Spunky Sweater one!
Christmas Messages Stamp Brush Set – Digital Download Price $6.95 (135268)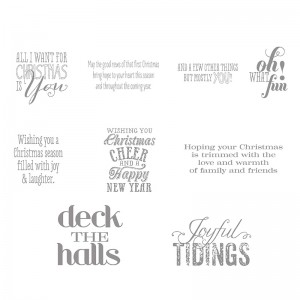
Hooray for Tags Designer Template – Digital Download $6.95 (135640)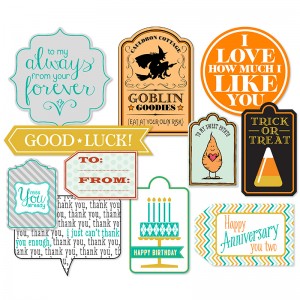
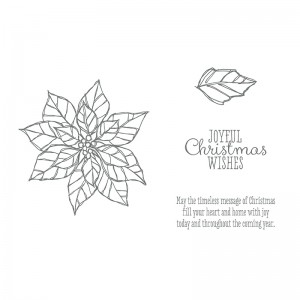
Joyful Christmas Stamp Brush Set – Digital Download $4.95 (#135269)
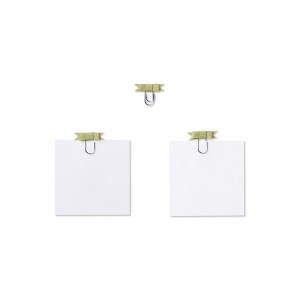
 Old Olive Simply Style Embellishments – Digital Download $1.95 (135270)
 Spunky Sweater Greeting Card Designer Templates – Digital Download $8.95 (135714)
Here are the details! I will draw for Hostess Benefits on October 17th! Any order placed before 9 pm that evening will be eligible to win. You get one entry into the drawing for each $15 you spend!!! CLICK HERE to head to my online store & shop (the Hostess Code gets entered in the box in the checkout screen!) DO NOT use the hostess code if you are placing more than $150 order – YOU get the benefits then!!!
Mystery Hostess Code: KKFF7MYD
I apologize that I just gave you info today but there was A LOT of it! 🙂 Please contact me if you have any questions!
Hello! Today I have a super easy, quick card! 🙂 I participated in the 10 Minute Craft Dash and interpreted their colors for the challenge as Stampin’ Up!’s Tangerine Tango, Basic Black, and Wild Wasabi! I totally encourage anyone to play along with these challenges! They are truly that, a challenge!!! I LOVE that it forces me to make a quick and simple card, although I wish I had had more time to add some black rhinestones to this card.
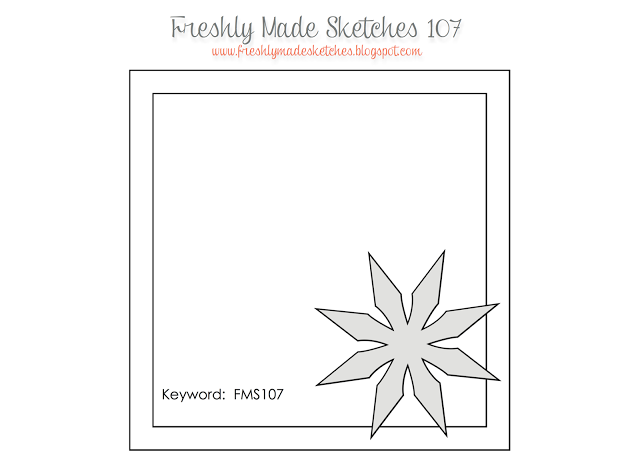
I also filmed a video as I was making this card so you could see the somewhat crazy process! 🙂 I’m proud to say it took me 9 minutes 45 seconds!!! Barely made it! I’ll embed the video here as soon as it uploads to YouTube. I also combined this challenge with the sketch over at Freshly Made Sketches, although I did take a tad bit of creative license and put something in the upper left corner. I also made the sketch into a regular card as I don’t make square cards, except once in a blue moon.
Below is the supply list! Click on any item to see it in my online store and order it now! 🙂 Or CLICK HERE for easy shopping 24/7!
Supply List
STAMPS:
Tags 4 You (Wood-Mount 131820, Clear-Mount 131823)
***Save 15% and buy the Tags 4 You Stamp Set and matching Label Bracket Punch as bundle! Wood-Mount 133293, Clear-Mount 133294***
Gorgeous Grunge (Wood-Mount 130514, Clear-Mount 130517)
Off the Grid (Wood-Mount Only 130736)
PAPER:
8-1/2″ x 11″ Whisper White Cardstock (100730)
8-1/2″ x 11″ Basic Black Cardstock (121045)
8-1/2″ x 11″ Tangerine Tango Cardstock (111349)
INK:
Tangerine Tango Classic Stampin’ Pad (126946)
Wild Wasabi Classic Stampin’ Pad (126959)
Jet Black StazOn Ink Pad (101406)
***Note: The Tangerine Tango & Wild Wasabi markers are not available individually.***
Basic Black Stampin’ Write Marker (100082)
Brights Collection Stampin’ Write Markers (131259) – Tangerine Tango
Subtles Collection Stampin’ Write Markers (131263) – Wild Wasabi
OR get ALL 38 Core Colors in our Color Collections (not Whisper White or Very Vanilla) in the Many Marvelous Markers (131264)
ACCESSORIES:
SNAIL Adhesive (104332)
Multipurpose Liquid Glue (110755)
Stampin’ Dimensionals (104430)
TOOLS:
Stampin’ Trimmer (126889)
Simply Scored Scoring Tool (122334)
Bone Folder (102300)
Blender Pens (102845)
Label Bracket Punch (132153)
***Save 15% and buy the Label Bracket Punch and matching Tags 4 You Stamp Set as bundle! Wood-Mount 133293, Clear-Mount 133294***
Grid Paper (102787)
Stampin’ Scrub (126200)
Stampin’ Mist (102394)
StazOn Cleaner (109196)
ruler
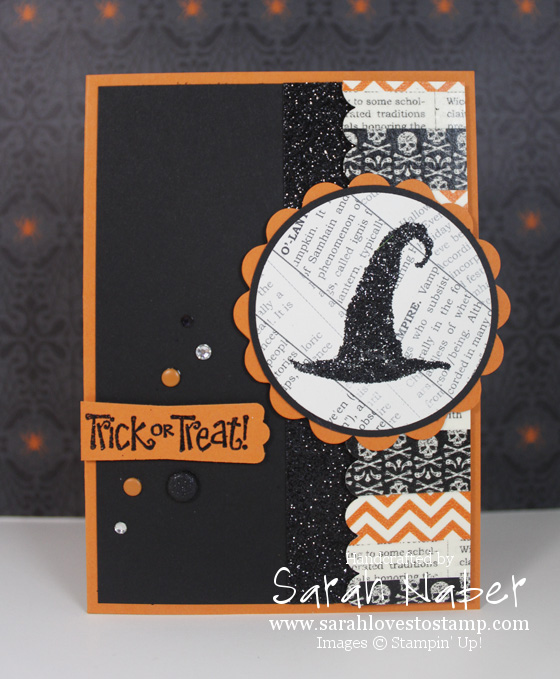
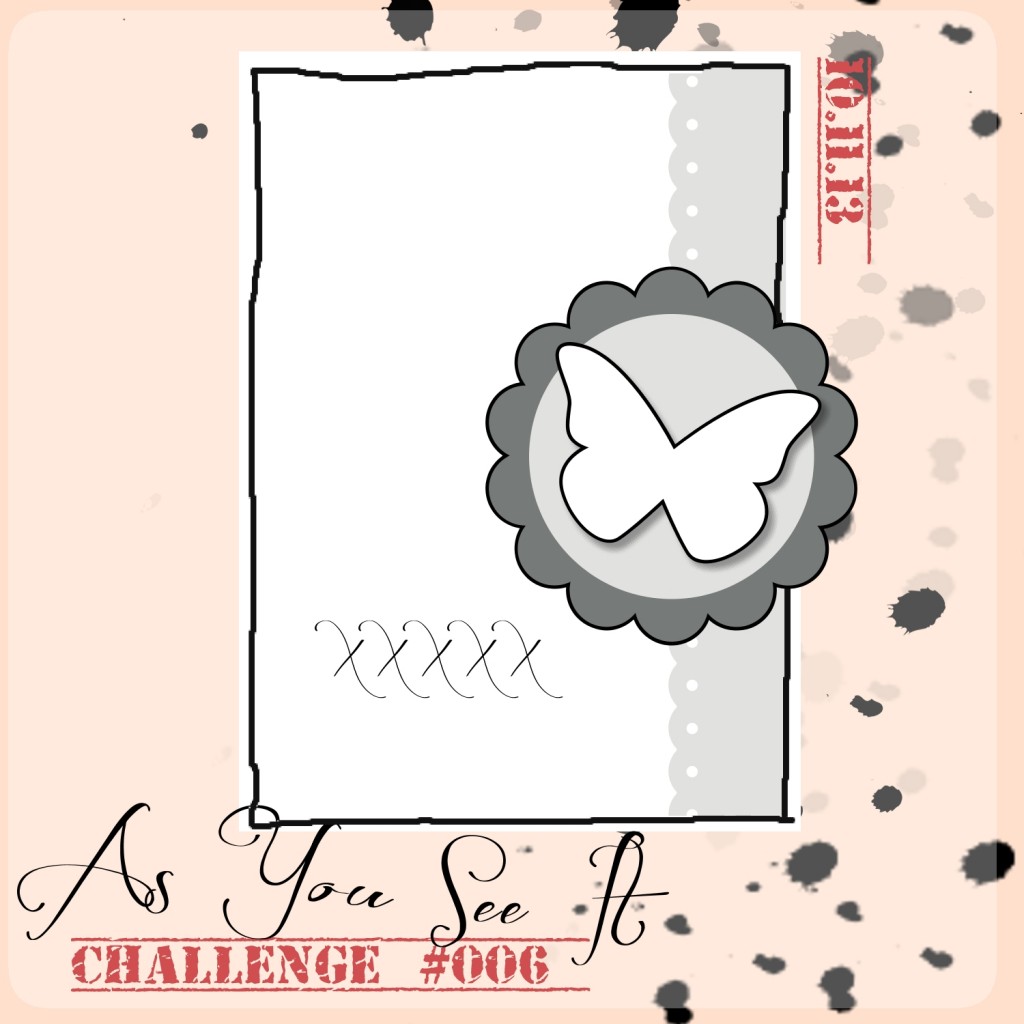
I’m back again today with a GREAT sketch challenge from the As You See It Challenge Blog! This one featured a scalloped element that hung off the edge of the card so I made the card base a tad bit smaller at 4″ x 5-1/2″ so it would still fit in a standard A2 envelope. I used lots of the new Black & Orange Stampin’ Glitter (I only used the black) with Heat and Stick powder. Stay tuned for a video on that!
The patterned part on the right is the Witches Brew washi tape on top of Very Vanilla cardstock. I used the Scallop Edge Punch to make the fun edge. The witch’s hat and sentiment are from the Best of Halloween set! These are only available until March 2014, so make sure not to miss out! LOVE this set! The witch’s hat was stamped onto the Witches Brew Designer Series paper and cropped out with one of the circles from the Circles Collection Framelits dies. I then layered it onto a 2-1/2″ circle punched out of Basic Black cardstock. Those were layered onto the 2-3/8″ Scallop Circle Punch and popped up on dimensionals. *TIP: Since the edge of the circle hangs over the edge, make sure not to put adhesive on the very right side of it as it doesn’t have anything to adhere to, so the adhesive will be sticky and exposed. I made the black glittery strip with by pressing my VersaMark pad directly onto Basic Black cardstock, covering it in Heat and Stick Powder, heating it, covering it in the black glitter, and then heating it to set it. Honestly, it’s faster to do it than it is to type it! 🙂
I finished it off by stamping the sentiment in VersaMark and embossing it with Black Stampin’ Emboss Powder. I punched it out with the Modern Label Punch, chopped off the very edge and popped it up on Stampin’ Dimensionals! I wanted a little more pizzazz so I added a few fun embellishments to draw the eye to the sentiment! I used Pumpkin Pie Candy Dots (from the Brights Candy Dots), Basic Rhinestone Jewels, and a Glimmer Brad. One of the tiny rhinestones is colored with a black Sharpie marker to color it to match the project.
I hope you love it as much as I do! The only change I would make is to have a narrower black glittery strip. I had already glued it down to the card so I couldn’t fix it without redoing the whole card! (Hate it when that happens!)
Please head on over to the As You See It Challenge Blog and play along with us!!! You have from each Friday until the next Thursday to enter. I’m LOVING being on this Design Team and all of the creativity! 🙂
This card was entered into challenges at: Oldie But a Goodie (Old items: Pumpkin Pie cardstock and Heat & Stick Powder, Bingo: embossing, die cuts, glitter), Papertake Weekly (2 stamps), Simon Says Stamp, Moving Along with the Times, Stamp-n-doodle, Paper Pretties, Creative Craft Challenges 2, Sister Act Card Challenge, Simply Create Too, Polkadoodles, and Crafty Catz.
Supply List
STAMPS:
Best of Halloween (Clear-Mount Only 134381)
PAPER:
8-1/2″ x 11″ Very Vanilla Cardstock (101650)
8-1/2″ x 11″ Basic Black Cardstock (121045)
8-1/2″ x 11″ Pumpkin Pie Cardstock (105117)
Witches’ Brew Designer Series Paper (132185)
INK:
VersaMark (102283)
ACCESSORIES:
Basic Rhinestone Jewels (119246)
Brights Candy Dots (130931)
Basics Glimmer Brads (121003)
Heat & Stick Powder (100625)
Black Stampin’ Emboss Powder (109133)
Black & Orange Stampin’ Glitter (132206)
Witches’ Brew Designer Washi Tape (132156)
SNAIL Adhesive (104332)
Multipurpose Liquid Glue (110755)
Stampin’ Dimensionals (104430)
TOOLS:
Stampin’ Trimmer (126889)
Simply Scored Scoring Tool (122334)
Bone Folder (102300)
Paper Snips (103579)
Embossing Buddy (103083)
Modern Label Punch (119849)
2-1/2″ Circle Punch (120906)
2-3/8″ Scallop Circle Punch (118874)
Scallop Edge Border Punch (119882)
Big Shot Die-Cutting Machine (113439)
Magnetic Platform (130658)
Circles Collection Framelits Dies (130911)
Grid Paper (102787)
Stampin’ Scrub (126200)
Stampin’ Mist (102394)
Hi there! Just a quick little post today to remind you to follow all of the Sarah Loves to Stamp online family, so you don’t miss out on a bit of what I have to offer: projects, tips, tricks, information, etc. 🙂
It’s super easy, just click the link to the right for whichever online sources you aren’t yet following and click on “like”, “follow”, “subscribe”, etc.!
Thanks so much!!!
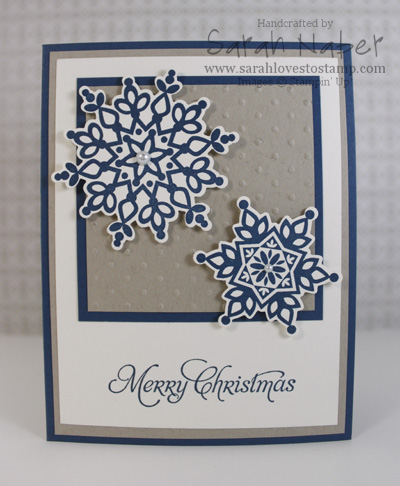
Hi there! I’ll be back tomorrow with your video for Quick Tip Tuesday! Today I have another of my Stampin’ Up! Convention swaps from this summer for you! If I could only have one stamp set out of the Holiday Catalog, it would be the Festive Flurry Stamp Set! HOWEVER, I totally recommend if you’re looking at this set, that you look at the Festive Flurry Bundle instead, which contains the stamp set and the matching Festive Flurry Framelits Dies at a 15% discount. Love how quick and easy it is to make cut out, beautiful snowflakes!!!
This card is really pretty simple! A GREAT mass-producible card that you could make to mail out to friends and family this holiday season. I LOVE Midnight Muse and combined it here with Crumb Cake and Very Vanilla to make a simple, monochromatic color scheme. You could switch out any color for Midnight Muse and totally change the look of the card! If you have our catalogs memorized, you may be wondering where the sentiment comes from! It’s from a stamp set that is on our Carryover List of previously released products that aren’t in our catalogs but are still available! Check that out HERE!
Supply List
STAMPS:
Festive Flurry (Wood-Mount 131778, Clear-Mount 131781)
***Save 15% and order with the matching Festive Flurry Framelits Dies as part of the Festive Flurry Bundle! Wood-Mount 133284, Clear-Mount 133285***
More Merry Messages (Wood-Mount 126400, Clear-Mount 126402)
PAPER:
8-1/2″ x 11″ Very Vanilla Cardstock (101650)
8-1/2″ x 11″ Crumb Cake Cardstock (120953)
8-1/2″ x 11″ Midnight Muse Cardstock (126843)
INK:
Midnight Muse Classic Stampin’ Pad (126860)
ACCESSORIES:
Basic Pearl Jewels (119247)
SNAIL Adhesive (104332)
Multipurpose Liquid Glue (110755)
Stampin’ Dimensionals (104430)
TOOLS:
Stampin’ Trimmer (126889)
Simply Scored Scoring Tool (122334)
Bone Folder (102300)
Stamp-a-ma-jig (101049)
Big Shot Die-Cutting Machine (113439)
Festive Flurry Framelits Dies (132193)
***Save 15% and order with the matching Festive Flurry Stamp Set as part of the Festive Flurry Bundle! Wood-Mount 133284, Clear-Mount 133285***
Perfect Polka Dots Textured Impressions Embossing Folders (117335)
Grid Paper (102787)
Stampin’ Scrub (126200)
Stampin’ Mist (102394)
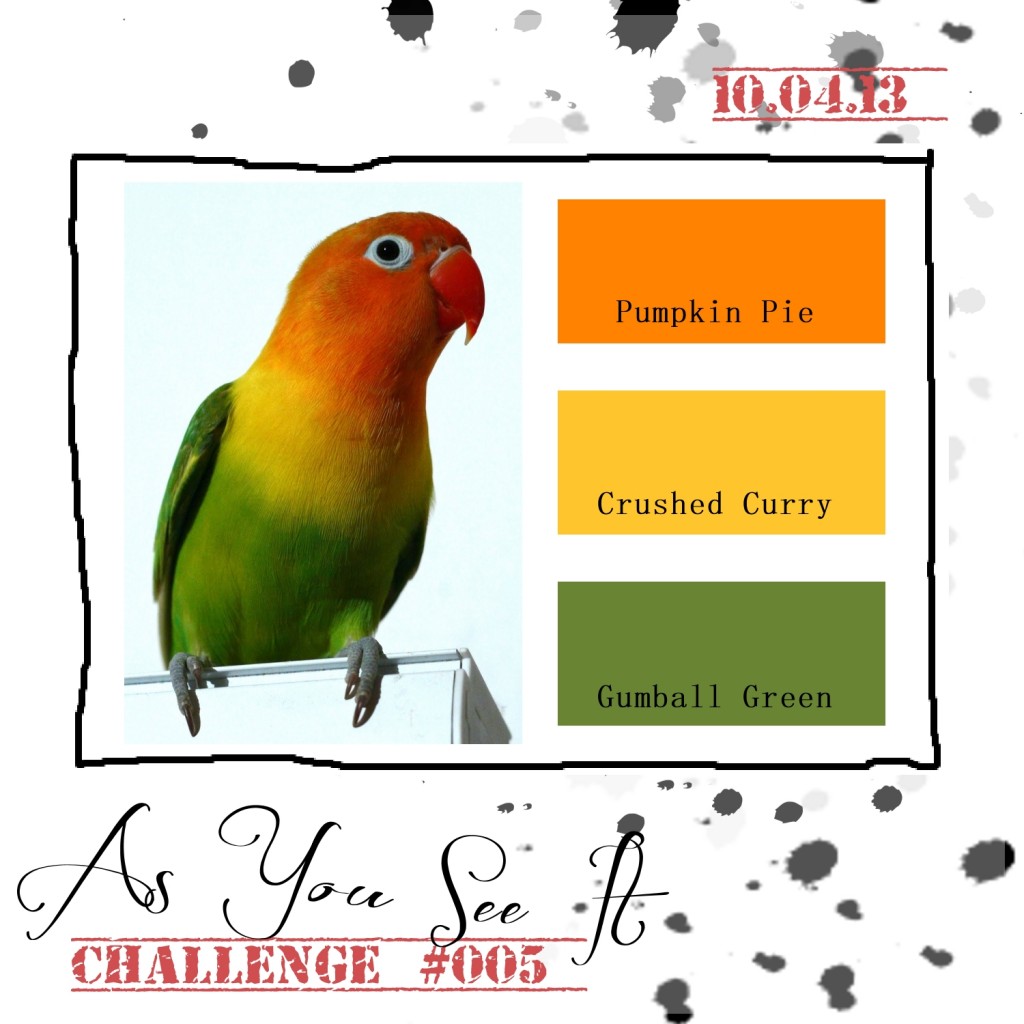
Hi there!!! Are you enjoying my Friday posts for the As You See It Design Team? I’m sure enjoying making these projects with the awesome inspiration from the challenge blog. I combined this week’s color challenge with a few other ones so I’ll list those below. 🙂
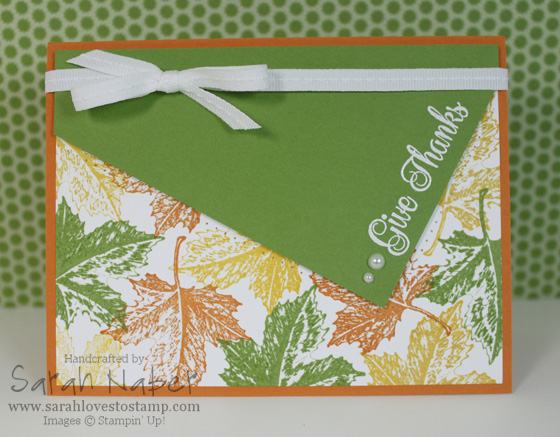
Super simple card for you today! I LOVE the sketch from over at Retro Sketches and I thought a simple layout would be best for this bright and funky color combination of Pumpkin Pie, Crushed Curry, and Gumball Green. I only used ONE stamp set on this project! (Ok, that’s like, a miracle for me!) I’ve been loving the fun and surprise of getting a new Best of set each month featuring a theme and best selling stamps fitting that theme from the 25 years SU! has been in business!!! The set I used here was the Best of Autumn! LOVE, LOVE, LOVE! *Side Note: The Best of Christmas released on October 1st and is going to have to be mine!!! It’s so awesome!
As far as details, I have just a couple here. The greeting was stamped in VersaMark and heat embossed with White Stampin’ Emboss Powder onto the Gumball Green cardstock. I added a couple of pearls to mimic the dots in the sketch. Then I used a temporary adhesive to layer the Gumball Green cardstock piece onto my leaf stamped Whisper White panel and used straight piercing template from the Essentials Paper-Piercing Pack (along with a Paper Piercer and Stampin’ Pierce Mat) to pierce holes that would outline the Gumball Green piece. It’s easier to see in person. Then I popped the Gumball Green piece up on Stampin’ Dimensionals and onto the Whisper White piece. This whole panel then was glued to a Pumpkin Pie card base. I tied some Whisper White Stitched Grosgrain Ribbon around the top to finish it off! (I did a bow instead of a knot this time to add a little more weight on the left side of the card to balance it a bit more.)
Head on over to the As You See It Challenge Blog and play along!!!
This card was entered into challenges at: Retro Sketches, Tuesday Throwdown, Dream Valley Challenges, Moving Along with the Times, Creative Craft Challenges 2, Pile It On Challenge, and Loves Rubber Stamps.
Supply List
STAMPS:
Best of Autumn (Clear-Mount ONLY 134390)
***Note: Buy 6 of the Best of… Stamp Sets and get any set $14.95 or under for FREE!***
PAPER:
8-1/2″ x 11″ Whisper White Cardstock (100730)
8-1/2″ x 11″ Gumball Green Cardstock (126840)
8-1/2″ x 11″ Pumpkin Pie Cardstock (105117)
INK:
Crushed Curry Classic Stampin’ Pad (131173)
Gumball Green Classic Stampin’ Pad (126861)
Pumpkin Pie Classic Stampin’ Pad (126945)
VersaMark (102283)
ACCESSORIES:
Basic Pearl Jewels (119247)
1/4″ Whisper White Stitched Grosgrain Ribbon (126877)
Multipurpose Liquid Glue (110755)
Stampin’ Dimensionals (104430)
TOOLS:
Stampin’ Trimmer (126889)
Simply Scored Scoring Tool (122334)
Bone Folder (102300)
Craft Scissors (108360)
Stamp-a-ma-jig (101049)
Paper Piercing Tool (126189)
Stampin’ Pierce Mat (126199)
Essentials Paper-Piercing Pack (126187)
White Stampin’ Emboss Powder (109132)
Heat Tool (129053)
Grid Paper (102787)
Stampin’ Scrub (126200)
Stampin’ Mist (102394)
Q: How do you make card bases?
A: This is a GREAT question. In the US, the typical finished size of the cards we make (called A2 cards) is 4-1/4″ x 5-1/2″. This is super easy to accomplish by cutting a piece of 8-1/2″ x 11″ cardstock in half either way and folding those pieces in half. One option is to cut it in half to make two 8-1/2″ x 5-1/2″ pieces and score and fold them at 4-1/4″. I do this the most often as your actual fold is longer (5-1/2″) and thus the card seems to be a little more sturdy – especially if you want to stand them up somewhere or know you’re mailing it to someone who likes to stand their cards up. 🙂 The other way is to cut the paper to 4-1/4″ x 11″ and scoring each piece and folding at 5-1/2″.
Send me YOUR Questions and you may see them here at my Q&A feature or in a Q&A video which I hope to start soon! 🙂
