
From the monthly archives: December 2015
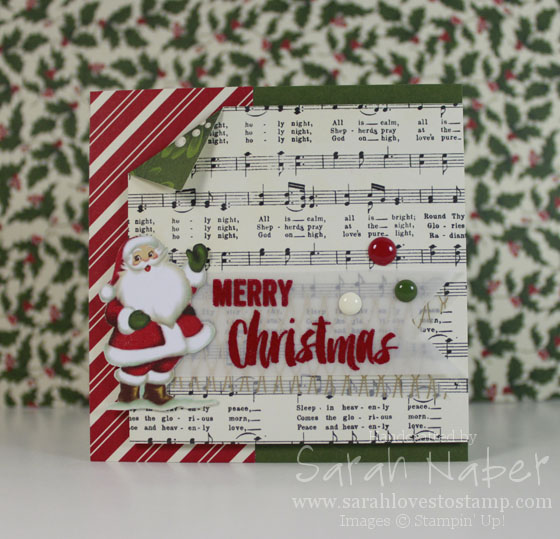
This week the As You See It Challenge is SANTA! This paper became a fast favorite when we used it at Convention this summer! We made a card element that I turned into a card (I’ll show it next week) and the main part of it was the Santa from the Home for Christmas Designer Series Paper! This paper is fantastic…especially if you like to fussy cut the beautiful, handpainted images of Santas, Christmas Trees, Poinsettias and if you aren’t me, Deer. (I swear I’m the only person on the planet who doesn’t love these deer.)
This card is really pretty simple. I combined the As You See It Challenge #116 with the Retro Sketches challenge this week. The sketch prompted me to do something I NEVER do…a square card! Here’s a tip for you: if you’re mailing a square card, it requires more postage, unless you put it in a rectangular envelope. The finished size of this card is 4-1/4″ x 4-1/4″ so you could pop it into a regular A2 envelope if you wanted to save on postage. OR, make a fabulous custom square envelope with the Envelope Punch Board!
Both patterned papers are from the same pack as the santa that I fussy cut. I layered a piece of the gold printed vellum from the Wonderland Vellum Stack (on sale now! more about that later!) under the vellum I stamped the sentiment on.
The sentiment is from the Project Life December 2015 Stamp Set. I am WILD about the font combinations in this stamp set! I used my Embossing Buddy to prep the vellum so stray powder flecks wouldn’t be a problem, stamped my sentiment in VersaMark (I stamped ‘Christmas’, poured the powder onto it, then stamped ‘Merry’, poured the powder onto it, and then heated it up), and used Cherry Cobbler Stampin’ Emboss Powder to really make the sentiment pop off the card. I went ahead and used Fast Fuse behind the gold foil vellum piece (I cannot see the adhesive) and hid a tiny bit of Multipurpose Liquid Glue behind the embossed letters, as well as adhering the banners under the Santa element.
The Sheet Music Designer Series Paper is popped up with a layer of Fun Foam. This is a tip I’m loving from Jennifer McGuire as it holds up better in the mail than foam tape, dimensionals, etc. on large layers. I stacked two Stampin’ Dimensionals I’d cut in half and put them under the left side of Santa (that’s hanging off of the paper layer) to support him.
My second favorite thing on this card (besides the yummy designer series paper) is the enamel dots! These are beautiful!!! Card measurements/cut list will be below, as well as the full list of supplies (just click on a picture to see it in my Online Store)!
New product alert…I may have lied…this may instead be my most favorite thing about this card! WINK OF STELLA Clear Glitter Brush Pen!!! It is coming out in our Occasions Catalog in January. I was excited about it, but didn’t truly fall in love until I brushed it onto the red parts of Santa’s suit! Gorgeous in real life!!!
All in all, a super simple but fun card! I hope you enjoyed it! Feel free to leave me a comment and tell me if you’re a fan of fussy cutting or not! I find it to be super relaxing and love to do it in front of the television.
NEW news…

If you aren’t on my email newsletter list, you’ll have missed my message that the Year-End Sale began today!!! We’re talking savings up to 60% on great products – some retiring products from the Holiday Catalog!
CLICK HERE to check out the Year-End Sale in my Online Store!
FINALLY, go check out the As You See It Challenge and play along! You have until next Wednesday to submit a card with a Santa theme! 🙂 Check it out at www.AsYouSeeItChallenge.com!!! If you haven’t been over there yet, we have a new challenge for you every Friday to get your creative juices flowing!
Cut List
Mossy Meadow: 4-1/4″ x 8-1/2″, scored at 4-1/4″
Home for Christmas Designer Series Paper: Red Stripe – 1-7/8″ x 4-1/4″; Sheet Music – 3-3/4″ x 3-3/4″
Vellum Banners: 1-1/8″ wide
Built for Free Using: My Stampin Blog
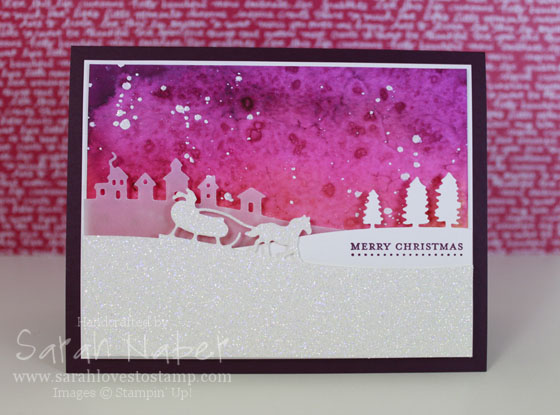
I fell in love with this technique when I saw my demo friend, Jen do it in shades of blue. I wanted to use this amazing edgelits set (RETIRING) as I’d just gotten it recently. The sketch was an As You See It Challenge a few weeks ago but I got sick so I just got around to editing the pictures and SURPRISE, a video too so I’m sharing those today! Check out the current challenge HERE!
The best thing about this technique is that you can do it with items you already have! Can’t beat that. 🙂 I love the color combo here of Pumpkin Pie (you can’t really see it except for at the very bottom of the colored part), Melon Mambo, Rich Razzleberry and Blackberry Bliss. I find doing things like this just really make me feel like a true artist!
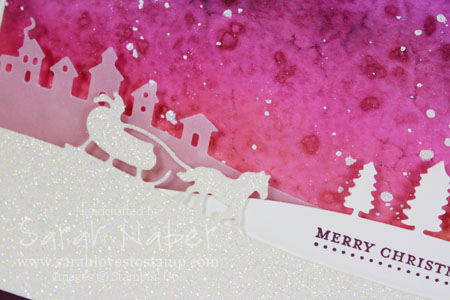
I layered all 3 of the framelits here with the village in Vellum Cardstock, the trees in regular Whisper White and the sleigh in Dazzling Diamonds Glitter Paper. EACH layer was popped up with Stampin’ Dimensionals so this is a VERY dimensional card. I would not recommend sending it in a regular envelope.
A note about the white splatters. I did them to tie all the white together with the technique piece. However, I would do them differently next time. I mixed a bit of Whisper White Craft Ink and water and splattered it on with a paintbrush. 14 hours later it wasn’t dry! So I tried to add White Stampin’ Emboss Powder to the wet splatters. When I heated it, it was almost like the powder went to the edges and melted normally while the wet ink bubbled up through the center of the splatter. Next, I tried 2 separate rounds of Iridescent Ice Embossing Powder. It still wasn’t perfect (I could touch the splatters and still had a tiny amount of ink transfer onto my fingers) but it was as close as I thought it would get. Next time, I plan to try splattering with a mixture of Multipurpose Liquid Glue and water and then embossing with either white or a mix of white and iridescent ice since I ended up loving the touch of sparkle in the sky. Anyway, that’s how crafting goes…sometimes it works, sometimes it doesn’t! Hopefully, you can learn from my mistake.
So here’s the video. I’ll also add the closeup picture, as well as the measurements and supplies below! 🙂
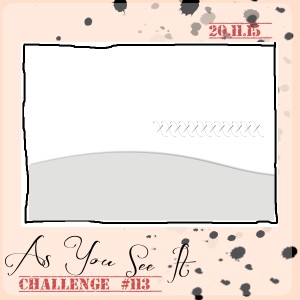
I used As You See It Challenge 113 for this card!
Cut List
Blackberry Bliss: 5-1/2″ x 8-1/2″, scored at 4-1/4″
Whisper White: 5-1/8″ x 4-7/8″
Watercolor piece (trimmed after technique was finished): 5″ x 4-3/4″
Village edge is 2″ from the bottom of the watercolor piece.
Built for Free Using: My Stampin Blog
