
From the monthly archives: May 2014
An apology in advance for this lengthy post! 🙂 I also apologize for my long hiatus! I’m working on 24 samples for display for our Stampin’ Up! Convention in July so I’m really trying to get those done. Bonus…in July, I’ll have 24 pretty sweet projects to share! 🙂
A new catalog is always exciting and brings a great variety of new things everyone wants to try out! I’m doing my first catalog shares to help you try everything you want at a MUCH lower cost than buying it all yourself. 🙂 A share means several people are splitting the 10 yard rolls of ribbon into 2 yard segments and getting every color OR cutting the Designer Series Paper into 6″x6″ pieces and having every pattern right now!
Here’s how the 2014-2015 Stampin’ Up! Product Shares work:
-Sign up for a spot in the product share(s) you’d like to receive
-As soon as the share is full, you’ll receive a Paypal invoice for the total amount
-Once I’ve collected payment from all people in the share, I will place the order for the product (SU! policy says I cannot order it and collect payment later)
-I will order the first round, if full, on June 2nd, and will plan to ship it out the week of June 9th (estimated arrival time is two weeks allowing for time for it to ship to me, get packaged and ship out to you)
-Designer Series Paper (DSP) Shares & I WANT IT ALL Shares will come packaged in a cello bag (to protect from water damage) in a Flat Rate Priority Bubble Mailer. Ribbon Shares will come wrapped and secured to chipboard for wrinkle free use and packaged in a cello bag in a bubble mailer.
-If you are local to me (St. Joseph, MO area), you can pick up your share(s) at my home instead of paying the shipping cost.
Pictures of shares will be added as soon as products are received.
PAPER SHARES
Designer Series Paper Share: 60 sheets 6″x6″ double-sided
$15.99 (+$5.95 Priority Shipping)
-Designer Series Paper (DSP) – 48 sheets
-Specialty Designer Series Paper (DSP) – 12 sheets
-If you wanted to buy full packages of all of this DSP, it would cost you $113.50 + shipping & tax!
***Are you a scrapbooker?***
***Would you rather have a 6″x12″ pieces?***
Do a double share of the above Designer Series Paper Share for $31.75
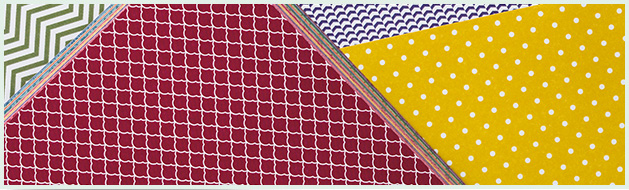
Background DSP Stacks Paper Share: 100 sheets 6″x6″ double-sided
$16.50 (+$5.95 Priority Shipping)
-Brights DSP stack – 20 sheets
-Subtles DSP stack – 20 sheets
-Regals DSP stack – 20 sheets
-Neutrals DSP stack – 20 sheets
-2013-2015 In Color Stack – 10 sheets
-2014-2016 In Color Stack – 10 sheets
-If you wanted to buy full stacks of all of this DSP, it would cost you $131.70 + shipping & tax!
RIBBON SHARES
NEW 5/8″ Satin Ribbon Share: $6.95 (+$3.00 shipping)
-Approximately 2 yards each of 4 colors = 8 yards total
-Gold, Silver, Very Vanilla, Whisper White
-Picture to follow.
-If you wanted to buy rolls of all of this ribbon, it would cost you $27.80 + shipping & tax!
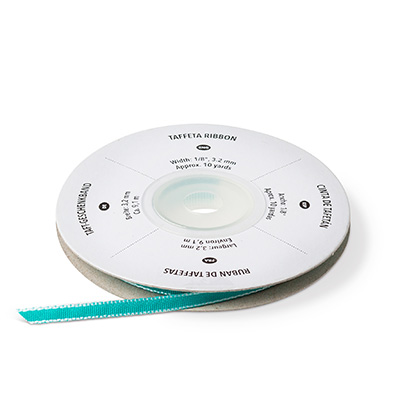
1/8″ Taffeta Ribbon: $13.95 (+$3.00 shipping)
-Approximately 2 yards of each of 10 colors = 20 yards total
-Gold, Silver, Basic Black, Bermuda Bay, Crushed Curry, Melon Mambo, Old Olive, Real Red, Smoky Slate, Soft Sky
-If you wanted to buy rolls of all of this ribbon, it would cost you $57.50 + shipping & tax!
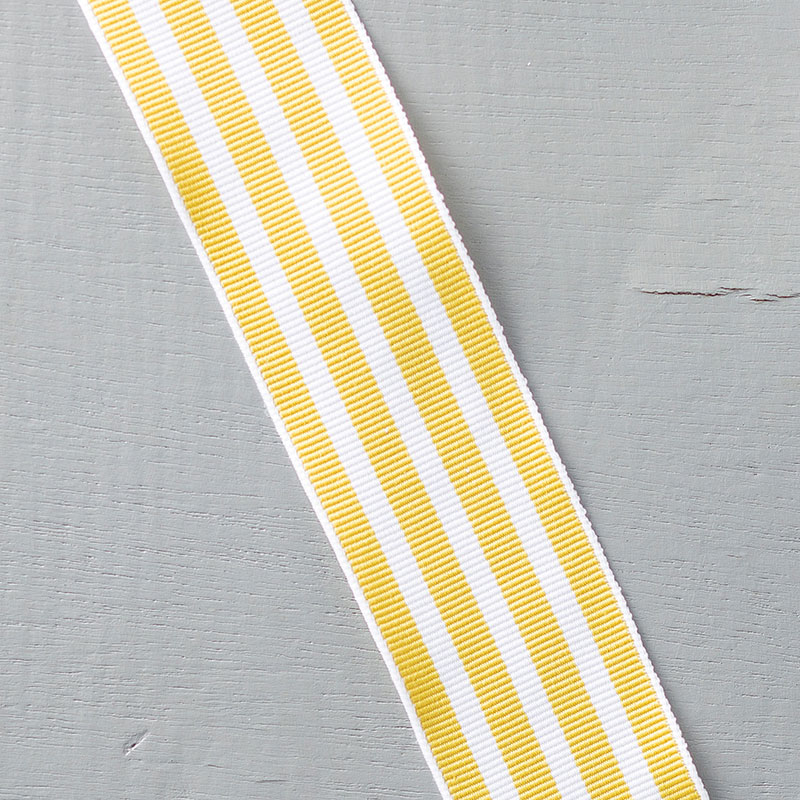
NEW 1-1/4″ Striped Grosgrain Ribbon Share: $10.95 (+$3.00 shipping)
-Approximately 2 yards of each of 5 colors = 10 yards total
-Bermuda Bay, Blushing Bride, Cherry Cobbler, Crumb Cake, Crushed Curry
-If you wanted to buy rolls of all of this ribbon, it would cost you $44.75 + shipping & tax!

NEW In Color 3/8″ Stitched Ribbon Share: $10.95 (+$3.00 shipping)
-Approximately 2 yards of each of 5 colors = 10 yards total
-Blackberry Bliss, Hello Honey, Lost Lagoon, Mossy Meadow, Tangelo Twist
-If you wanted to buy rolls of all of this ribbon, it would cost you $44.75 + shipping & tax!
*Project from Shelli Gardner, SU! CEO & Co-founder
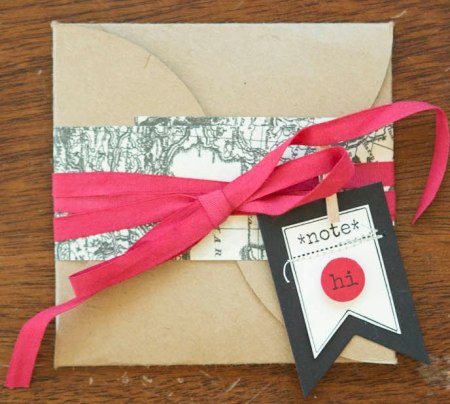
NEW 1/4″ Cotton Ribbon Share: $17.50 (+$3.00 shipping)
-Approximately 2 yards of each of 12 colors = 24 yards total
-Blushing Bride, Daffodil Delight, Early Espresso, Island Indigo, Marina Mist, Melon Mambo, Pear Pizzazz, Pool Party, Pumpkin Pie, Real Red, Rich Razzleberry, Whisper White
-If you wanted to buy rolls of all of this ribbon, it would cost you $71.40 + shipping & tax!
*Project from Shelli Gardner, SU! CEO and Co-founder – At our catalog premiere, Shelli kept talking about how nicely it ties and how soft it feels. I can’t wait to have this in hand!!! 🙂
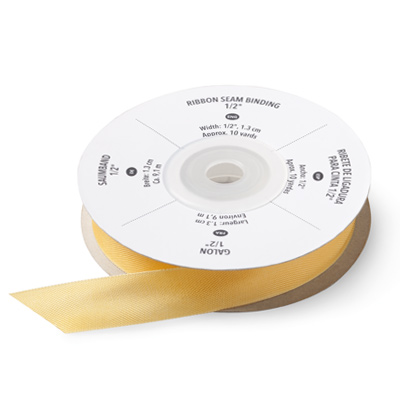
1/2″ Seam Binding Ribbon Share: $19.95 (+$3.00 shipping)
-Approximately 2 yards of each of 12 colors = 24 yards total
-Calypso Coral, Cherry Cobbler, Crumb Cake, Daffodil Delight, Early Espresso, Night of Navy, Pink Pirouette, Soft Sky, Very Vanilla, Whisper White, Wild Wasabi, Wisteria Wonder
-If you wanted to buy rolls of all of this ribbon, it would cost you $83.40 + shipping & tax!
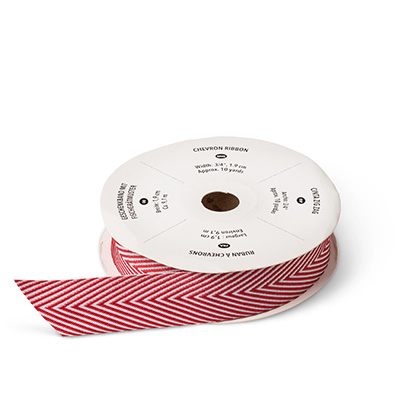
3/4″ Chevron Ribbon Share: $25.95 (+$3.00 shipping)
-Approximately 2 yards of each of 12 colors = 24 yards total
-Basic Black, Blushing Bride, Calypso Coral, Cherry Cobbler, Chocolate Chip, Crushed Curry, Island Indigo, Marina Mist, Pear Pizzazz, Pumpkin Pie, Smoky Slate, Wisteria Wonder
-If you wanted to buy rolls of all of this ribbon, it would cost you $107.40 + shipping & tax!
I WANT IT ALL!!!
“I’m a Ribbon Addict!” – ALL ribbons listed above!!!
$104.50 + FREE SHIPPING
That’s 120 yards of glorious, SU! exclusive ribbon!
Total, if you bought ALL of the rolls of ribbon instead, $427.10!!!
“I WANT IT ALL!” – EVERYTHING listed above!!!
$136.95 + FREE SHIPPING.
That’s 160 6″x6″ sheets of DSP and 120 yards of ribbon!
Total cost if you were to buy it all in full packs, stacks and rolls…a whopping $672.30!!!
Hi there! I’m LOVING the partnership of Becky Higgins and Stampin’ Up! to bring you Project Life in Stampin’ Up!’s exclusive colors! There are lots of great products to this line that you can purchase now! Here’s my unboxing and first impressions of the first part of my Project Life order (I’m totally going to have to make another to get those awesome dies).
I posted this video to YouTube last week and forgot that I hadn’t put it onto the blog so that’s why the date on the video is before this post! Don’t want that to happen again? Subscribe to my YouTube channel and get notified when I upload new videos!
Here are the Project Life products that are currently available! More will be available in the new catalog on June 2nd! Did you know? I’m sending out the brand new 2014-2015 Annual Catalog NOW to anyone who places a $50 order (before shipping and tax) in May! If you’re ordering under $150, please use the hostess code RGSHXDMM and you receive a free gift along with your brand new catalog! (If you’re ordering over $150, please don’t use the hostess code as you’re eligible for your own hostess benefits. OF COURSE, I will still send you a catalog and a free gift (or two)! 🙂 Ok, whoops! I’m excited about that info…back to the Project Life products! CLICK on any of the product photos to see them in my online store (you can also click on them in the store to see them larger)!

Variety Pack 12″ x 12″ Project Life Photo
Pocket Pages (135294) $6.95
12 pages: 2 ea. of 6 designs.

Everyday Adventure Project Life Card Collection (135298) $15.95
100 double-sided, color -coordinated cards in 3 sizes:
4″ x 6″, 4″ x 4″, and 3″ x 4″

Everyday Adventure Project Life Accessory Pack (135301) $9.95
4 3″ x 4″ specialty cards; 8 sticker sheets;
1 acetate accents sheet; 8 wood accents;
2 epoxy stickers; 4 arrow paperclips;
1 roll washi tape (5 yds.)

Project Life Journaling Pens (135304) $4.95
2 pens (01 and 05)

Project Life Corner Punch (135346) $7.95

Cards & Labels Project Life Framelits Dies (135707) $24.95
5 dies

Project Life Day to Day Photopolymer Stamp Set (135785) $25.95
42 stamps

Project Life Au jour le jour (Day to Day Set in French) (136706) $25.95

Project Life Point & Click Photopolymer Stamp Set (135787) $15.95
26 stamps
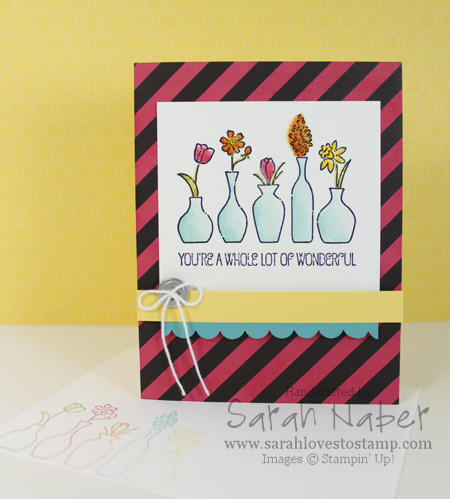
I LOVED this card made with the Vivid Vases single stamp! It was designed as one of our Make and Take projects for Stampin’ Up! Leadership 2014 this past January. This project is also what inspired me to make my video the other day about coloring black and white Designer Series Paper to custom match it to your project. (Check that out below.)
In particular, in this project, I thought coloring Designer Series Paper was a good solution as the Whisper White in the Designer Series Paper looked super bright next to the more muted white of the Watercolor Paper. It can also work well if your Designer Series Paper is Whisper White and your project features Very Vanilla or vice versa.
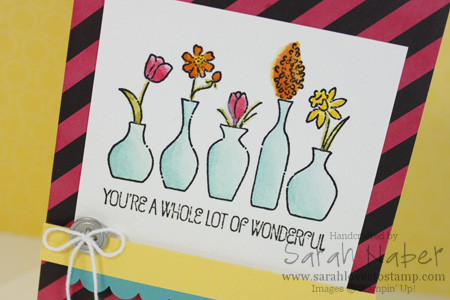
How To
1. Cut a piece of Daffodil Delight cardstock to 5-1/2″ x 8-1/2″. Score it at 4-1/4″ and crease with a Bone Folder.
2. Cut a piece of the black & white diagonal striped paper from the Kaleidoscope Designer Series Paper pack to 4-1/4″ x 5-1/2″. Color it with the Strawberry Slush Classic Stampin’ Pad using one of the techniques in the video below. Adhere it to the front of the card base with Multipurpose Liquid Glue.
3. Cut Watercolor Paper to 3-1/2″ x 3-1/4″. Stamp the Vivid Vases single stamp on it with the Jet Black StazOn Ink Pad. *TIP: For perfect placement, use the Stamp-a-ma-jig.
4. Watercolor the images with the fine tipped Aqua Painter and the Strawberry Slush, Pumpkin Pie, Daffodil Delight, Old Olive, and Bermuda Bay Classic Stampin’ Pads. (I’ll add my Watercoloring Basics Video below.) Adhere it to the card using Multipurpose Liquid Glue.
5. Cut a strip of Daffodil Delight cardstock to 4-1/4″ x 1/2″ and a piece of Bermuda Bay cardstock to 3-1/2″ x 3/4″. Punch the Bermuda Bay strip with the Scallop Edge punch, attach it to the Daffodil Delight strip and attach them both to the card with Stampin’ Dimensionals.
6. Thread a metal button with Whisper White Baker’s Twine, tie a bow and attach it to the card with a Glue Dot.
7. Use Stampin’ Write Markers to ink up each vase in a different color and stamp them onto the envelope. I used a Stamp-a-ma-jig for perfect placement (and to eliminate the sentiment on the envelope). You can see the stamped envelope in the first picture.
Related Videos
*Check out below the videos for the full supply list for this card.
Adding Color to Black & White Paper
Easy Watercolor Tips
Supply List
STAMPS:
Vivid Vases (Wood-Mount Only 133818)
PAPER:
8-1/2″ x 11″ Bermuda Bay Cardstock (131197)
8-1/2″ x 11″ Daffodil Delight Cardstock (119683)
Kaleidoscope Designer Series Paper (132995)
Watercolor Paper (122959)
INK:
Bermuda Bay Classic Stampin’ Pad (131171)
Daffodil Delight Classic Stampin’ Pad (126944)
Old Olive Classic Stampin’ Pad (126953)
Pumpkin Pie Classic Stampin’ Pad (126945)
Strawberry Slush Classic Stampin’ Pad (131178)
Jet Black StazOn Ink Pad (101406)
ACCESSORIES:
Basic Metal Buttons (133319)
Whisper White Baker’s Twine (124262)
Multipurpose Liquid Glue (110755)
Mini Glue Dots (103683)
Stampin’ Dimensionals (104430)
TOOLS:
Stampin’ Trimmer (126889)
Simply Scored Scoring Tool (122334)
Bone Folder (102300)
Craft Scissors (108360)
Aqua Painters (103954)
Stamp-a-ma-jig (101049)
Scallop Edge Border Punch (119882)
Grid Paper (102787)
Stampin’ Scrub (126200)
Stampin’ Mist (102394)
StazOn Cleaner (109196)
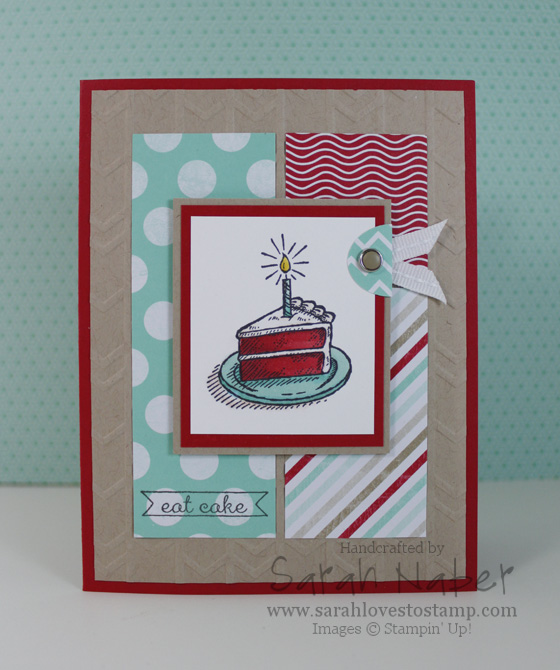
I’m so excited to show you my very first creation with Stampin’ Up!’s brand new alcohol-based markers, Blendabilities! They’re beyond fantastic and I’m loving that they come in SU!’s exclusive colors and are totally fool proof as they come in sets of 3 with a light, medium and dark of the same hue! I thought…if I’m using the piece of cake image from Sketched Birthday, why not make it Red Velvet? YUM!
What else do I love? THIS SKETCH! It’s out of this world! Won’t you please play along with us at the As You See It Challenge? Head over there by clicking the link and check out what the other Design Team members have to share today! I can’t wait to see what you’ll create!
I also used some favorites that will be gone after May 31st as they are in the Occasions Catalog. The Fresh Prints Designer Series Paper Stack is so darn cute! I’m obsessed with this color combo! I used the Cherry Cobbler Blendabilities and used a tiny amount of the darkest color to add the shading without using too much so that it would retain the brightness it needed to in order to look good with the Real Red in the Fresh Prints Designer Series Paper Stack.
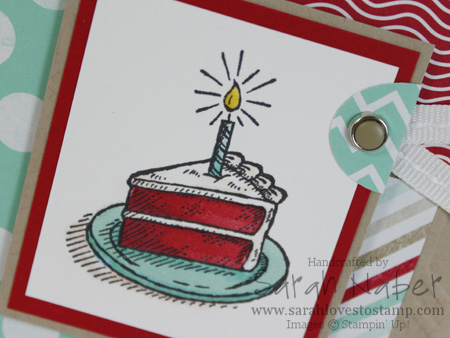
Here’s a closeup of the focal image. 🙂 Again, it isn’t perfect coloring but I was still pretty happy with the end result.
 How To
1. Cut Real Red Cardstock to 5-1/2″ x 8-1/2″. Score and fold at 4-1/4″
2. Cut Crumb Cake Cardstock to 4″ x 5-1/4″. Run through the Big Shot Die-Cutting Machine with the Arrows Textured Impressions Embossing Folder. Adhere to card base with Multipurpose Liquid Adhesive. *TIP: Anytime you want to adhere a textured piece of cardstock to another piece of cardstock, Multipurpose Liquid Adhesive is the best way to do it! The liquid glue is able to seep into the nooks and crannies and provide an excellent bond between the two paper layers.
3. Cut Fresh Prints Designer Series Paper (retiring May 31st) patterns to 1-1/2″ x 4-1/4″, 1-1/2″ x 2-5/8″ and 1-1/2″ x 1-1/2″. Stamp the greeting from Sketched Birthday on the bottom of the largest DSP piece with Memento Tuxedo Black Ink*. *TIP: I used my Stamp-a-ma-jig to get perfect positioning of the sentiment on the DSP. LOVE that Stamp-a-ma-jig!!!
4. Cut Crumb Cake Cardstock layer to 2-1/4″ x 2-5/8″, Real Red Cardstock to 2-1/8″ x 2-1/2″, and Whisper White Cardstock to 1-7/8″ x 2-1/4″.
5. Stamp the birthday cake image from Sketched Birthday onto the Whisper White piece from Step 4.
6. Color with Cherry Cobbler, Coastal Cabana and Daffodil Delight Blendabilities* trios. Add a bit of the lightest color from the Blendabilities Skin Tone Assortment* to the frosting and underneath the plate to add some extra dimension and realism (frosting isn’t truly white). *TIP: To better match my Real Red in the color combination (from the DSP), I used a LOT more of the light and medium markers in the Cherry Cobbler trio than the darkest. I used a tiny bit of the darkest color to add the shading I needed.
7. Attach the 3 cardstock focal-point layers from Step 4 together. *Tip: I use SNAIL to adhere Whisper White to other cardstock. Although Multipurpose Liquid Glue is my favorite adhesive, I find that it shows slight glue lines on top unless I apply it in a very thin and smooth layer, so I use SNAIL just to be safe. I know this is pretty picky as it is hard usually to even see the glue lines, but I’d rather be safe than sorry. (One exception to this is if the Whisper White layer is textured with an embossing folder and the Big Shot…then I still use Multipurpose Liquid Glue.)
8. Punch a Small Oval from the DSP. Fold it around the layered focal point. Punch a hole with the 1/16″ Circle Punch* and put a Candy Dot Brad Base through it. Bend the prongs outward and attach a Crumb Cake Candy Dot from the Neutrals Candy Dots to the center of it.
9. Cut two small pieces of 1/4″ Whisper White Stitched Grosgrain (while supplies last only) and attach with Glue Dots.
10. Finally attach the main focal point with Stampin’ Dimensionals! You’re done!
Hi there! Back with a new Quick Tip Tuesday for you on how to add color to black & white or black & vanilla paper! While the two options I show in the video will soon be gone, there are 2 new options in the 2014-2015 Annual Catalog! 🙂 I LOVE to do this technique and I think the easiest to get great results turned out to be the brayering option. Check out the video and let me know what you think. Have you tried this before? If not, will you try it now? Feel free to send me your projects that you’ve made using this technique! I’d love to see them and maybe feature you on the old blog-o if you’re alright with that!
I’ll be back later to add in the edited pictures of the project I show during the video. Oh how I LOVE that card!!!
