
From the daily archives: Thursday, February 11, 2016
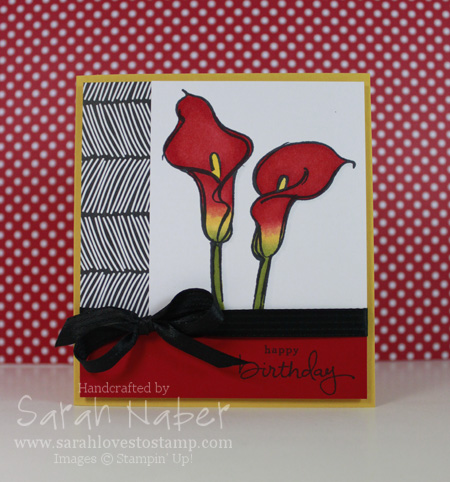
The Remarkable You stamp set is probably my favorite line art set I own! The images are a great size, wonderful to stand on their own on a simple notecard, to be the focal point of a larger card, or even for larger scrapbooking or 3D items. They’re fun to color, but also look stunning stamped in black ink on white cardstock or tone-on-tone with matching ink and cardstock too!
I used a bold color palette on this birthday card for my good friend, Sara (I hope she loved it as much as I did!). The mixed font greeting is from the awesome set, Endless Birthday Wishes. I LOVE that it’s a photopolymer set so it makes mixing and matching the sentiments especially easy. I would say it’s my 2nd most used set right behind Teeny Tiny Wishes!
The image was one I colored for the 30 day coloring challenge (I’m behind by a couple of days right now). I colored it with Copic markers. I’ve had them for a long time, but rarely used them as I started only using Stampin’ Up! products for several years now. You may or may not know, but Stampin’ Up! introduced our own alcohol-based markers a few years ago and I remembered how much I love coloring with this particular medium. The SU! ones had some issues from the manufacturer and were discontinued, but my love for alcohol-based marker coloring was rekindled! So I pulled them out, googled an image of a calla lily, and took inspiration from there to blend the green, yellow and red. I ended up really pleased with it.
Here’s a link to another card I did with a sketch that’s been a long time
favorite, as well as colored with alcohol-based markers!
I’m always saying that cardmaking is a process. This card was no different. I’d stumbled upon a sketch I loved when I was researching ideas with the Tap Tap Tap stamp set and wanted to try it with this image. The sketch I was inspired by had the main portion (focal image and vertical and horizontal strip) going from edge to edge on the card. I thought my image was plenty large enough and just started cutting. Before I knew it, it was too narrow to span to the edge and have the vertical strip be the 1″ that I planned. I tried it on a regular A2 card but just didn’t love it with the skinny border on two sides and larger at the top and bottom. So I ended up with a very unique sized card. 4-1/4″ x 4-3/4″ was the finished measurement. I may retry making it another day and cutting the focal image piece 1/4″ larger (width) to see how it would compare to this one!
Anyway, I think the rest of the card is pretty simple, so I’ll just get on to the Cut List and Supplies!
If you haven’t already, join my mailing list by entering your info into the box to the right. I send out an exclusive project PDF filled with ideas once a month to my subscribers!
Cut List
Crushed Curry Cardstock: 8-1/2″ x 4-3/4″, scored at 4-1/4″
Whisper White Cardstock: 4″ x 4-1/2″ (base I glued other pieces to)
White Copic-friendly Cardstock: 3″ x 3-1/2″
Everyday Chic Designer Series Paper: 1″ x 3-1/2″
Real Red Cardstock: 1″ x 4″
Built for Free Using: My Stampin Blog
