
From the daily archives: Sunday, May 11, 2014
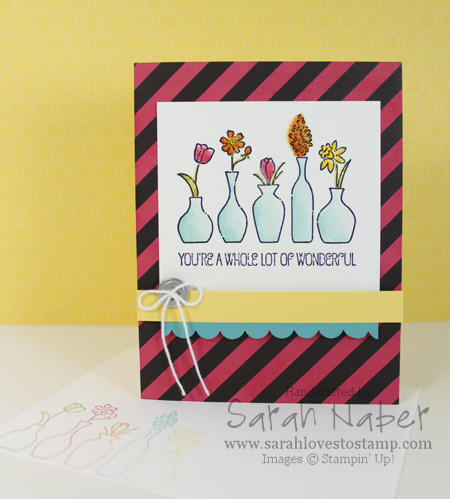
I LOVED this card made with the Vivid Vases single stamp! It was designed as one of our Make and Take projects for Stampin’ Up! Leadership 2014 this past January. This project is also what inspired me to make my video the other day about coloring black and white Designer Series Paper to custom match it to your project. (Check that out below.)
In particular, in this project, I thought coloring Designer Series Paper was a good solution as the Whisper White in the Designer Series Paper looked super bright next to the more muted white of the Watercolor Paper. It can also work well if your Designer Series Paper is Whisper White and your project features Very Vanilla or vice versa.
How To
1. Cut a piece of Daffodil Delight cardstock to 5-1/2″ x 8-1/2″. Score it at 4-1/4″ and crease with a Bone Folder.
2. Cut a piece of the black & white diagonal striped paper from the Kaleidoscope Designer Series Paper pack to 4-1/4″ x 5-1/2″. Color it with the Strawberry Slush Classic Stampin’ Pad using one of the techniques in the video below. Adhere it to the front of the card base with Multipurpose Liquid Glue.
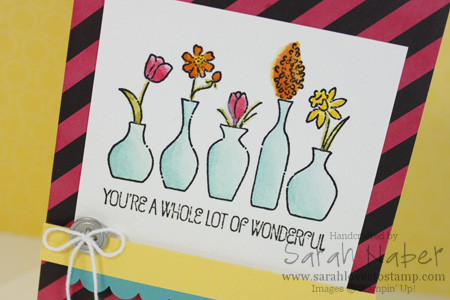
3. Cut Watercolor Paper to 3-1/2″ x 3-1/4″. Stamp the Vivid Vases single stamp on it with the Jet Black StazOn Ink Pad. *TIP: For perfect placement, use the Stamp-a-ma-jig.
4. Watercolor the images with the fine tipped Aqua Painter and the Strawberry Slush, Pumpkin Pie, Daffodil Delight, Old Olive, and Bermuda Bay Classic Stampin’ Pads. (I’ll add my Watercoloring Basics Video below.) Adhere it to the card using Multipurpose Liquid Glue.
5. Cut a strip of Daffodil Delight cardstock to 4-1/4″ x 1/2″ and a piece of Bermuda Bay cardstock to 3-1/2″ x 3/4″. Punch the Bermuda Bay strip with the Scallop Edge punch, attach it to the Daffodil Delight strip and attach them both to the card with Stampin’ Dimensionals.
6. Thread a metal button with Whisper White Baker’s Twine, tie a bow and attach it to the card with a Glue Dot.
7. Use Stampin’ Write Markers to ink up each vase in a different color and stamp them onto the envelope. I used a Stamp-a-ma-jig for perfect placement (and to eliminate the sentiment on the envelope). You can see the stamped envelope in the first picture.
Related Videos
*Check out below the videos for the full supply list for this card.
Adding Color to Black & White Paper
Easy Watercolor Tips
Supply List
STAMPS:
Vivid Vases (Wood-Mount Only 133818)
PAPER:
8-1/2″ x 11″ Bermuda Bay Cardstock (131197)
8-1/2″ x 11″ Daffodil Delight Cardstock (119683)
Kaleidoscope Designer Series Paper (132995)
Watercolor Paper (122959)
INK:
Bermuda Bay Classic Stampin’ Pad (131171)
Daffodil Delight Classic Stampin’ Pad (126944)
Old Olive Classic Stampin’ Pad (126953)
Pumpkin Pie Classic Stampin’ Pad (126945)
Strawberry Slush Classic Stampin’ Pad (131178)
Jet Black StazOn Ink Pad (101406)
ACCESSORIES:
Basic Metal Buttons (133319)
Whisper White Baker’s Twine (124262)
Multipurpose Liquid Glue (110755)
Mini Glue Dots (103683)
Stampin’ Dimensionals (104430)
TOOLS:
Stampin’ Trimmer (126889)
Simply Scored Scoring Tool (122334)
Bone Folder (102300)
Craft Scissors (108360)
Aqua Painters (103954)
Stamp-a-ma-jig (101049)
Scallop Edge Border Punch (119882)
Grid Paper (102787)
Stampin’ Scrub (126200)
Stampin’ Mist (102394)
StazOn Cleaner (109196)
