
Currently viewing the tag: "punch"
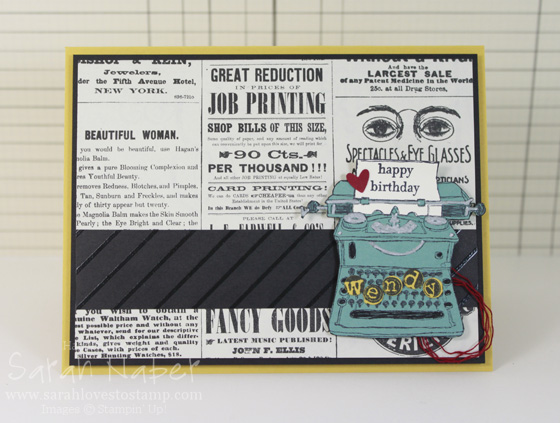
I thought I’d better get this Tap Tap Tap birthday card post up as the Tap Tap Tap stamp set is one that will be retiring this month! I found this post in my drafts folder so I actually created this card close to a year ago!
I cannot believe how long I’ve owned this stamp set and not used it! My sweet friend Allison is a huge fan of this stamp set and has constantly inspired me with her adorable uses for this versatile set. SO…I finally pulled it out to make a vintage-loving friend of mine a birthday card. Allison had colored a Lost Lagoon typewriter on one of her Tap Tap Tap cards in a similar way so that’s what I did – not sure if we used the same supplies, but hers was the look I was going for.
Cut List
Hello Honey Cardstock: 5-1/2″ x 8-1/2″, scored at 4-1/4″
Basic Black Cardstock: 5-1/4″ x 4″
Typeset Designer Series Paper: 5-1/8″ x 3-7/8″
Color Me Irresistable Designer Series Paper: 5-1/8″ x 1″
Lost Lagoon, Hello Honey, Cherry Cobbler, and Very Vanilla Cardstock scraps
How To
1. Stamp typewriter onto Lost Lagoon cardstock (RETIRING) and the paper portion of the typewriter onto Very Vanilla.
2. Stamp sentiment from Teeny Tiny Wishes onto Very Vanilla “typewriter paper”. I used post it notes to mask the sentiment to make it two lines (watch for a video on that coming soon). Cut out paper (two separate pieces).
3. Color typewriter parts with Basic Gray Stampin’ Write Marker and Silver Stampin’ Dazzle Marker (retired but any silver marker will do). Cut it out using the Paper Snips.
4. Stamp alphabet stamp on Hello Honey paper (RETIRING) with black ink. Punch out selected letters with the 1/4″ Handheld Circle Punch (RETIRING).
5. Punch heart from Owl Builder punch out of Cherry Cobbler scrap.
6. Adhere typewriter paper, letters and heart onto typewriter. Place Stampin’ Dimensionals on back.
7. Adhere black embossed stripe from Color Me Irresistable Specialty Designer Series Paper (RETIRING) onto Typeset Specialty Designer Series Paper (RETIRING). Adhere that onto black layer and then onto card base. *TIP: With this Typeset paper, they are much thinner (this is NOT true of all specialty DSPs but of the 24/pack ones), so use a dry adhesive instead of a liquid.
8. Unravel Cherry Cobbler Thick Baker’s Twine (RETIRING) and make a messy nest of a few strands. Stick it to the back of the typewriter, onto one of the Stampin’ Dimensionals.
9. Attach typewriter to card.
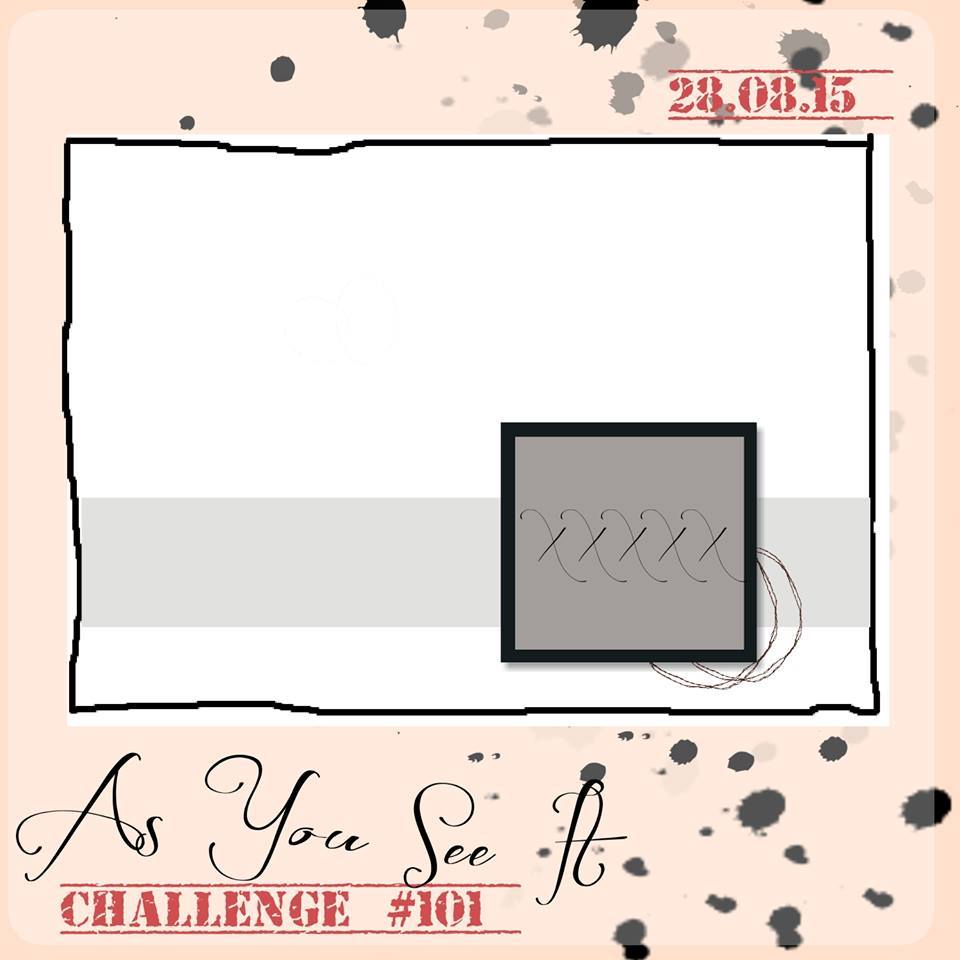
This was a card I created for the As You See It Challenge #101. Obviously it’s over now, but you can play along with the current challenge or use any past challenges to inspire you too!!!
I hope you enjoyed this birthday card made with the Tap Tap Tap stamp set! It’s one of my favorites and I think I’ll really miss it when it’s retired! The color combo of Lost Lagoon, Hello Honey, Cherry Cobbler, Basic Black, and Very Vanilla also includes two retiring In Colors too.
CLICK HERE to get your
Typeset Specialty Designer Series Paper, while supplies last!!!
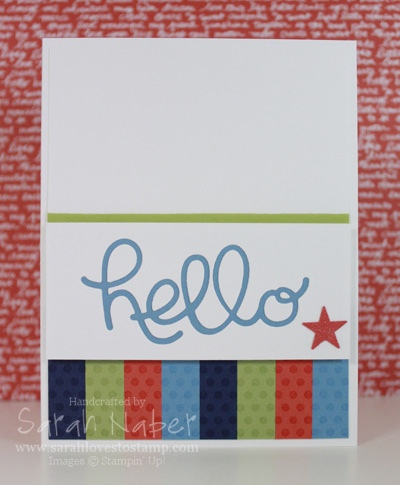
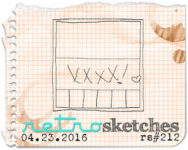
This bright card was a creation that blended the challenges from Colour Q Challenges and Retro Sketches this week! I LOVED both and wanted to make one more project to show at a mini tool demonstration I did at a team meeting last night. My tips were all about die cuts, specifically ones with more than just 2 pieces when the cut is complete. I’m planning on filming some videos on the tips I shared so those will go up on the blog as soon as I get them done (I’m nursing some dry, broken cuticles back to health before I can film).
 I’ve still been loving fun foam for popping up larger panels. I still use Stampin’ Dimensionals for most things but I know the fun foam for large panels holds up better if the card is going to be mailed. I’ve rediscovered my love for my ATG (Advanced Tape Glider) so I use that to adhere the fun foam to my cardstock, but any strong adhesive should work well. I have used Stampin’ Up!’s Tear & Tape, as well as Fast Fuse with good results!
Cut List
Thick Whisper White Cardstock: 8-1/2″ x 5-1/2″, scored at 4-1/4″; 4″ x 1-3/4″
Whisper White Cardstock: 4″ x 5-1/4″ (no reason you couldn’t use the Thick here – I already had panels cut to this size)
Marina Mist Cardstock: 3-3/4″ x 1-1/2″, 2 strips at 1/2″ x 1-3/4″
Tangerine Tango, Pear Pizzazz, and Night of Navy Cardstock: 2 strips each at 1/2″ x 1-3/4″
How To
1.Die cut Whisper White strip with ‘hello’ die from Hello You Thinlits Dies. Adhere a piece of Marina Mist cardstock to the back of strip.
2. Place regular word die cut (positive image) back into the cut strip to guide where to glue missing pieces in (the loops of the ‘h’ and both ‘l’s, and centers into the ‘e’ and ‘o’). *TIP: I use Multipurpose Liquid Glue (and a tweezers) for this but it is VERY important that you don’t get too much on the small pieces or it’ll squish out and adhere the positive image onto the Marina Mist too!
3. Adhere small colored cardstock strips to the bottom of Whisper White layer. Stamp Dots for Days Background Stamp (RETIRING) in VersaMark ink. Here’s another card using the Dots for Days Background Stamp!
4. Use SNAIL to adhere 1/4″ Pear Pizzazz Cotton Ribbon (RETIRING) about 3″ above the bottom of the card. Fold ends onto back. *TIP: I much prefer folding the ends of the ribbon onto the back of the card and securing them with Scotch tape to trimming the ribbon off at the edges. It often frays if it’s trimmed so taping it onto the back prevents this.
5. Adhere panel onto card base (I used Fast Fuse).
6. Use fun foam to pop up sentiment panel onto card front.
7. Cover a small area of a Tangerine Tango cardstock scrap with the clear Wink of Stella Glitter Brush pen. Punch star from Itty Bitty Accents Punch Pack (RETIRING) and adhere to card.
It’s really a pretty simple bright card, great for a masculine or kid’s card. It would also be super easy to make this into a more feminine card with a different color combo and a little heart (like in the original sketch). I was tempted to add some Candy Dots (RETIRING) or sequins to it but didn’t want to disrupt the white space, as I LOVE this sketch. I think I’ll have to use it again.
I have made all the retiring items in red letters, just so you don’t miss out on something you love! The Stampin’ Up! Retiring List is while supplies last for everything except stamps (they’ll be produced until May 22nd) and the last day to order these products will be May 31st. I’m a collector of background stamps and I think the Dots for Days is simply a MUST HAVE!
If you’re interested in checking out the retiring products in my Online Store,
simply CLICK HERE!
Here’s a card I made for a challenge over at part of being on the As You See It Design Team! It was several weeks ago but I have some news to share…I’m pregnant! It seems the first trimester exhaustion has spilled over into my second trimester, so I apologize for my absence! I am just, at 24 weeks, feeling more like myself again so hopefully that’ll mean good things for you if you’d like to see more from me! 🙂 I don’t mean it at all as complaining because we couldn’t feel more excited or blessed to add the first little person to our family in January, but I thought some explanation for my extended absences was in order! 🙂
Anyway, I liked this card so I thought I’d share anyway. It also shows you that you can use previous challenges from any challenge site to inspire your creativity!!! New challenges on As You See It post on Friday mornings and you have until the following Wednesday night to complete the challenge! Check it out here at the As You See It Challenge Blog (and feel free to dive into the archives to check out some of the past challenges by our fabulous team leader, Amanda to inspire you)!
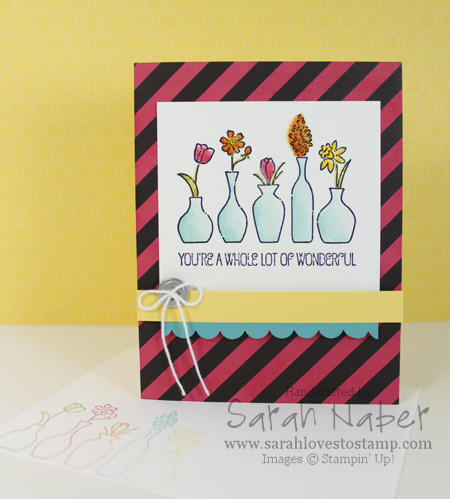
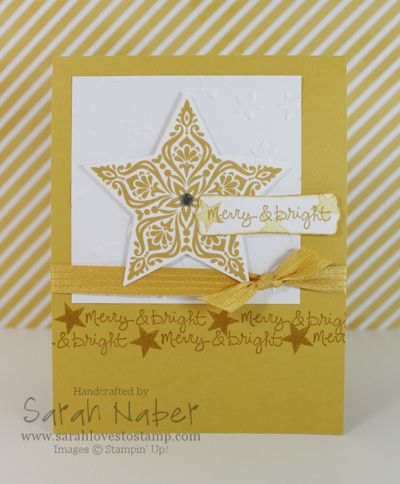
I LOVED this card made with the Vivid Vases single stamp! It was designed as one of our Make and Take projects for Stampin’ Up! Leadership 2014 this past January. This project is also what inspired me to make my video the other day about coloring black and white Designer Series Paper to custom match it to your project. (Check that out below.)
In particular, in this project, I thought coloring Designer Series Paper was a good solution as the Whisper White in the Designer Series Paper looked super bright next to the more muted white of the Watercolor Paper. It can also work well if your Designer Series Paper is Whisper White and your project features Very Vanilla or vice versa.
How To
1. Cut a piece of Daffodil Delight cardstock to 5-1/2″ x 8-1/2″. Score it at 4-1/4″ and crease with a Bone Folder.
2. Cut a piece of the black & white diagonal striped paper from the Kaleidoscope Designer Series Paper pack to 4-1/4″ x 5-1/2″. Color it with the Strawberry Slush Classic Stampin’ Pad using one of the techniques in the video below. Adhere it to the front of the card base with Multipurpose Liquid Glue.
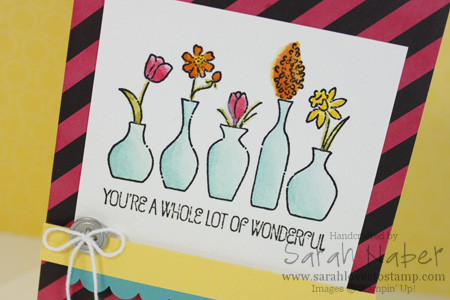
3. Cut Watercolor Paper to 3-1/2″ x 3-1/4″. Stamp the Vivid Vases single stamp on it with the Jet Black StazOn Ink Pad. *TIP: For perfect placement, use the Stamp-a-ma-jig.
4. Watercolor the images with the fine tipped Aqua Painter and the Strawberry Slush, Pumpkin Pie, Daffodil Delight, Old Olive, and Bermuda Bay Classic Stampin’ Pads. (I’ll add my Watercoloring Basics Video below.) Adhere it to the card using Multipurpose Liquid Glue.
5. Cut a strip of Daffodil Delight cardstock to 4-1/4″ x 1/2″ and a piece of Bermuda Bay cardstock to 3-1/2″ x 3/4″. Punch the Bermuda Bay strip with the Scallop Edge punch, attach it to the Daffodil Delight strip and attach them both to the card with Stampin’ Dimensionals.
6. Thread a metal button with Whisper White Baker’s Twine, tie a bow and attach it to the card with a Glue Dot.
7. Use Stampin’ Write Markers to ink up each vase in a different color and stamp them onto the envelope. I used a Stamp-a-ma-jig for perfect placement (and to eliminate the sentiment on the envelope). You can see the stamped envelope in the first picture.
Related Videos
*Check out below the videos for the full supply list for this card.
Adding Color to Black & White Paper
Easy Watercolor Tips
Supply List
STAMPS:
Vivid Vases (Wood-Mount Only 133818)
PAPER:
8-1/2″ x 11″ Bermuda Bay Cardstock (131197)
8-1/2″ x 11″ Daffodil Delight Cardstock (119683)
Kaleidoscope Designer Series Paper (132995)
Watercolor Paper (122959)
INK:
Bermuda Bay Classic Stampin’ Pad (131171)
Daffodil Delight Classic Stampin’ Pad (126944)
Old Olive Classic Stampin’ Pad (126953)
Pumpkin Pie Classic Stampin’ Pad (126945)
Strawberry Slush Classic Stampin’ Pad (131178)
Jet Black StazOn Ink Pad (101406)
ACCESSORIES:
Basic Metal Buttons (133319)
Whisper White Baker’s Twine (124262)
Multipurpose Liquid Glue (110755)
Mini Glue Dots (103683)
Stampin’ Dimensionals (104430)
TOOLS:
Stampin’ Trimmer (126889)
Simply Scored Scoring Tool (122334)
Bone Folder (102300)
Craft Scissors (108360)
Aqua Painters (103954)
Stamp-a-ma-jig (101049)
Scallop Edge Border Punch (119882)
Grid Paper (102787)
Stampin’ Scrub (126200)
Stampin’ Mist (102394)
StazOn Cleaner (109196)
Connect with Me!


