
Currently viewing the tag: "Simple Thank You Cards"

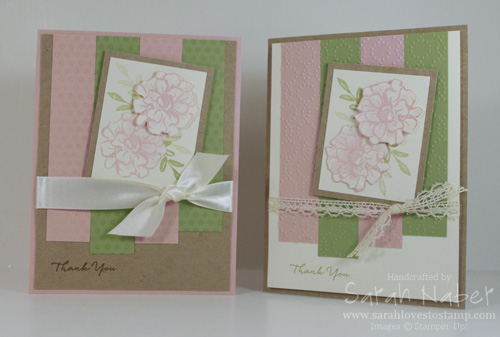
Hello! I hope you’re having a great start to your week! This was the first version of the pastel floral card I made Friday with the What I Love stamp set from Stampin’ Up! Sale-A-Bration 2016! I wasn’t sure if I loved it, so I tried again and made the card that I posted on Friday. Which version do you prefer?
The supplies are basically the same, except the lace trim and the strips are embossed instead of stamped.
CLICK HERE to check out my post about the card on the left, including the paper dimensions in the cut list. The Very Vanilla layer and Kraft layer are identical in size, as well as the card bases and the rest is the same colors and everything.
If you haven’t heard of Stampin’ Up! Sale-A-Bration, here’s a quick rundown of what that is. It’s our best promotion of the year because you get an exclusive free item with every $50 you spend! It’s also a great time to host – you get an extra $25 hostess dollars with a party of $250 or more or join – you get $155 worth of any products you choose for only $99 during Sale-A-Bration this year! Free shipping on your kit/order when you join too plus the $56 of freebies! Gotta love that!
Do you like seeing the full stamp sets in my posts? I’m happy to share them if it’s something people enjoy. Here’s the What I Love stamp set. It’s only available during Sale-A-Bration 2016 and it isn’t available to buy outright. You can earn it free by spending $50 in any product first.
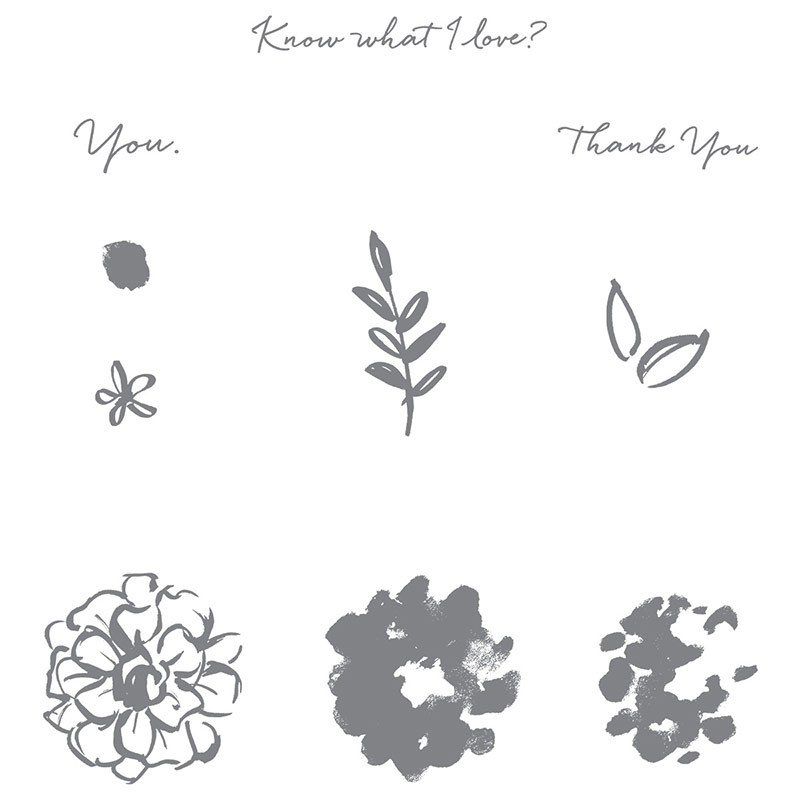
I’m also sharing a video today! This is a video by Stampin’ Up! all about the What I Love stamp set! It’s a short one but does show great ideas with this versatile set.
Today marks the end of February, meaning you have just one month remaining to get this year’s Sale-A-Bration items! The company has also said that stock is not guaranteed until March 31st. If you want to make sure you get the ones you love, click here to shop in my Online Store! It’s open 24/7! The What I Love stamp set featured here is just one of the great options from Sale-A-Bration 2016!!!
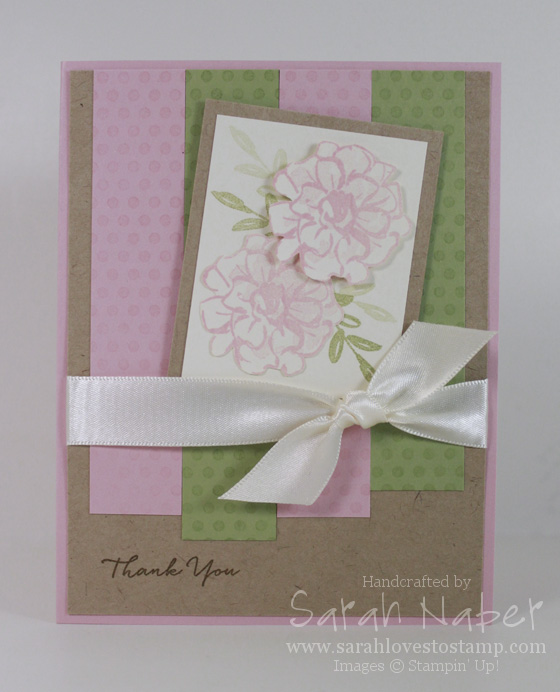
It’s no surprise that it’s pretty easy for me to make a feminine thank you card but I’m really loving the way this one came together. A “fill in the blank” challenge from As You See It (“Thank You” is my favorite sentiment to use), a color challenge from Color Throwdown, and a sketch challenge from Retro Sketches provided me with massive inspiration! I’m wild about this stamp set – What I Love – just one of the many Sale-A-Bration exclusive options this year FREE with a $50 purchase.
Today’s card uses a very basic stamping technique that never fails to delight me with it’s simplicity – 2nd generation stamping. It’s where you ink up the stamp and then stamp off onto scrap paper (I always use my grid paper since that’s what I work on) and then stamp it onto your project. The result is a lighter image and it works perfectly for two step stamp sets, although it’s a useful technique for many different things. I also love to use it when I am making a layered or collage stamped piece.
If you’re interested in seeing my first take on this card, as well as the two cards side by side, here’s a link to that post!
Cut List
Blushing Bride cardstock: 8-1/2″ x 5-1/2″, scored at 4-1/4″; 2 strips at 7/8″ x 4-1/4″
Pear Pizzazz cardstock: 7/8″ x 4-1/2″; 7/8″ x 4″
Kraft 12″x12″ cardstock: 4″ x 5-1/4″; 2-1/4″ x 2-3/4″
Very Vanilla cardstock: 2″ x 2-1/2″; scraps
How To
1. Stamp flower outline from What I Love twice onto Very Vanilla scrap in Blushing Bride ink. Stamp flower details (I used the stamp with less coverage but you could do either) lighter by stamping Blushing Bride inked stamp off onto scrap paper first.
2. Use Paper Snips to quickly fussy cut the two flowers.
3. Stamp leaf image (also from What I Love) onto Very Vanilla layer, stamping once full strength and then once without reinking to get a lighter image.
4. Adhere one flower directly to the layer and adhere one with Stampin’ Dimensionals.
5. Adhere Very Vanilla layer to Kraft mat.
6. Temporarily adhere strips onto a sheet of copy paper how they will appear on the card. Stamp the Dots for Days background on them in VersaMark ink. This will give them a seamless look.
7. Adhere strips onto larger Kraft layer.
8. Stamp “Thank You” sentiment from What I Love in Soft Suede ink onto the larger Kraft layer.
9. Tie Very Vanilla Satin Ribbon around the layer.
10. Adhere to Blushing Bride card base with Fast Fuse adhesive.
11. Adhere focal point with Stampin’ Dimensionals onto card.
I hope you enjoyed this feminine thank you card as much as I do! Check back tomorrow for an alternate take on these 3 challenges that is similar but different!
Leave a comment below and tell me what your crafty plans for the weekend are! Happy Friday!!!
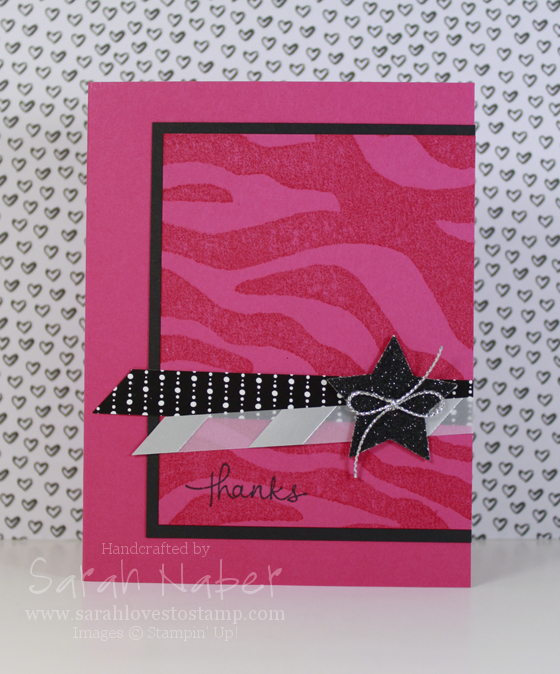
Oh how I love this sketch! I hope you’ll play along! I needed a thank you for my customers so I’m creating this card in a few different colors. I’ll post a picture of the finished cards later, or check out my Facebook and Instagram for an instant look!
Anyway, this card is pretty simple. Melon Mambo layer is stamped with the It’s Wild Background Stamp in Melon Mambo ink. The sentiment is from Endless Thanks and is stamped in Memento Tuxedo Black. And that’s all the stamping on this one!
The medium star punch was used to crop it out of the Black Glimmer Paper. It’s retiring! Did you see that? I’m so so sad! I LOVE it for so much more than Halloween. A piece of the Wonderland DSP (see how versatile it is?) and Silver Foil Vellum were added and then the star popped on top with Stampin’ Dimensionals. Check below for the cut list, as well as the supplies too!
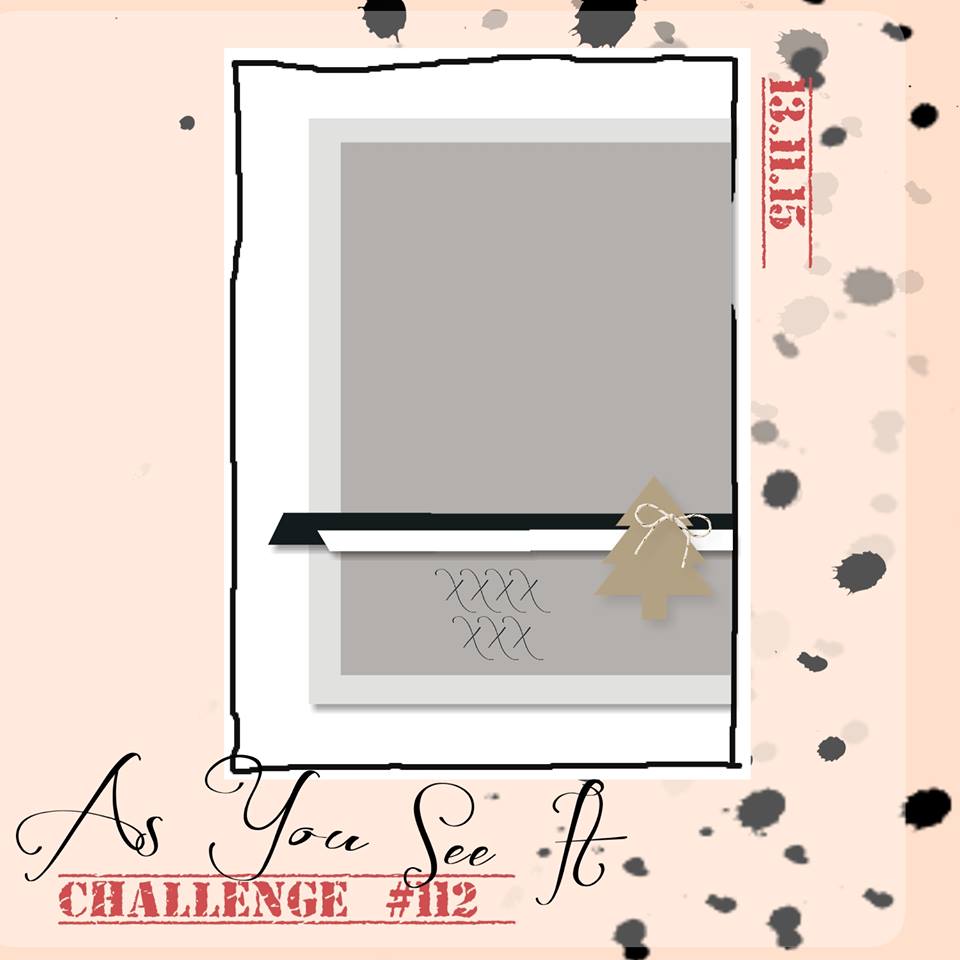
I hope you’ll play along with us this week at the As You See It Challenge! This sketch is a great, simple one for ANY card! Lots of Christmas inspiration from the Design Team so head on over to the As You See It Challenge Blog and check it out!
Cut List
Melon Mambo: 5-1/2″ x 8-1/2″, scored at 4-1/4″; 3-3/8″ x 4-1/4″
Basic Black: 3-1/2″ x 4-1/2″
Silver Foil Vellum: 3/8″ wide
Black DSP: 1/2″ wide
Built for Free Using: My Stampin Blog

Hi there! I hope you’re having a great start to your weekend! Today I have a SUPER fun project to share with you using LOTS of new goodies!!! This card uses a stamp set from the upcoming Occasions Catalog, Starburst Sayings, as well as the matching Starburst Framelits Dies. Of course, Stampin’ Up! is being amazing and offering bundles again so you can get the stamp set and framelits at a 15% discount.
I also used the same Designer Series Paper as my project yesterday – the new Sale-A-Bration offering, Sweet Sorbet DSP. Starting January 31, 2014, you’ll be able to get this package of fantastic DSP for free with a $50 purchase! Oh yay! I also used the same twine too that is from the SAB Sweet Sorbet Accessory Pack. AND…a BRAND NEW Sale-A-Bration Decorative Dots embossing folder too!!! Could this year’s Sale-A-Bration get any better?!?
I’m sure you also noticed my piece of 3″ x 4-1/2″ Core’dinations cardstock (can I even make a project without it?) that I cut the starburst shape out of using the 2nd smallest Starburst Framelits Die. Then I embossed and then sanded with the Stampin’ Sanding Block to reveal that lighter inner core. *TIP: Remember to do all of your cutting with framelits or other dies before you emboss. Otherwise the embossing will be flattened because of running the embossed piece through the machine without its folder. I then glued it down with the Multipurpose Liquid Adhesive to a piece of 3-1/4″ x 4-3/4″ Basic Black Cardstock. A 3/4″ x 4-3/4″ strip of my favorite pattern from the Sweet Sorbet DSP is layered over the top. I tied a bow of the Crisp Cantaloupe twine from the Sweet Sorbet Accessory Pack over the top of the DSP and glued it down to the Whisper White Note Card base (they come pre-cut and pre-scored with matching envelopes…easy peasy!).
I stamped the “Thank You So Much” stamp in Crisp Cantaloupe ink onto a scrap of Whisper White Cardstock and used the matching framelit to cut it out (the smallest one). *TIP: I actually stamped this first and ran it through the Big Shot at the same time as the Core’dinations piece with the 2nd smallest framelit. I try to always run all of my framelits for one project through at the same time if possible to save time! Super easy, especially with the Magnetic Platform to hold each piece in place. I layered that onto a circle of Gold Foil Sheet punched out with the 1-3/8″ Circle Punch. Finally, I cut a Stampin’ Dimensional in half and put one half on the top and one half on the bottom then stuck it onto the card! *TIP: Placing your dimensionals so they adhere straight to the card (not the twine) will insure that everything lays flat. If the dimensionals were on top of the twine, then the focal point may bow around the twine a bit. Not too big of a deal, but just a little idea to add that extra professional look to your projects.
Supply List
STAMPS:
Starburst Sayings (Wood-Mount 133182, Clear-Mount 133185)*
-Also available as a bundle with the Starburst Framelits Dies at a 15% discount! Wood-Mount 134817, Clear-Mount 134818*
PAPER:
Whisper White Note Cards & Envelopes (131527)
8-1/2″ x 11″ Whisper White Cardstock (100730)
8-1/2″ x 11″ Basic Black Cardstock (121045)
12″ x 12″ Gold Foil Sheets (132622)
In Color 2012-2014 Core’dinations Cardstock (129957)
SAB Sweet Sorbet DSP (133521)**
INK:
Crisp Cantaloupe Classic Stampin’ Pad (131176)
ACCESSORIES:
SAB Sweet Sorbet Accessory Pack (133522)**
SNAIL Adhesive (104332)
Multipurpose Liquid Glue (110755)
Stampin’ Dimensionals (104430)
TOOLS:
Stampin’ Trimmer (126889)
Simply Scored Scoring Tool (122334)
Bone Folder (102300)
Craft Scissors (108360)
Stampin’ Sanding Block (129367)
Core’dinations Dust Buddy (129366)
1-3/8″ Circle Punch (119860)
Big Shot Die-Cutting Machine (113439)
Big Shot Magnetic Platform (130658)
Starburst Framelits Dies (132967)*
-Also available as a bundle with the Starburst Framelits Dies at a 15% discount! Wood-Mount 134817, Clear-Mount 134818*
SAB Decorative Dots Textured Impressions Embossing Folders (133520)**
Grid Paper (102787)
Stampin’ Scrub (126200)
Stampin’ Mist (102394)
*Available January 3, 2014 when the Stampin’ Up! Occasions Catalog begins!
**Exclusive Sale-A-Bration item FREE with each $50 purchase from January 28, 2014-March 31, 2014!

Hi there!!! Are you enjoying my Friday posts for the As You See It Design Team? I’m sure enjoying making these projects with the awesome inspiration from the challenge blog. I combined this week’s color challenge with a few other ones so I’ll list those below. 🙂
Super simple card for you today! I LOVE the sketch from over at Retro Sketches and I thought a simple layout would be best for this bright and funky color combination of Pumpkin Pie, Crushed Curry, and Gumball Green. I only used ONE stamp set on this project! (Ok, that’s like, a miracle for me!) I’ve been loving the fun and surprise of getting a new Best of set each month featuring a theme and best selling stamps fitting that theme from the 25 years SU! has been in business!!! The set I used here was the Best of Autumn! LOVE, LOVE, LOVE! *Side Note: The Best of Christmas released on October 1st and is going to have to be mine!!! It’s so awesome!
As far as details, I have just a couple here. The greeting was stamped in VersaMark and heat embossed with White Stampin’ Emboss Powder onto the Gumball Green cardstock. I added a couple of pearls to mimic the dots in the sketch. Then I used a temporary adhesive to layer the Gumball Green cardstock piece onto my leaf stamped Whisper White panel and used straight piercing template from the Essentials Paper-Piercing Pack (along with a Paper Piercer and Stampin’ Pierce Mat) to pierce holes that would outline the Gumball Green piece. It’s easier to see in person. Then I popped the Gumball Green piece up on Stampin’ Dimensionals and onto the Whisper White piece. This whole panel then was glued to a Pumpkin Pie card base. I tied some Whisper White Stitched Grosgrain Ribbon around the top to finish it off! (I did a bow instead of a knot this time to add a little more weight on the left side of the card to balance it a bit more.)
Head on over to the As You See It Challenge Blog and play along!!!

This card was entered into challenges at: Retro Sketches, Tuesday Throwdown, Dream Valley Challenges, Moving Along with the Times, Creative Craft Challenges 2, Pile It On Challenge, and Loves Rubber Stamps.
Supply List
STAMPS:
Best of Autumn (Clear-Mount ONLY 134390)
***Note: Buy 6 of the Best of… Stamp Sets and get any set $14.95 or under for FREE!***
PAPER:
8-1/2″ x 11″ Whisper White Cardstock (100730)
8-1/2″ x 11″ Gumball Green Cardstock (126840)
8-1/2″ x 11″ Pumpkin Pie Cardstock (105117)
INK:
Crushed Curry Classic Stampin’ Pad (131173)
Gumball Green Classic Stampin’ Pad (126861)
Pumpkin Pie Classic Stampin’ Pad (126945)
VersaMark (102283)
ACCESSORIES:
Basic Pearl Jewels (119247)
1/4″ Whisper White Stitched Grosgrain Ribbon (126877)
Multipurpose Liquid Glue (110755)
Stampin’ Dimensionals (104430)
TOOLS:
Stampin’ Trimmer (126889)
Simply Scored Scoring Tool (122334)
Bone Folder (102300)
Craft Scissors (108360)
Stamp-a-ma-jig (101049)
Paper Piercing Tool (126189)
Stampin’ Pierce Mat (126199)
Essentials Paper-Piercing Pack (126187)
White Stampin’ Emboss Powder (109132)
Heat Tool (129053)
Grid Paper (102787)
Stampin’ Scrub (126200)
Stampin’ Mist (102394)

Hi there! Today is the FINAL day of the Online Extravaganza! If you haven’t taken advantage of the best sale Stampin’ Up! offers all year, you have just a few more hours until it closes at 11:50 pm Mountain Time. In the spirit of sharing cards made with products on the sale, here is a card we made last week at my Intro to Stamping Class! Super fun and cute! I love layering the little punches on top of the 1″ Square Punch (on sale) and then onto the Postage Stamp Punch! The smaller, simple note cards below this info use many of the same supplies, but do not use the stamp set, just the punches. These are going to be my Christmas thank yous that I send out to friends and family. For these cards, punch the smaller punch first (Merry Minis Punch Pack) and then it is much easier to center the larger one (1″ Square Punch) around it. I CASEd both the little thank yous, as well as the card above from the fantastic Julie Davison!!!
I used a favorite of mine, the Basic Rhinestone Jewels (30% off) yet again! The Gumball Green 3/8″ Stitched Satin Ribbon is in a bundle with the Raspberry Ripple & Summer Starfruit (30% off too) for $18.81 – that’s 30 yards of ribbon total! That’s just under $0.63 per yard! WOW!


Supply List for Tri-color Merry Christmas Card
STAMPS:
Merry Minis (Wood-Mount 127916, Clear-Mount 127919)
Sassy Salutations (Wood-Mount 126705, Clear-Mount 126707)
PAPER:
8-1/2″ x 11″ Whisper White Card Stock (100730)
8-1/2″ x 11″ Daffodil Delight Card Stock (119683)
8-1/2″ x 11″ Gumball Green Card Stock (126840)
8-1/2″ x 11″ Real Red Card Stock (102482)
INK:
Daffodil Delight Classic Stampin’ Pad (126944)
Gumball Green Classic Stampin’ Pad (126861)
Real Red Classic Stampin’ Pad (126949)
ACCESSORIES:
In Color Ribbon Bundle: Gumball Green, Raspberry Ripple, & Summer Starfruit (132701) 30% OFF!!!
Basic Rhinestone Jewels (119246) 30% OFF!!!
SNAIL Adhesive (104332)
Multipurpose Liquid Glue (110755)
Stampin’ Dimensionals (104430)
TOOLS:
Tabletop Paper Cutter (106959) 30% OFF!!!
Simply Scored Scoring Tool (122334)
Bone Folder (102300)
Craft Scissors (108360)
Merry Minis Punch Pack (126882)
1″ Square Punch (124094) 30% OFF!!!
Postage Stamp Punch (122344)
Grid Paper (102787)
Stampin’ Scrub (126200)
Stampin’ Mist (102394)
Supply List for Christmas Thank You Note Cards
STAMPS:
Made for You (Wood-Mount 126340, Clear-Mount 126342)
PAPER:
8-1/2″ x 11″ Whisper White Card Stock (100730)
8-1/2″ x 11″ Gumball Green Card Stock (126840)
12″ x 12″ Red Glimmer Paper (121790)
Note Cards & Envelopes (107311)
INK:
Real Red Classic Stampin’ Pad (126949)
Gumball Green Classic Stampin’ Pad (126861)
ACCESSORIES:
Multipurpose Liquid Glue (110755)
Stampin’ Dimensionals (104430)
TOOLS:
Tabletop Paper Cutter (106959) 30% OFF!!!
Bone Folder (102300)
Merry Minis Punch Pack (126882)
1″ Square Punch (124094) 30% OFF!!!
Postage Stamp Punch (122344)
Grid Paper (102787)
Stampin’ Scrub (126200)
Stampin’ Mist (102394)
Connect with Me!


