
From the daily archives: Friday, April 29, 2016
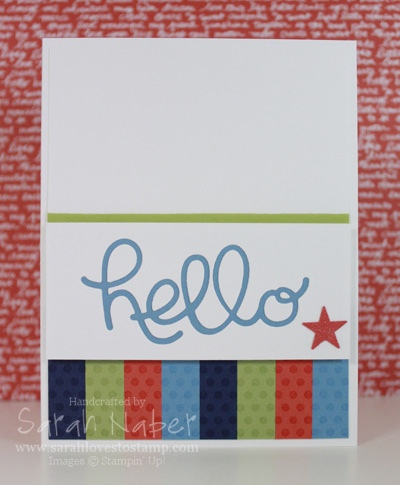
This bright card was a creation that blended the challenges from Colour Q Challenges and Retro Sketches this week! I LOVED both and wanted to make one more project to show at a mini tool demonstration I did at a team meeting last night. My tips were all about die cuts, specifically ones with more than just 2 pieces when the cut is complete. I’m planning on filming some videos on the tips I shared so those will go up on the blog as soon as I get them done (I’m nursing some dry, broken cuticles back to health before I can film).
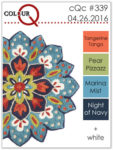
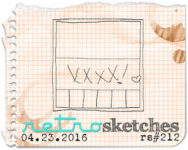 I’ve still been loving fun foam for popping up larger panels. I still use Stampin’ Dimensionals for most things but I know the fun foam for large panels holds up better if the card is going to be mailed. I’ve rediscovered my love for my ATG (Advanced Tape Glider) so I use that to adhere the fun foam to my cardstock, but any strong adhesive should work well. I have used Stampin’ Up!’s Tear & Tape, as well as Fast Fuse with good results!
Cut List
Thick Whisper White Cardstock: 8-1/2″ x 5-1/2″, scored at 4-1/4″; 4″ x 1-3/4″
Whisper White Cardstock: 4″ x 5-1/4″ (no reason you couldn’t use the Thick here – I already had panels cut to this size)
Marina Mist Cardstock: 3-3/4″ x 1-1/2″, 2 strips at 1/2″ x 1-3/4″
Tangerine Tango, Pear Pizzazz, and Night of Navy Cardstock: 2 strips each at 1/2″ x 1-3/4″
How To
1.Die cut Whisper White strip with ‘hello’ die from Hello You Thinlits Dies. Adhere a piece of Marina Mist cardstock to the back of strip.
2. Place regular word die cut (positive image) back into the cut strip to guide where to glue missing pieces in (the loops of the ‘h’ and both ‘l’s, and centers into the ‘e’ and ‘o’). *TIP: I use Multipurpose Liquid Glue (and a tweezers) for this but it is VERY important that you don’t get too much on the small pieces or it’ll squish out and adhere the positive image onto the Marina Mist too!
3. Adhere small colored cardstock strips to the bottom of Whisper White layer. Stamp Dots for Days Background Stamp (RETIRING) in VersaMark ink. Here’s another card using the Dots for Days Background Stamp!
4. Use SNAIL to adhere 1/4″ Pear Pizzazz Cotton Ribbon (RETIRING) about 3″ above the bottom of the card. Fold ends onto back. *TIP: I much prefer folding the ends of the ribbon onto the back of the card and securing them with Scotch tape to trimming the ribbon off at the edges. It often frays if it’s trimmed so taping it onto the back prevents this.
5. Adhere panel onto card base (I used Fast Fuse).
6. Use fun foam to pop up sentiment panel onto card front.
7. Cover a small area of a Tangerine Tango cardstock scrap with the clear Wink of Stella Glitter Brush pen. Punch star from Itty Bitty Accents Punch Pack (RETIRING) and adhere to card.
It’s really a pretty simple bright card, great for a masculine or kid’s card. It would also be super easy to make this into a more feminine card with a different color combo and a little heart (like in the original sketch). I was tempted to add some Candy Dots (RETIRING) or sequins to it but didn’t want to disrupt the white space, as I LOVE this sketch. I think I’ll have to use it again.
I have made all the retiring items in red letters, just so you don’t miss out on something you love! The Stampin’ Up! Retiring List is while supplies last for everything except stamps (they’ll be produced until May 22nd) and the last day to order these products will be May 31st. I’m a collector of background stamps and I think the Dots for Days is simply a MUST HAVE!
If you’re interested in checking out the retiring products in my Online Store,
simply CLICK HERE!
