
Currently viewing the tag: "technique"
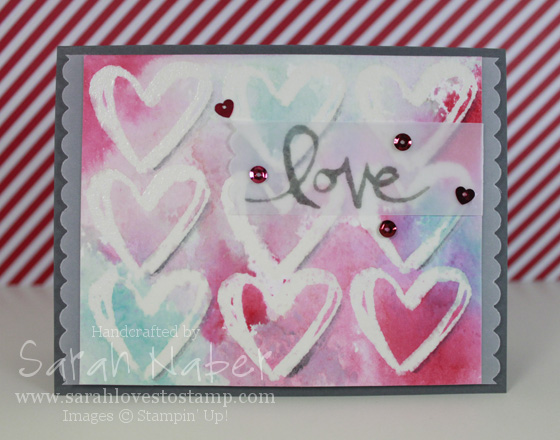
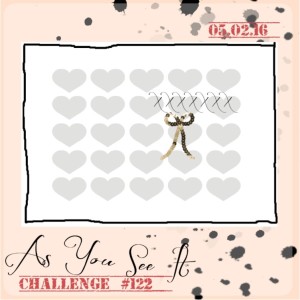
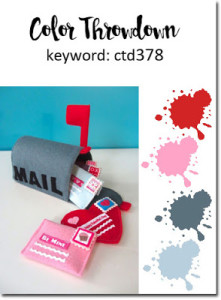
Hello! Today I have a new challenge coming at you from As You See It Challenges! LOVED this sketch. I obviously took it VERY literally but of course, you can do any repeated image! I also used a technique called watercolor smooshing. It is so easy and beautiful! Click to go check out the challenge over at the As You See It Challenge blog! I hope you can join us this week. The colors I used are from the Color Throwdown challenge. I actually used their colors in last week’s card but was too late to enter it by the time I got the blog post written!
If you read my last blog post, you’ll know that I’m participating in the The Daily Marker’s 30 Day Coloring Challenge. This card was a 2 day process. After it dried the first day, I ended up adding more color and decided to tie in the Basic Grey by adding it with an Aquapainter on one side of the heart for a shadow. *TIP: Our new Archival Ink pads in Basic Black and Basic Grey are not made for watercoloring and will dye the ends of your brush. They also don’t move as well as our regular inks as they aren’t water-based.
Here’s the sketch and color challenge I used this week!
Cut List
Basic Gray Cardstock: 8-1/2″ x 5-1/2″, scored at 4-1/4″
Watercolor Paper: I recommend using a larger piece and cutting it down after everything was dry. It ended up being 4-3/4″ x 3-15/16″ but I didn’t even measure it to get that. I just cut where I liked how the edges looked with the pattern.
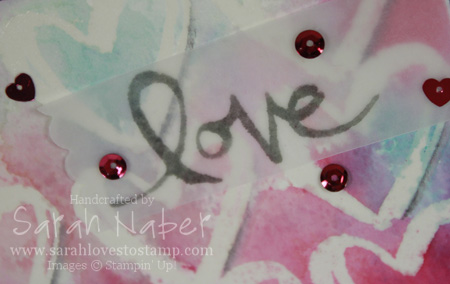
Cardstock Vellum: 1-1/8″ x 3″ (to edge of scallop, the original piece was larger) Scallops were cut using the Squares Collection Framelits Dies.
Built for Free Using: My Stampin Blog
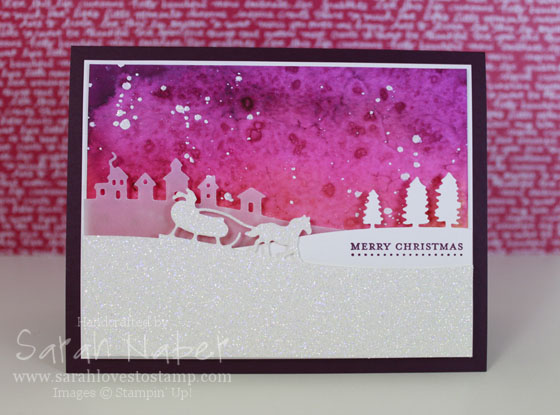
I fell in love with this technique when I saw my demo friend, Jen do it in shades of blue. I wanted to use this amazing edgelits set (RETIRING) as I’d just gotten it recently. The sketch was an As You See It Challenge a few weeks ago but I got sick so I just got around to editing the pictures and SURPRISE, a video too so I’m sharing those today! Check out the current challenge HERE!
The best thing about this technique is that you can do it with items you already have! Can’t beat that. 🙂 I love the color combo here of Pumpkin Pie (you can’t really see it except for at the very bottom of the colored part), Melon Mambo, Rich Razzleberry and Blackberry Bliss. I find doing things like this just really make me feel like a true artist!
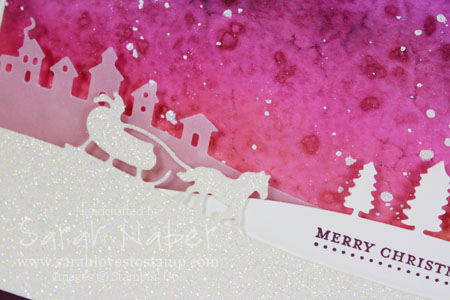
I layered all 3 of the framelits here with the village in Vellum Cardstock, the trees in regular Whisper White and the sleigh in Dazzling Diamonds Glitter Paper. EACH layer was popped up with Stampin’ Dimensionals so this is a VERY dimensional card. I would not recommend sending it in a regular envelope.
A note about the white splatters. I did them to tie all the white together with the technique piece. However, I would do them differently next time. I mixed a bit of Whisper White Craft Ink and water and splattered it on with a paintbrush. 14 hours later it wasn’t dry! So I tried to add White Stampin’ Emboss Powder to the wet splatters. When I heated it, it was almost like the powder went to the edges and melted normally while the wet ink bubbled up through the center of the splatter. Next, I tried 2 separate rounds of Iridescent Ice Embossing Powder. It still wasn’t perfect (I could touch the splatters and still had a tiny amount of ink transfer onto my fingers) but it was as close as I thought it would get. Next time, I plan to try splattering with a mixture of Multipurpose Liquid Glue and water and then embossing with either white or a mix of white and iridescent ice since I ended up loving the touch of sparkle in the sky. Anyway, that’s how crafting goes…sometimes it works, sometimes it doesn’t! Hopefully, you can learn from my mistake.
So here’s the video. I’ll also add the closeup picture, as well as the measurements and supplies below! 🙂
I used As You See It Challenge 113 for this card!

Cut List
Blackberry Bliss: 5-1/2″ x 8-1/2″, scored at 4-1/4″
Whisper White: 5-1/8″ x 4-7/8″
Watercolor piece (trimmed after technique was finished): 5″ x 4-3/4″
Village edge is 2″ from the bottom of the watercolor piece.
Built for Free Using: My Stampin Blog

Today’s video is a long one as I ended up making the entire card on camera! I hope you enjoy it! I show a little bonus tip about how I add Dazzling Diamonds Stampin’ Glitter to my projects as well. I’ll be back later today to edit this post with a full supply list, as well as a photo of the card I made in the video. I apologize that the video didn’t get posted until today – I didn’t notice (for a long time) that my YouTube upload had completely stalled out and I had to restart it! Sorry!
Supply List
STAMPS:
Ornament Keepsakes Bundle (Wood-Mount 128048, Clear-Mount 128051) OR the October Promotion, CLICK HERE!
Delightful Dozen (Wood-Mount 122650, Clear-Mount 122652)
PAPER:
8-1/2″ x 11″ Whisper White Card Stock (100730)
8-1/2″ x 11″ Pool Party Card Stock (122924)
INK:
Lucky Limeade Classic Stampin’ Pad (126984)
Pool Party Classic Stampin’ Pad (126982)
Real Red Classic Stampin’ Pad (126949)
Real Red Stampin’ Write Marker (100052)
ACCESSORIES:
Lucky Limeade Baker’s Twine (125572)
Dazzling Diamonds Stampin’ Glitter (102023)
Multipurpose Liquid Glue (110755)
2-Way Glue Pen (100425)
Mini Glue Dots (103683)
Stampin’ Dimensionals (104430)
TOOLS:
Tabletop Paper Cutter (106959)
Simply Scored Scoring Tool (122334)
Bone Folder (102300)
Craft Scissors (108360)
Stamp-a-ma-jig (101049)
Paper Piercing Tool (126189)
Stampin’ Pierce Mat (126199)
Essentials Paper-Piercing Pack (126187)
3/4″ Circle Punch (119873)
1″ Circle Punch (119868)
Big Shot Die-Cutting Machine (113439)
Grid Paper (102787)
Stampin’ Scrub (126200)
Stampin’ Mist (102394)

“But I’m not creative…” That short phrase is probably one I hear more than any other as a demonstrator! I hear it at classes I teach, at workshops, and in the community when I tell people what I do and say they can do it too! Creativity is a tricky thing – I understand not feeling creative! I know some of my peers have more creativity in their pinky finger than I do in my entire body. But I love doing what I do, so my response is always the same! You don’t have to be creative to create things and to enjoy the process!
This card is a GREAT example of that! I used a color combination from the Stampin’ Up! Color Coach #120148 (a GREAT tool – in fact I did a video on it a while ago that I will link HERE): Perfect Plum, Wild Wasabi, and So Saffron!!! Gorgeous! This ended up being my favorite swap card I made for Stampin’ Up! Convention 2012! We also made this card shortly before I left for Convention in my Crazy about Techniques class as it uses the Faux Linen technique! This technique is an oldy but a goody!!! You use glossy card stock and sand it horizontally and vertically until the gloss is worn off, then sponge and stamp it and sand it more if you want until you get the desired result!!! LOVE IT! The layout is one I took from an old Mojo Monday challenge (I LOVE to print their monthly ones and then page through them when I’m creating – I rarely participate in a challenge in real time. I just found it and it was from Week 2 of Mojo Monday!!! Really really old!) I also LOVE the Field Flowers stamp set! (I do wish I had it in Wood-Mount though so I could make permanent vellum sheets to use with the Stamp-a-ma-jig!) And I used Teeny Tiny Wishes – my go-to stamp set as it includes every greeting I could need! (This card would be great for any occasion – just switch out the greeting!!!) I most always punch it out with the Word Window punch as I have here – super easy, cute and will fit anywhere on any card!!! I used another favorite of mine from SU! – background stamps!!! I LOVE them and they are a favorite of mine. I almost always make a card with either a background stamp or a background embossed with a Textured Impressions Embossing Folder and the Big Shot! Anyway enjoy!!! Let me know if you have any questions!!!
Supply List
STAMPS:
Field Flowers (Wood-Mount 122760, Clear-Mount 122762)
Teeny Tiny Wishes (Wood-Mount 115370, Clear-Mount 127802)
Netting Background Stamp (122655)
Distressed Dots Background Stamp (122815)
PAPER:
8-1/2″ x 11″ Glossy White Card Stock (102599)
8-1/2″ x 11″ Very Vanilla Card Stock (101650)
8-1/2″ x 11″ Perfect Plum Card Stock (101889)
8-1/2″ x 11″ So Saffron Card Stock (105118)
8-1/2″ x 11″ Wild Wasabi Card Stock (108641)
INK:
Perfect Plum Classic Stampin’ Pad (126963)
So Saffron Classic Stampin’ Pad (126957)
Wild Wasabi Classic Stampin’ Pad (126959)
ACCESSORIES:
Victoria 5/8″ Crochet Trim (118481)
Vintage Trinkets (118764)
SNAIL Adhesive (104332)
Multipurpose Liquid Glue (110755)
Stampin’ Dimensionals (104430)
TOOLS:
Tabletop Paper Cutter (106959)
Simply Scored Scoring Tool (122334)
Color Coach (120148)
2012-2014 In Color Color Coach Cards (126890)
2011-2013 In Color Color Coach Cards (124886)
Bone Folder (102300)
Craft Scissors (108360)
Stamp-a-ma-jig (101049)
Paper Piercing Tool (126189)
Stampin’ Pierce Mat (126199)
3/16″ Corner Rounder Punch (119871)
Word Window Punch (119857)
Big Shot Die-Cutting Machine (113439)
Labels Collection Framelits Dies (125598)
Grid Paper (102787)
Stampin’ Scrub (126200)
Stampin’ Mist (102394)
Connect with Me!


