Hi there! Here’s my video I promised when I posted my As You See It speed stamping challenge card last Friday. A little late with this one but it’s a simple design that can be executed in a myriad of colors! Go with the ombre, or go with 3 different (non-monochromatic) colors instead, or do all 5 panels the same color! So many options but I LOVE stamping the background stamp over them to tie them all together. Hope you love it too!
It’s finally here! This is Week #1 in a 10 part series that I’ve promised to my Mailing List Subscribers! I thought I’d share Week #1 with all of you! If you want to make sure you see the rest of the 9 videos to come, just put your name and email in the box over to the right and hit the “Send Me My Video!” button. Don’t forget to click the confirmation link in the email that will come immediately to your inbox or you won’t be added! 🙂
I hope you enjoy this week’s card! It was my favorite sample shown at our Stampin’ Up! Leadership Conference in January!
Hi there! I’m writing to you from {not so} sunny Houston! I’m at the Stampin’ Up! Leadership Conference and having a GREAT time. Last night, I was able to attend my first ever Manager’s Reception. All I can say is WOW! It was so amazing and I work for such a generous company! I am so blessed. I want to thank each of you, my friends and customers, for helping me get there! Without you, none of this would be possible. I cannot stress that enough! We were at the beautiful Houston Aquarium and I will be posting pictures soon, but it was a night full of fun, food, amusement rides, feeding sting rays, food, mocktails, food…and more food! Seriously, Stampin’ Up! spoils us SO much! Unbelievable!!! I can’t wait to share some fun new things I’ve learned with you all as well!
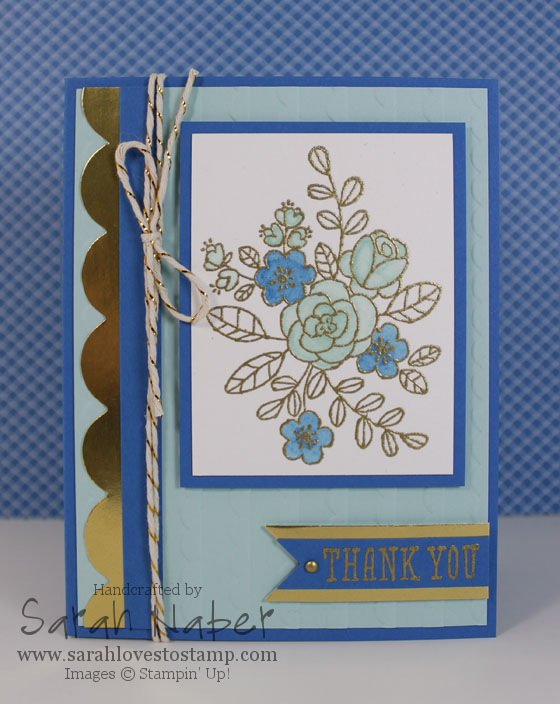
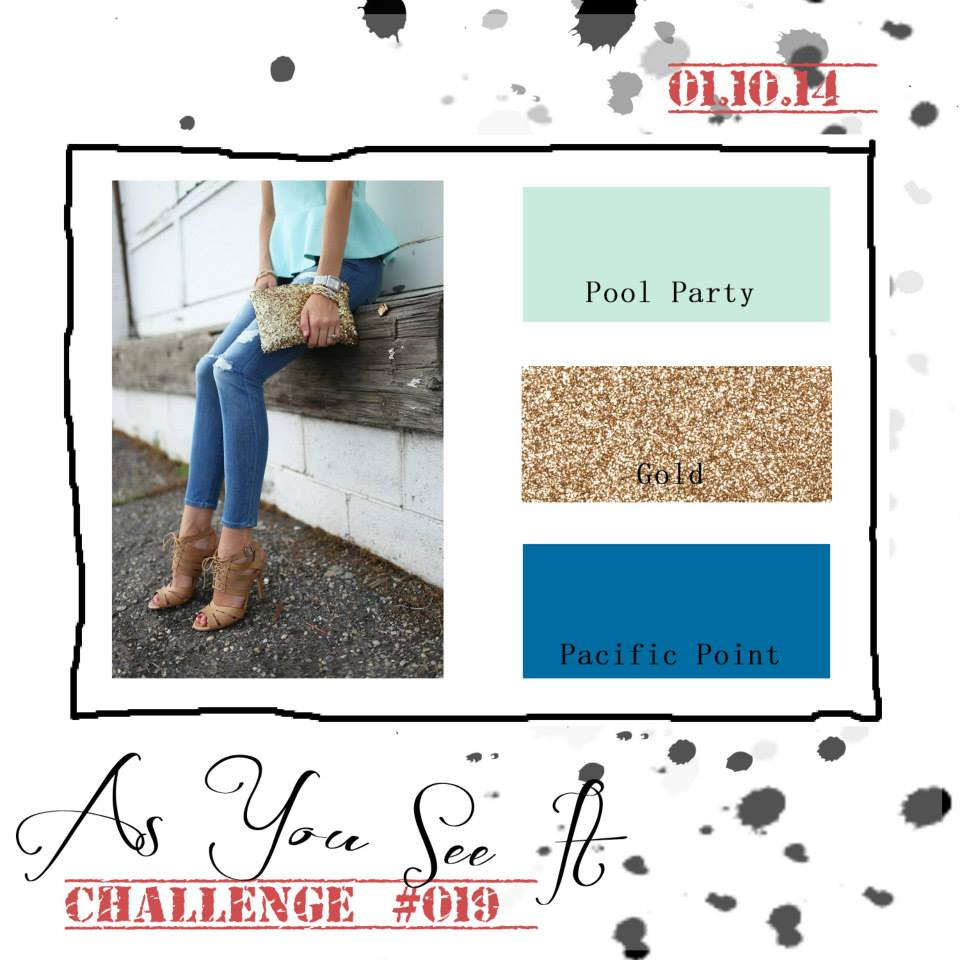
This week’s challenge over at the As You See It Challenge Blog is a color combo. Have you noticed gold popping up everywhere, from jewelry to clothes to papercrafting? This challenge totally embraces that trend with a color combo of Pacific Point, Pool Party and Gold! I LOVE the inspiration photo, but this one was tricky for me. Do you ever have that? Like you are just needing one more color to make your vision come to life? But I stuck with it and was able to make a card that I not only liked, but enjoyed enough to make 16 of for a swap I’m hosting here at Leadership 2014. I hope you enjoy it too!
I just had to have the So Very Grateful stamp set when I saw the fun, line art image of those flowers! So beautiful, fun and versatile, depending on which look you are wanting to achieve. I stamped it onto a piece of Watercolor Paper with VersaMark ink and sprinkled on some Gold Stampin’ Emboss Powder before heating it (where the magic actually happens). I then colored in the flowers with Pool Party and Pacific Point Classic Ink Refills and an Aqua Painter (they come in a pack of 2 – I used the one with the smaller brush). That piece was mounted onto a rectangle of Pacific Point cardstock. The base of the card is a 8-1/2″ x 5-1/2″ piece of Pacific Point cardstock, scored at 4-1/4″. I embossed a piece of 4″ x 5-1/4″ Pool Party cardstock with the Scallops Textured Impressions Embossing Folder and mounted that on top of the base. I followed that with a strip of Gold Foil Sheets cut out with the fantastic Tasteful Trim Bigz XL Die on the larger scallop pattern (there are FOUR 12″ long patterns on this one die). A 3/8″ x 5-1/4″ strip of Pacific Point was adhered on top, followed by a bit of the new Gold Baker’s Twine (LOVE!). To create the sentiment banner, I embossed the “Thank You” sentiment from So Very Grateful onto Pacific Point cardstock, then die cut it out with the largest of the Bitty Banners Framelits. I also cut one of these out of the Gold Foil Sheets and cut it in half to make a little mat for the Pacific Point Piece. I trimmed the right edge to be straight and stuck a Mini Brad through it. Are you wondering how I made a SILVER Mini Brad gold? I took the brad, dabbed it into the VersaMark ink pad and then sprinkled Gold Stampin’ Emboss Powder on and heated it. *TIP: I recommend using a tweezers to heat it up as the brad will get pretty hot! To finish it off and add some sweet dimension, I used Stampin’ Dimensionals to adhere the focal point and the sentiment piece.
I hope you’ll head on over to the As You See It Challenge blog at http://www.AsYouSeeItChallenge.com and give this week’s fun color combo a try!!!
Supply List
STAMPS:
So Very Grateful (Wood-Mount 133050, Clear-Mount 133053)*
PAPER:
8-1/2″ x 11″ Pacific Point Cardstock (111350)
8-1/2″ x 11″ Pool Party Cardstock (122924)
Watercolor Paper (122959)
12″ x 12″ Gold Foil Sheets (132622)*
INK:
Pacific Point Classic Stampin’ Pad (126951)
Pool Party Classic Stampin’ Pad (126982)
VersaMark (102283)
ACCESSORIES:
Gold Baker’s Twine (132975)*
1/8″ Mini Brads (122941)
Gold Stampin’ Emboss Powder (109129)
Multipurpose Liquid Glue (110755)
Stampin’ Dimensionals (104430)
TOOLS:
Stampin’ Trimmer (126889)
Simply Scored Scoring Tool (122334)
Bone Folder (102300)
Paper Snips (103579)
Craft Scissors (108360)
Aqua Painters (103954)
Heat Tool (129053)
Paper-Piercing Tool (126189)
Stampin’ Pierce Mat (126199)
Big Shot Die-Cutting Machine (113439)
Bitty Banners Framelits Dies (129267)
Scallops Textured Impressions Embossing Folder (132971)*
Grid Paper (102787)
Stampin’ Scrub (126200)
Stampin’ Mist (102394)
*Product featured in the 2014 Occasions Catalog! Contact me today at 816.341.0208 or Sarah@SarahLovesToStamp.com if you need a copy!
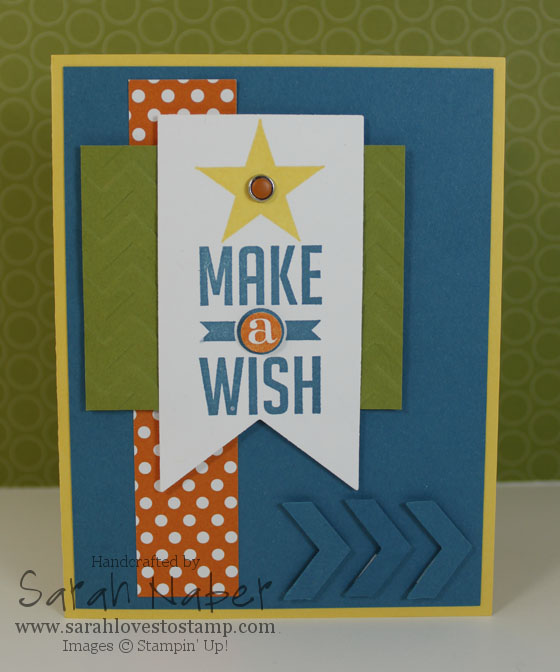
TODAY is the first day of the fabulous Occasions Catalog!!! My first must have item is what I used on this card – the Perfect Pennants Bundle!!! It has great sentiments, a great medium-sized heart and star, as well as some fun border patterned strips too. And to top it all off, it is made to work with the Banner Framelits which come bundled with the stamp set at a 15% discount! You can’t beat that, right? LOVE!
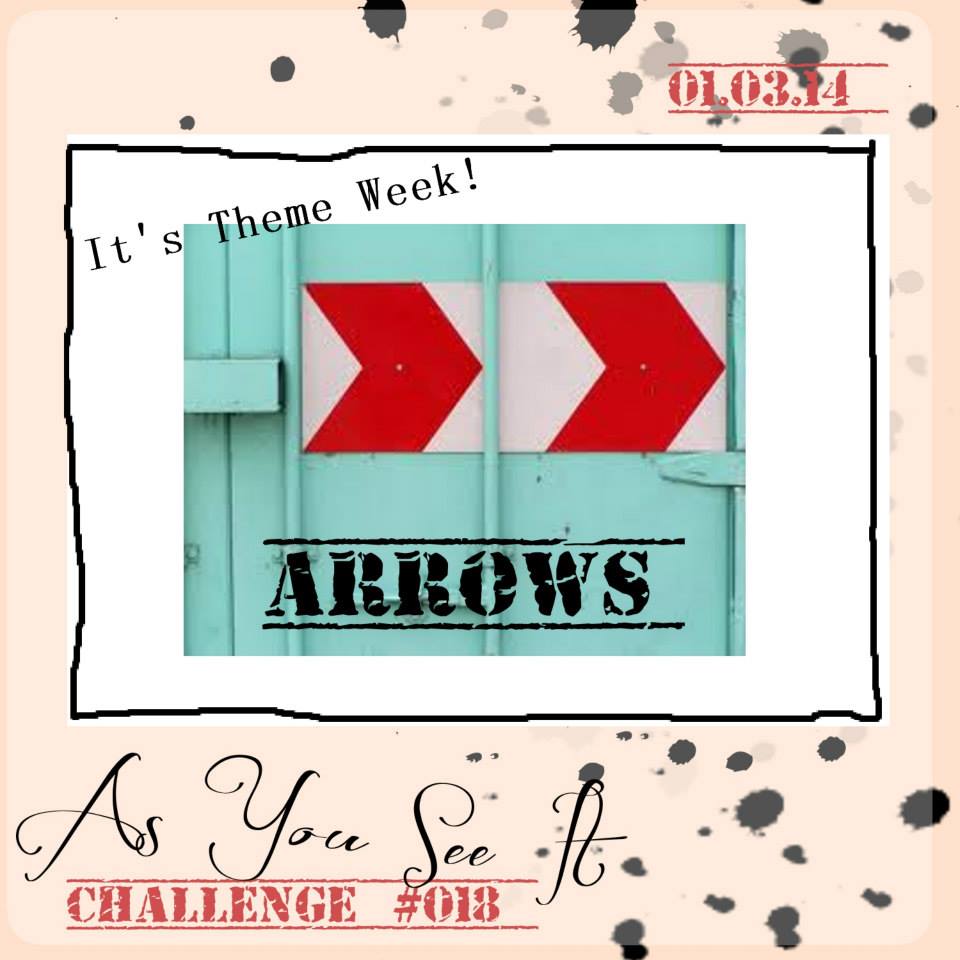
This card is also my Design Team submission for our “Arrows” theme challenge this week over at the As You See It Blog! Hot, hot trend in papercrafting right now and I just love this punch! I did a fun tone on tone effect with it here. I also, loved accenting the center of the star with a Candy Dot Brad Base with a Pumpkin Pie Candy Dot (from the Brights Collection) in the center! The “a” in “Make a Wish” is cropped out with the teeny circle in the Itty Bitty Shapes Punch Pack and popped up on a dimensional (well, a 1/4 of a dimensional anyway) for a bit of extra pizzazz. The other layers are a strip of pumpkin designer series paper from the Polka Dot Parade DSP and a piece of Old Olive cardstock that I textured with the Chevron folder.
I hope you love today’s card. Now, head on over to the As You See It Blog, check out what the other design team members have made and play along with Challenge 018! Can’t wait to see what you’ll create in our very first theme challenge!!!
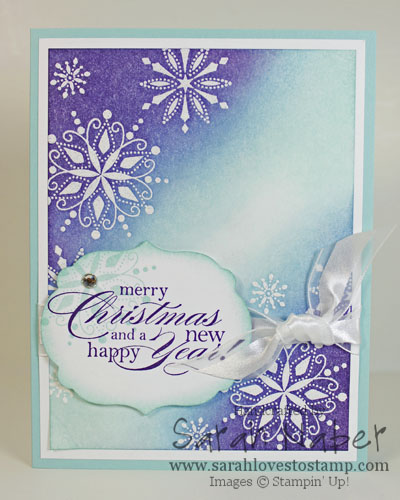 This was a favorite card from last year that I never got around to posting! It’s a total CASE (Copy And Share Everything) of a card Catherine Pooler made, but she brayered and I chose to sponge it instead. 🙂 I’m not sure my colors are the same as hers and I used a different shape for the sentiment, a different ribbon, and different stamp sets too so that hopefully shows you that there are a variety of ways to accomplish a similar card.
First, start by embossing your snowflakes onto a piece of Whisper White Cardstock cut to 3-3/4″ x 5″ with either White Stampin’ Emboss Powder or Clear Stampin’ Emboss Powder. (I believe I used clear here with VersaMark ink, but you could also use the white powder or White Craft Pad too.) *TIP: Rub your cardstock with the Embossing Buddy before you stamp the images you want to emboss. This will remove the static and allow your images to remain crisp and sharp, with no extra embossing powder little pieces left behind. I’ve heard you can make your own, but I’ve had the same one for over 5 years now and it won’t need replacing probably in my lifetime! I’ve also heard a used dryer sheet works too but again, I’ve been using the Embossing Buddy with great results so I haven’t tried that one. (FYI: I did try a brand new dryer sheet and that definitely doesn’t work.) Then I sponged the upper left hand and bottom right hand corner with Elegant Eggplant ink, leaving a large portion of the center blank. I followed that with Marina Mist ink blended into the Elegant Eggplant and used circular motions to move towards the center a tad bit more. I used the same process to add the Pool Party ink. The end result is gorgeous!!!
If you’re sending out your Christmas cards late this year, mailing a joint Christmas/New Years card is a great idea! This sentiment, from Delightful Dozen, is a favorite of mine. It is stamped in Elegant Eggplant, then I added a snowflake to the corner in Pool Party. It was cropped out with a Labels Collection Framelits Die, then the edges were sponged with Pool Party ink. I glued the sponged panel to a piece of Whisper White cardstock cut to 4″ x 5-1/4″, then tied a piece of 5/8″ Whisper White Organza Ribbon around it, and attached it to a 8-1/2″ x 5-1/2″ Pool Party card base, scored at 4-1/4″. I popped the sentiment panel up with Stampin’ Dimensionals and for the very final touch, I added a Rhinestone Basic Jewel to the center of the snowflake on the sentiment panel.
The other great thing about this card is that it is PERFECT for those upcoming winter birthdays in January and February if you just switch out the sentiment! Or you can play with different color combinations to completely change the look of the card (pinks and purples? blues and greens? or just monochromatic aquas?) Super fun! If you give it a try, let me know and send me a picture of it! 🙂
I hope you enjoyed today’s project and that you had a very merry Christmas! I was blessed to take a bit of time off to spend with friends and family. I hope you were able to do the same! See you back here soon!
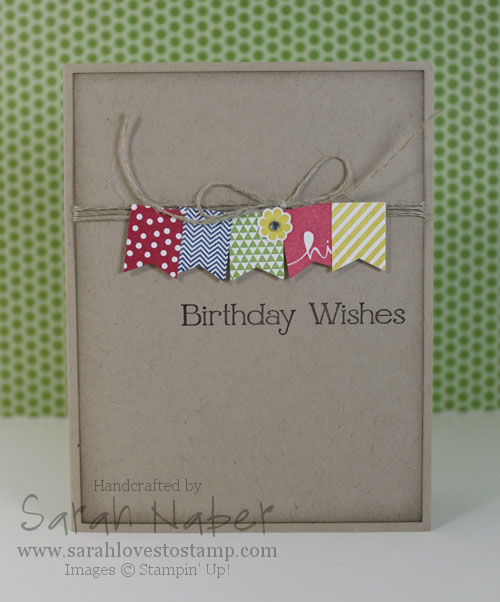
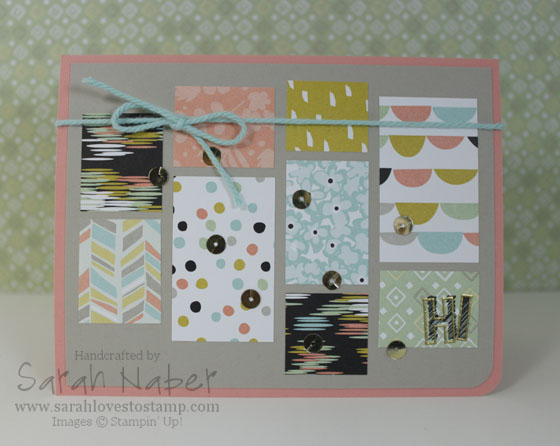
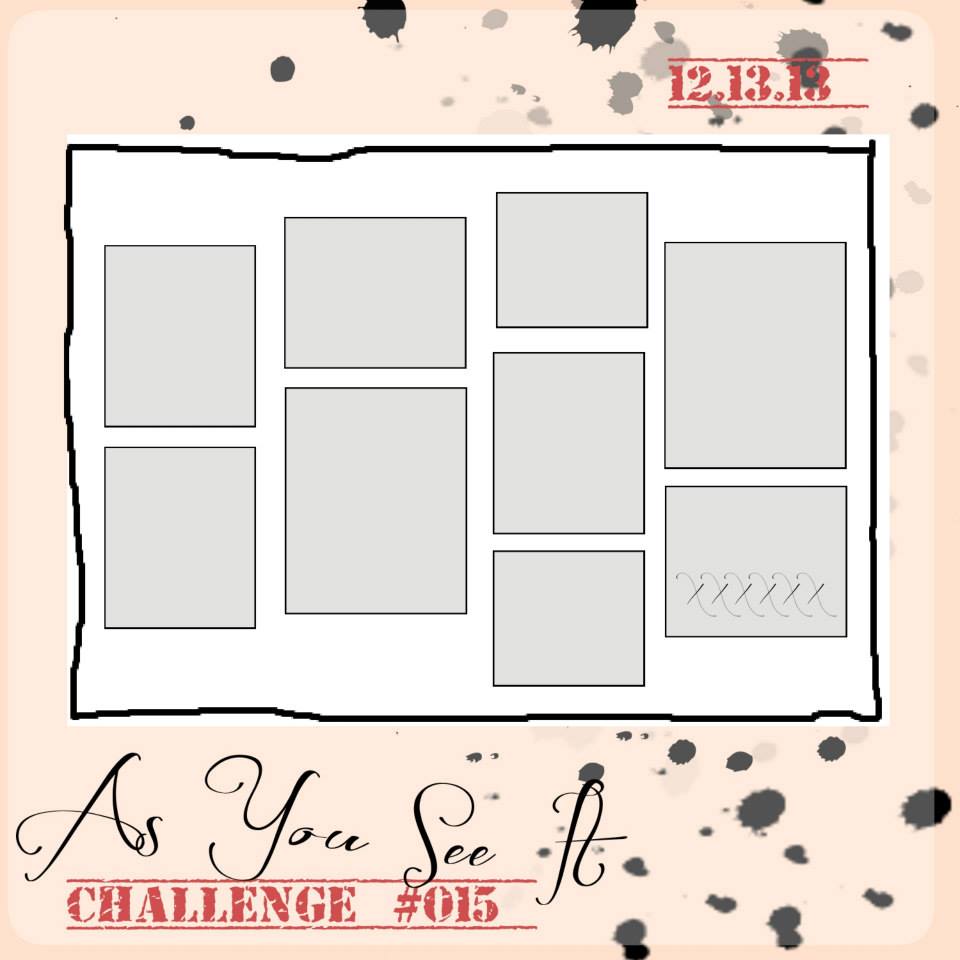
Wow! This one was a toughie for me! I LOVE this sketch now but I sure struggled to get it together for this card. This sketch is a GREAT one for showcasing SU!’s Designer Series Paper (DSP) because the packages come with 12 different double-sided designs (12 sheets 12″ x 12″, 2 of each double-sided design) in our coordinating colors. SO…I picked out the fantastic NEW Sale-A-Bration DSP!!! I’m SO SO SO in love with this paper that it isn’t even funny! The best thing about it? You can get it FREE with a $50 purchase beginning on January 28, 2014! I’m super stoked about this year’s Sale-A-Bration offerings.
Anyway, this color combo of Basic Black, Pistachio Pudding, Sahara Sand, Whisper White, Coastal Cabana, Summer Starfruit, and Crisp Cantaloupe feels SO fresh! Combine that with whimsical scallops, fun florals and interesting ikats and you have a home run!!! I wanted to make the DSP the star of the show so I used a simple Sahara Sand layer behind the papers and added the “Hi” greeting with my favorite Sketch and Outline Alphabets. I stamped the sketch ones in Jet Black Staz On and embossed the Outline ones with Gold Stampin’ Emboss Powder. The twine is also a Sale-A-Bration offering! I LOVE it as it’s a tad weightier than the normal SU! Baker’s Twine. 🙂 Super fun! The twine is specifically designed to coordinate with the DSP and comes in a package of 3 colors, as well as some fun adhesive backed printed cork die cuts. There’s also a stamp set that goes with this suite of products too! Again, each $50 you spend will allow you to pick from our fabulous choices! (From January 28, 2014 – March 31, 2014)
I hope you love today’s card! I couldn’t resist throwing a few sequins on there from an upcoming Sequin Trim that I just pulled apart to get some individual cuties. 🙂
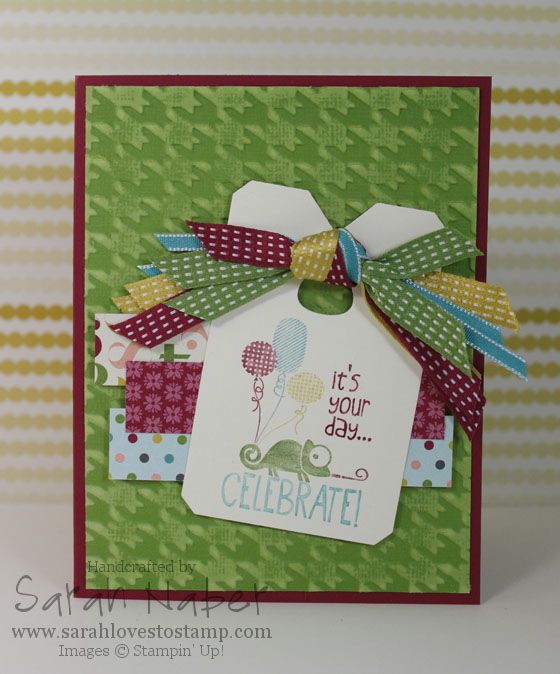
I’m late on this challenge from our As You See It Challenge Blog last week! You still have time to play along today though! I cannot believe how fast December is FLYING by! WOW! Do you have all of your Christmas cards done?
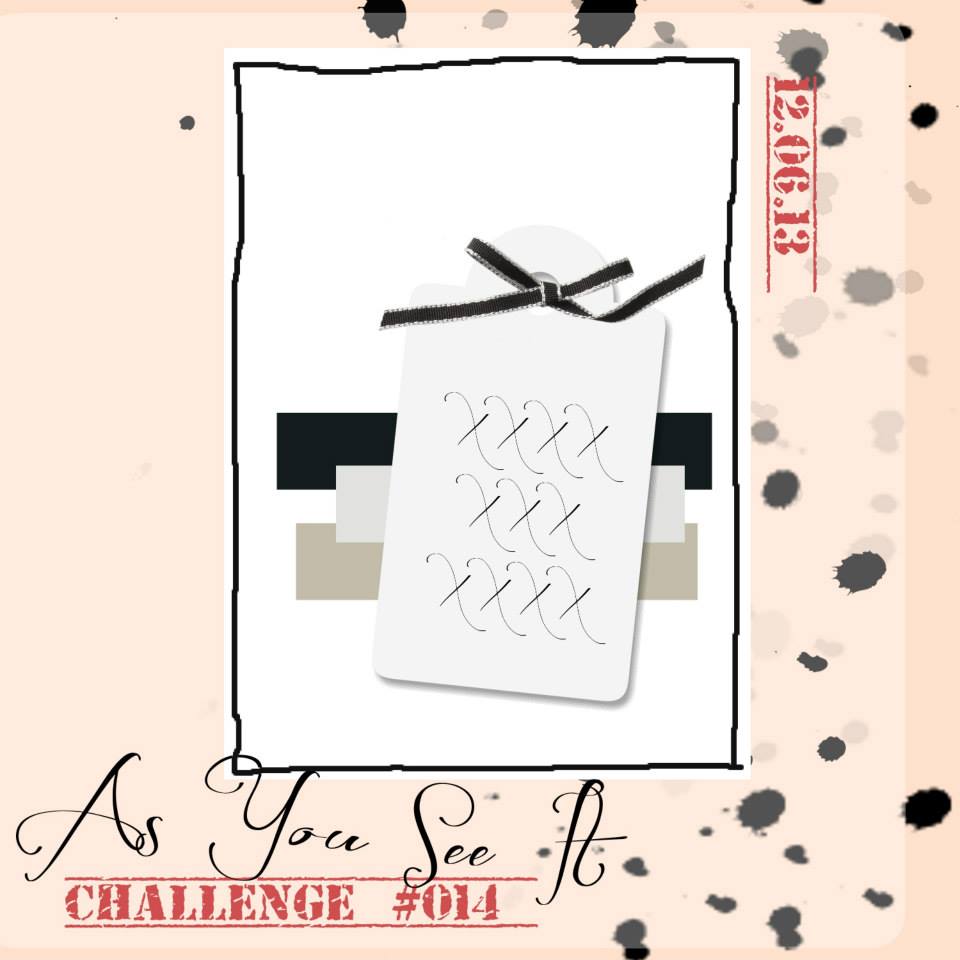
I knew from the sketch, I wanted to use the large tag from the Chalk Talk Framelits and I immediately thought of this super cute lizard from Stampin’ Up!’s Ronald McDonald House Charity Stamp Set this year, Tag It! I LOVE it and it is designed to work with the Chalk Talk Framelits! YAY – gotta love that coordination!
My fav thing about this card? Well, it may be a tie between the Core’dinations Cardstock and the ribbon treatment I did here. I started with 4 different ribbons, 2 pieces each and tied them into a knot. I simply attached it with a dimensional over the hole in the tag. Ohhh…I also LOVE this DSP! Such fun colors and patterns for birthday! Super cheery and fun!
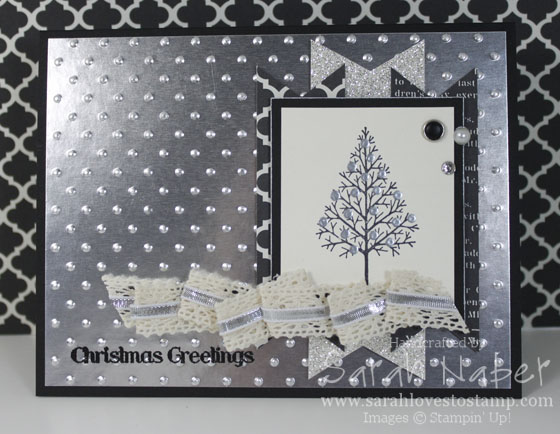
Hi there! Back with a great sketch again today from the As You See It Challenge Blog! I also used a color combo from Dynamic Duos too! Man…was this the hardest card EVER to photograph or what!!! That Silver Foil paper really makes it tricky! I really enjoyed trying a Black, Vanilla and Silver combo instead of the normal red and green for Christmas cards. 🙂 I embossed the greeting in black and the ornaments in silver for a bit of extra shine! That Silver Foil paper is STUNNING and looks so fantastic when you dry emboss it (Big Shot & embossing folders…not that old method with the stylus and metal stencil thing 🙂 )
I chose Very Vanilla instead of Whisper White so I could use the Modern Medley Designer Series Paper. What a versatile DSP that is! LOVE it! Also used a piece of the Silver Glimmer Paper for a little razzle dazzle!
On to the blog candy…to enter, you have to head over to the As You See It Challenge Blog and post your picture before next Thursday. The winner of the challenge wins the Blog Candy – a Pop and Place Gift Tag Bundle! 🙂 LOVE THAT!
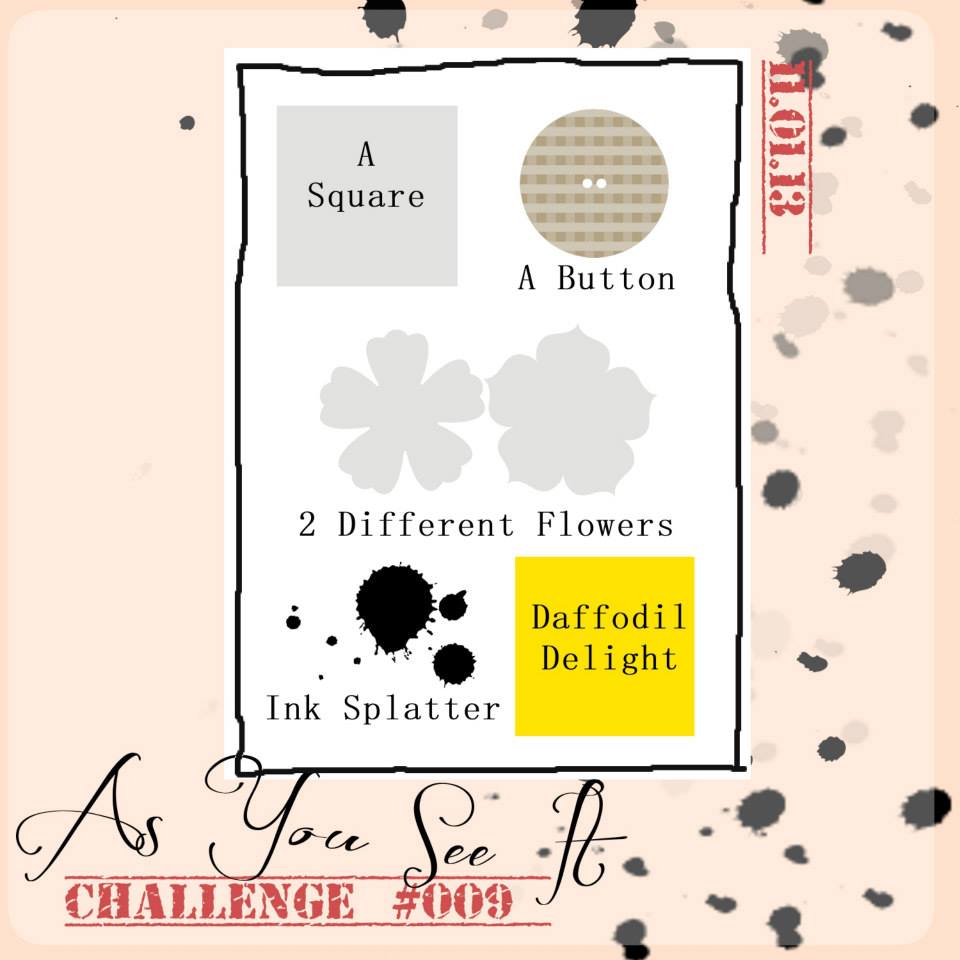
Hi there! It’s Friday and you know what that means…As You See It Challenge Day!!! We’re on Challenge #009! Can you believe that?!?
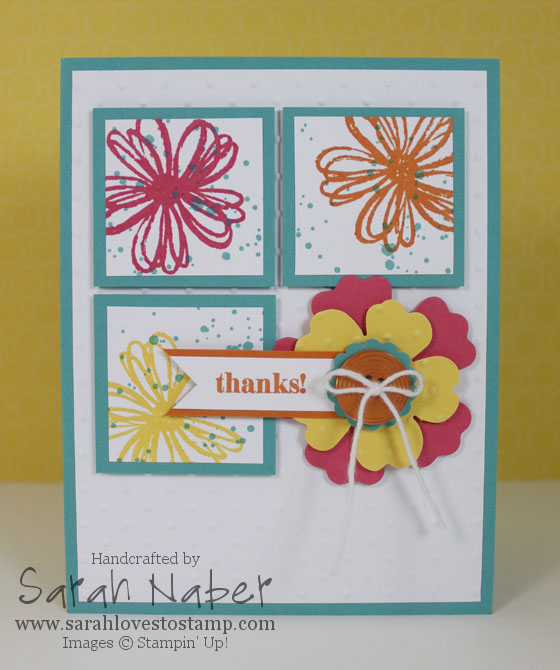
You’ll see the challenge graphic below! It’s a fun “Assortment” challenge where you have to use all of the items in the challenge on your project! Otherwise, it’s pretty open! I found a sketch over at Freshly Made Sketches that I thought would work perfectly with the elements I needed to include. You shouldn’t be surprised that I saw Daffodil Delight and immediately thought of my favorite color combo of Strawberry Slush, Pumpkin Pie, Daffodil Delight, Bermuda Bay, and Whisper White.
The main Whisper White squares at 1-1/2″ x 1-1/2″ and the Bermuda Bay layers are 1-3/4″ x 1-3/4″. The Bermuda Bay card base is 8-1/2″ x 5-1/2″ scored at 4-1/4″ and the Whisper White mat on top of that was cut to 4″ x 5-1/4″ before being run through the Big Shot with the Perfect Polka Dots Embossing Folder. The flowers are from the Flower Shop set and the ink splatters from…you guessed it…Gorgeous Grunge!!! Finally, my large Strawberry Slush flower was cut out with the Big Shot and Fun Flowers die, while I used the other part of the Flower Shop Bundle – the punch – to crop out the smaller flower from an old scrap of Daffodil Delight that had already been embossed with the Perfect Polka Dots folder (gotta love that!). On top of those, I layered the 7/8″ Scallop Circle Punch, as well as a Pumpkin Pie button (from the Brights Collection Designer Buttons) threaded with a scrap snippet of White Baker’s Twine. Finally, the greeting is from Lots of Thanks and I stamped it and matted it with a scrap of Pumpkin Pie.
Hope you love the card I have for you today!!! Check the challenge out over at As You See It Challenges!!!
This card was entered into challenges at: Freshly Made Sketches, Simon Says Stamp, Party Time Tuesdays, Moving Along with the Times, Paper Pretties, Pile it On, Crafty Hands, Crafty Girls, and Card Crafter’s Circle.
Supply List
*I’ll be back later today with the full supply list and links to my online store!*
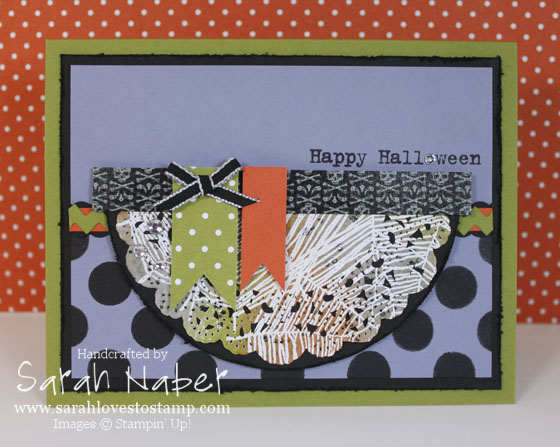
I’m so excited to bring you another new fun challenge from the As You See It Challenge Blog today! I can’t believe we’re already on Challenge #008! Great, fun, different sketch for you today! I combined that sketch with the color challenge from colourQ Challenges!
I fell in LOVE with the new Photopolymer stamp set from Stampin’ Up!, called Bite Me! Super fun! I embossed the spiderweb stamp onto the doily in white, then sponged on Old Olive, Tangerine Tango, and Wisteria Wonder. Then glued it to a half circle from the Circles Framelits Collection (the largest plain circle) that I distressed with the distressing tool. I used Jet Black StazOn Ink and a sponge dauber to stencil onto the Wisteria Wonder the polka dotted pattern from the Banner Kit. (LOVE those banners! SO CUTE!) The strip across the main panel is a labor of love with a piece of Old Olive cut with the Tasteful Trim XL Die in the ric rac pattern layered onto a strip of Tangerine Tango over a strip of Basic Black punched with the Scallop Border Punch. A shame that I had to cover up most of it! The sentiment was stamped in Jet Black StazOn Ink and also comes from the Bite Me stamp set. The half circle was layered onto the Wisteria layer with Stampin’ Dimensionals.
I stuck the Witches’ Brew Washi Tape onto a piece of Basic Black Cardstock and glued it on there. The patterned Old Olive flag is a pattern from the Brights Designer Series Paper Stack. A few rhinestones and a small snippet of 1/8″ Basic Black Taffeta Ribbon finished it off. The main panel was mounted onto a piece of distressed Basic Black Cardstock and that was layered onto an Old Olive base! 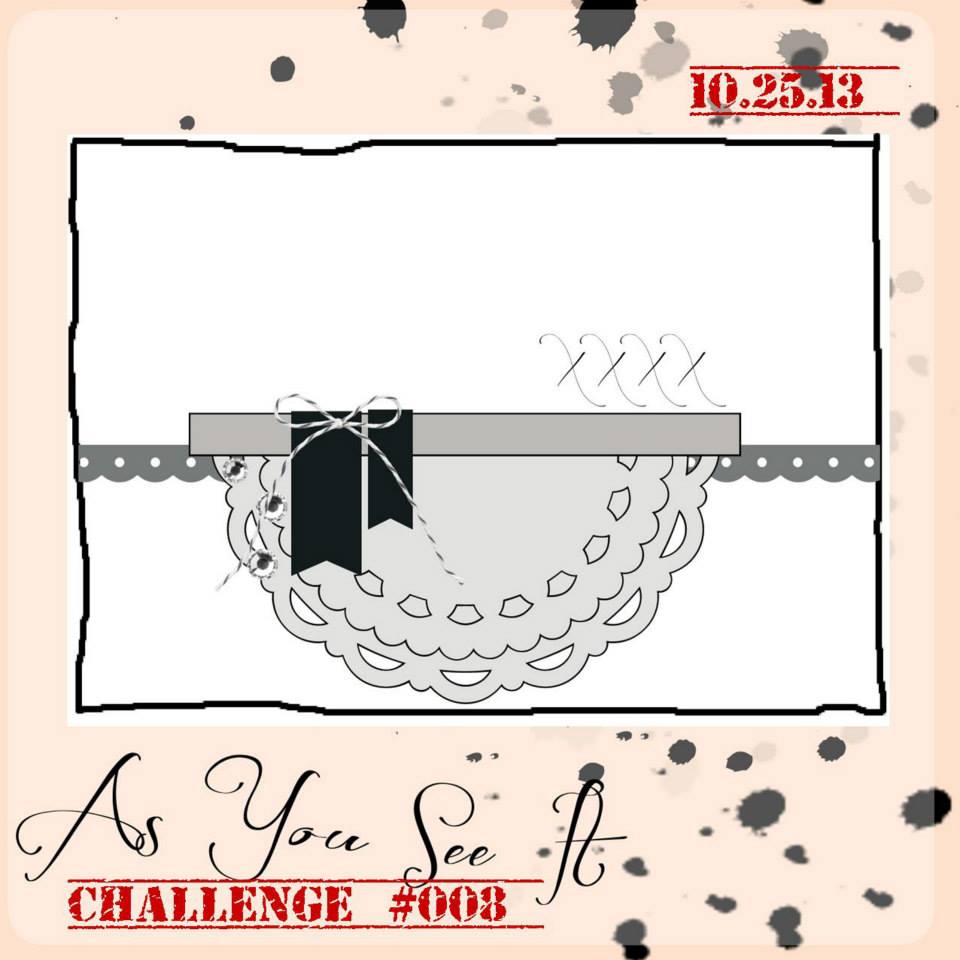
I really hope you’ll play along with us over at As You See It Challenges!!! Bookmark the web address (http://www.AsYouSeeItChallenge.com) and come visit us each Friday for a new challenge!!! Next week’s is one I’m SUPER excited about – not a sketch – so something a little different!
This card was entered into challenges at:
Today Stampin’ Up! announced 25% off of 25 stamp sets in celebration of the actual 25th anniversary of SU! this week!!! (We’ve been celebrating all year, of course, but SU! was actually founded on October 25th so that’s what this extra special stamp sale is about!) This special only runs from October 22th – October 28th!!! If you want to place an order, may I suggest using my hostess code? I’ll draw on October 30th for the winner of the Hostess Benefits! (Remember if the party reaches $250 and you win, you’ll get an extra $25 to spend because of the hostess special! YAY!!!)
Ok, so here’s the Hostess Code: 72HU2EKF
It’s super easy, just enter it in the box to the bottom left of your shopping cart! It’ll say my name as the hostess since I don’t know which one of you lucky stampers will win!!! You’ll also get a spot on my 50/50 board for the chance to win a $50 shopping spree for every $50 increment you spend! Also, I’m doing my FREE SHIPPING offer which is rare and just during this sale for orders including at least ONE stamp set from the 25 stamp sets on sale AND totaling at least $50 in merchandise (before tax & shipping). Feel free to email me at sarah@sarahlovestostamp.com or call/text me at 816.341.0208 if you have any questions!!!
Without further ado, here’s the link to the 25 Stamp Sets! Until the 28th, I won’t feature a creation on my blog that doesn’t use at least one of the 25 Stamp Sets that are 25% off!!! I’ll get us started with some favorite past creations today. Below each picture is the name of the stamp set(s) that I used to make each card! You’ll notice MANY of these are from pretty recent As You See It Challenge Design Team posts! I guess many of these stamp sets are favorites of mine that I reach for when I make cards! MUST HAVES: Gorgeous Grunge & Gently Falling!!!
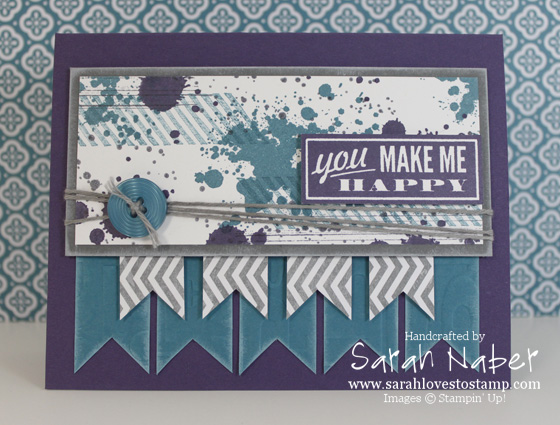 Hello, Lovely & Gorgeous Grunge
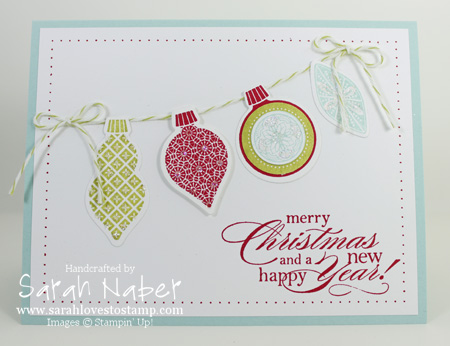 Ornament Keepsakes
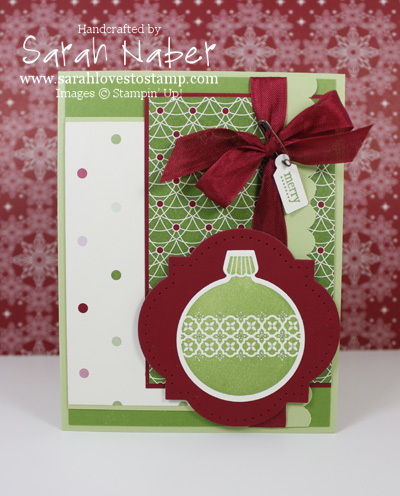 Ornament Keepsakes
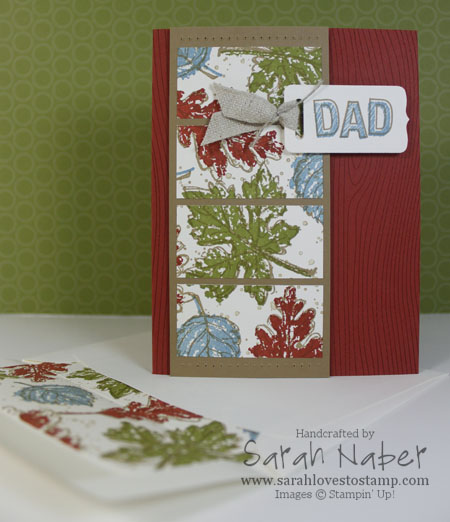 Gently Falling & Gorgeous Grunge
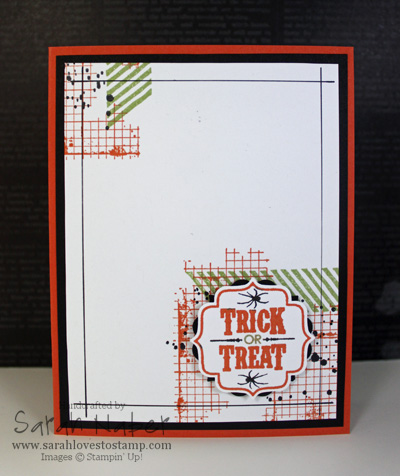 Gorgeous Grunge
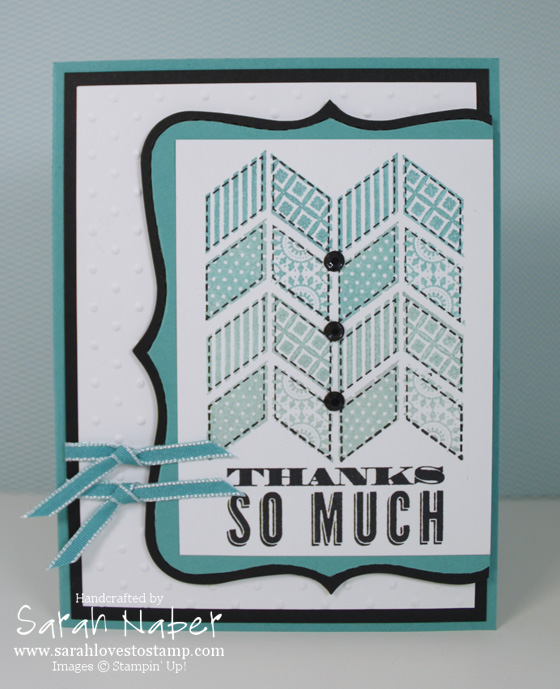 Oh, Hello
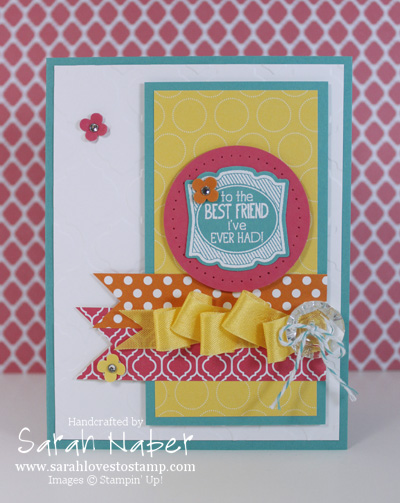 Label Love
Weekly Deals also were announced today! 🙂 Double up your savings and get some of these products too!!! HERE’S the link to the Weekly Deals!
Hi there! Here are a couple of my videos I made last week! Just wanted to make sure you didn’t miss them, although I added them to my post last Friday with the card that I featured in the videos. I hope you enjoy them!
Also, here are the Partial Liner Cardstock Sizes that I promised I’d post with this video:
Partial Liner Cardstock Sizes
Medium Envelope: 3″ x 5-3/4″
Note Card Envelope: 2-1/2″ x 5-1/4″
Square Envelope: 2-1/4″ x 3-1/4″
Hi there! I’d like to send you both of our free product catalogs! Normally, they retail together for $6.25, but I’m going to send them to you for free. However, before I do, I need to have a conversation with you. So if you want your free catalogs, here’s what you need to do. Send me an email at Sarah@SarahLovesToStamp.com with your phone number and the best time to call you. I’ll then call you and we’ll have a short chat. I can’t wait to speak with you and am looking forward to sending you our fantastic catalogs!
*Note: I’m still uploading a YouTube video today so stay tuned for that!!!*
Hi there! Tuesdays are normally the day that new Digital Downloads but now we have the Weekly Deals being announced on Tuesday too! We also had a BRAND NEW Christmas Photopolymer Set release today too! So I’ll share all of that today and bring you the Quick Tip Tuesday Video tomorrow! 🙂
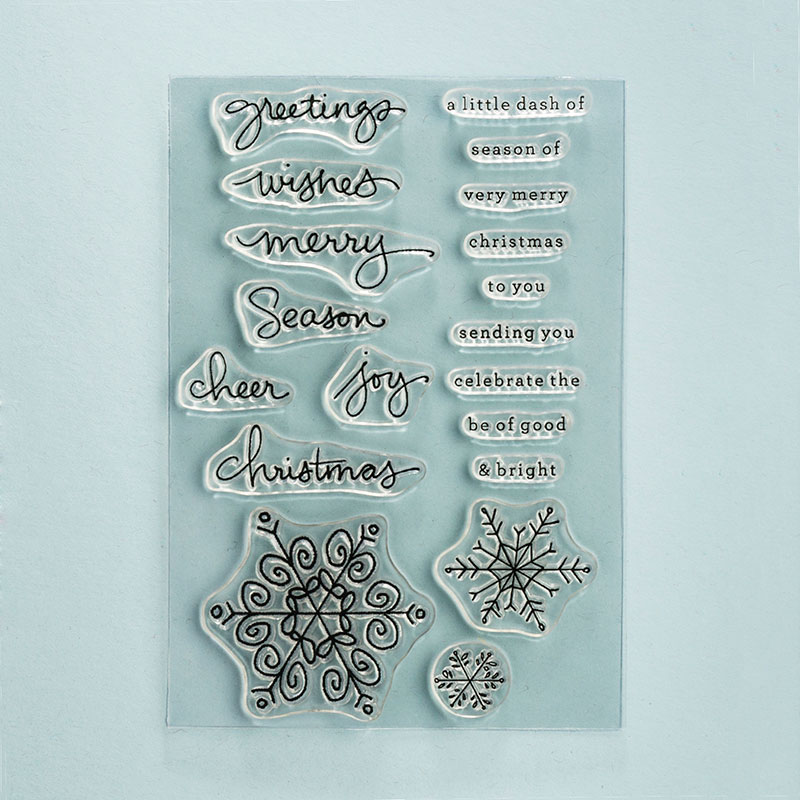
First off, here’s the fantastic Brand New Christmas Photopolymer Stamp Set, Endless Wishes! I LOVE it!!! Look below for a photo of the stamp set, as well as another photo with some samples from SU! using this set. Great for cards, tags, gift packaging, and even scrapbooks too! 🙂 And at only $13.95, the price is right!!! I can’t say enough great things about this stamp set!!! Click here to see Endless Wishes in my Online Store!
Weekly Deals! These deals are only good until next Monday! Some great ones this week! Watch your email on Thursday for the Thursday Daily Deals (I wouldn’t recommend ordering until then, in case you want to add one of those on). Remember that I do have a Mystery Hostess Event going on right now! Check out the bottom of this post for the info on that! CLICK HERE to see these items in my Online Store!
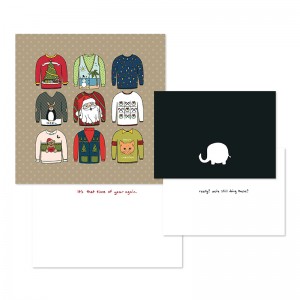
Digital Downloads! Feel free to click on the name of any of the downloads to see the item in my Online Store for more information, more pictures, etc. Hope you love them! I can definitely see some HILARIOUS cards made with the Spunky Sweater one!
Christmas Messages Stamp Brush Set – Digital Download Price $6.95 (135268)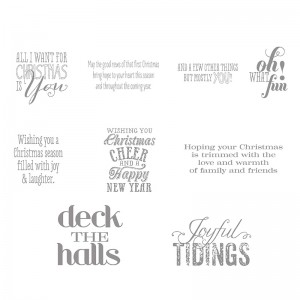
Hooray for Tags Designer Template – Digital Download $6.95 (135640)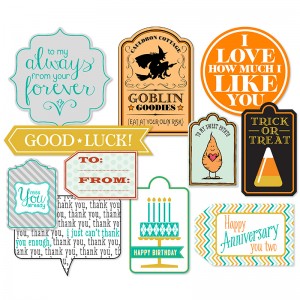
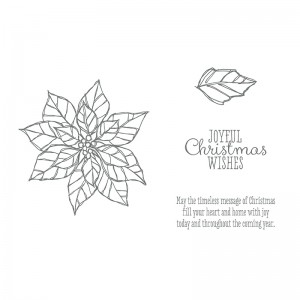
Joyful Christmas Stamp Brush Set – Digital Download $4.95 (#135269)
 Old Olive Simply Style Embellishments – Digital Download $1.95 (135270)
 Spunky Sweater Greeting Card Designer Templates – Digital Download $8.95 (135714)
Here are the details! I will draw for Hostess Benefits on October 17th! Any order placed before 9 pm that evening will be eligible to win. You get one entry into the drawing for each $15 you spend!!! CLICK HERE to head to my online store & shop (the Hostess Code gets entered in the box in the checkout screen!) DO NOT use the hostess code if you are placing more than $150 order – YOU get the benefits then!!!
Mystery Hostess Code: KKFF7MYD
I apologize that I just gave you info today but there was A LOT of it! 🙂 Please contact me if you have any questions!
Connect with Me!
Categories
Archives
Copyright Info
Copyright Info All Images © Stampin' Up! 2011 Sarah Naber, Independent Stampin' Up! Demonstrator The content of this blog is my sole responsibility as an independent Stampin' Up! demonstrator and the use of, and content of, the classes, services, or products offered on this blog is not endorsed by Stampin' Up!

